19
Click ‘Search’ to search for existing wireless networks then select
the network you would like to connect to. Enter the password then
click ‘Setup’. The camera will automatically configure itself with the
router.
This function is used to setup the wireless function. The device will
restart once the settings have been configured. You can then
unplug the Ethernet Cable from the wireless router to test whether
the camera works remotely.
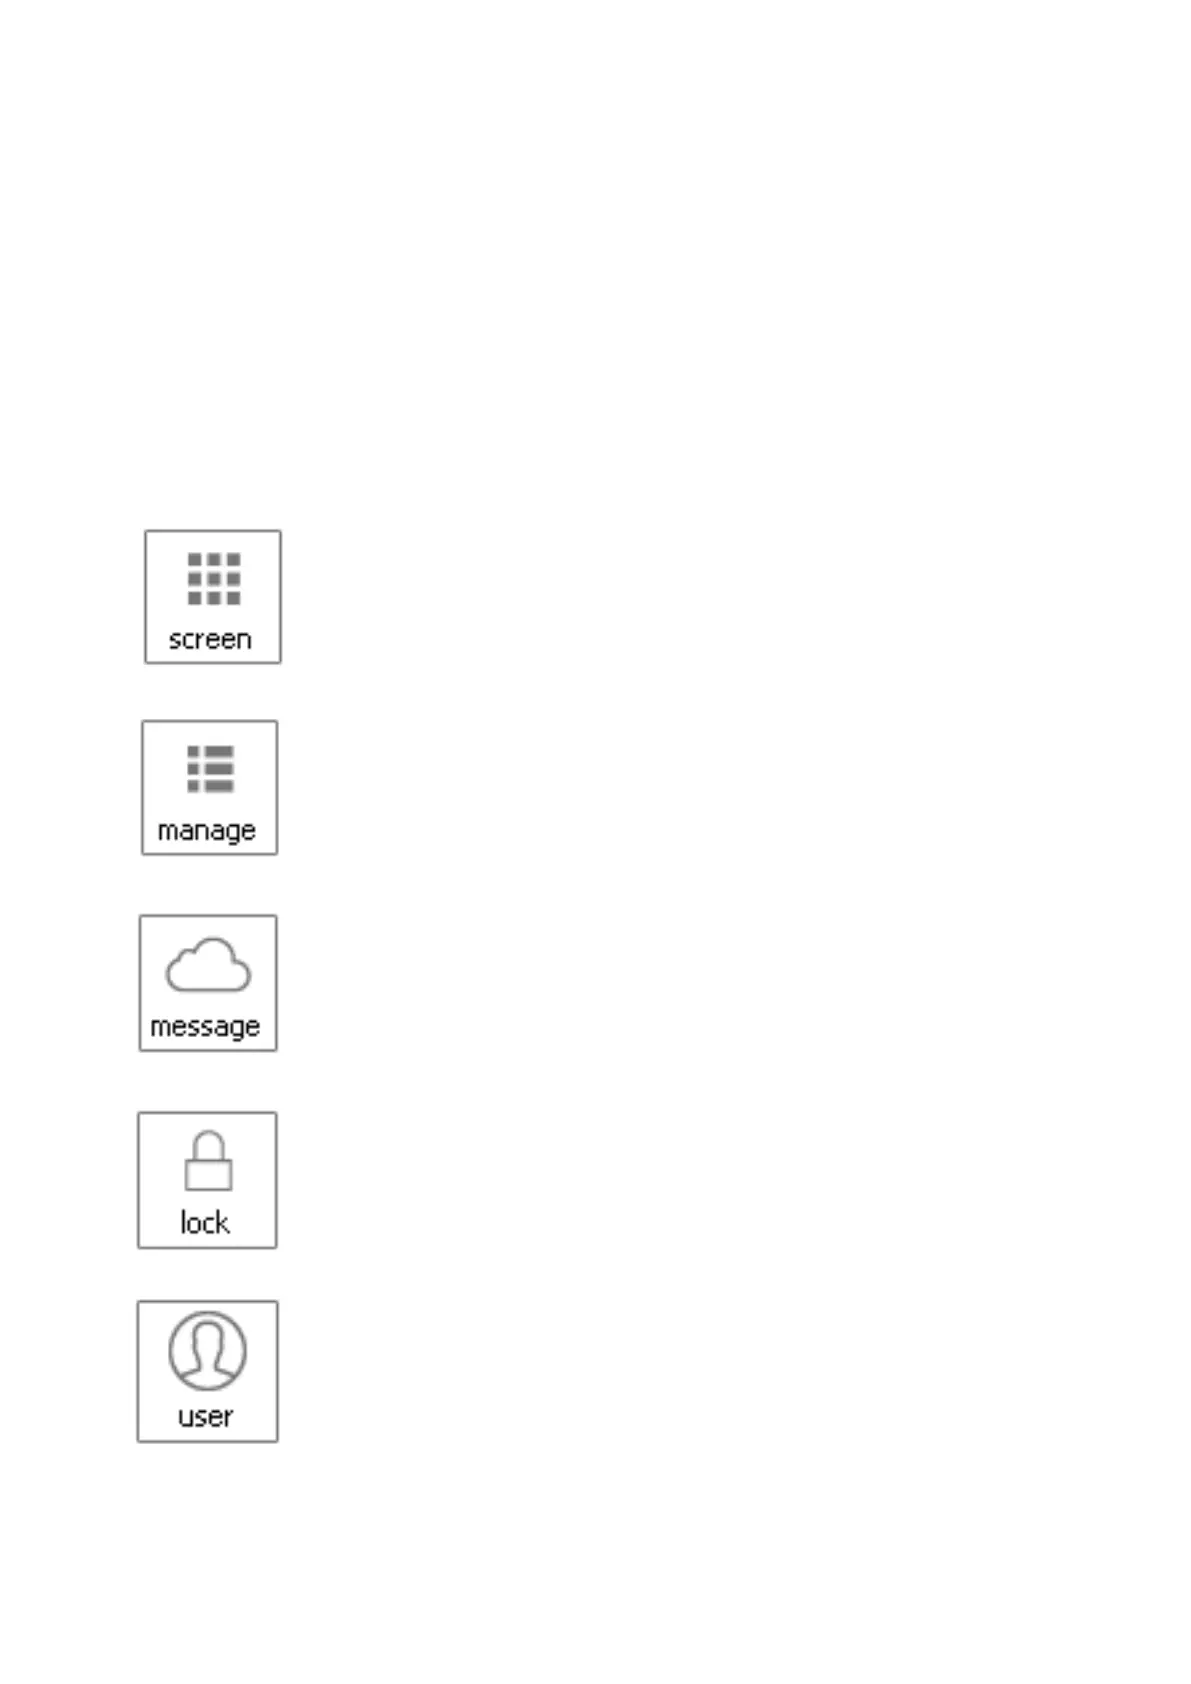
Screen
Click this icon to choose how many cameras you would
like to view at once.
Manage
Click this icon to search for other devices connected to
the same wireless network or even add more devices.
Message
Click to view a record of alarm triggers (Video or Image)
by Day, Week, Month or even Year.
Lock
Click to lock the screen, then enter the camera
password to unlock.
User
Click to modify the Operator and Administrator
usernames and passwords.