18
VII. Installing the T100
The T100 may be installed on a flat surface or wall-mounted. No special
wiring is needed. However, we recommend installing the T100 on a separate
power circuit. We do not recommend using a
power strip. Always follow
basic safety precautions when using this product to reduce the risk of injury,
fire, or electric shock.
Wall-mounting
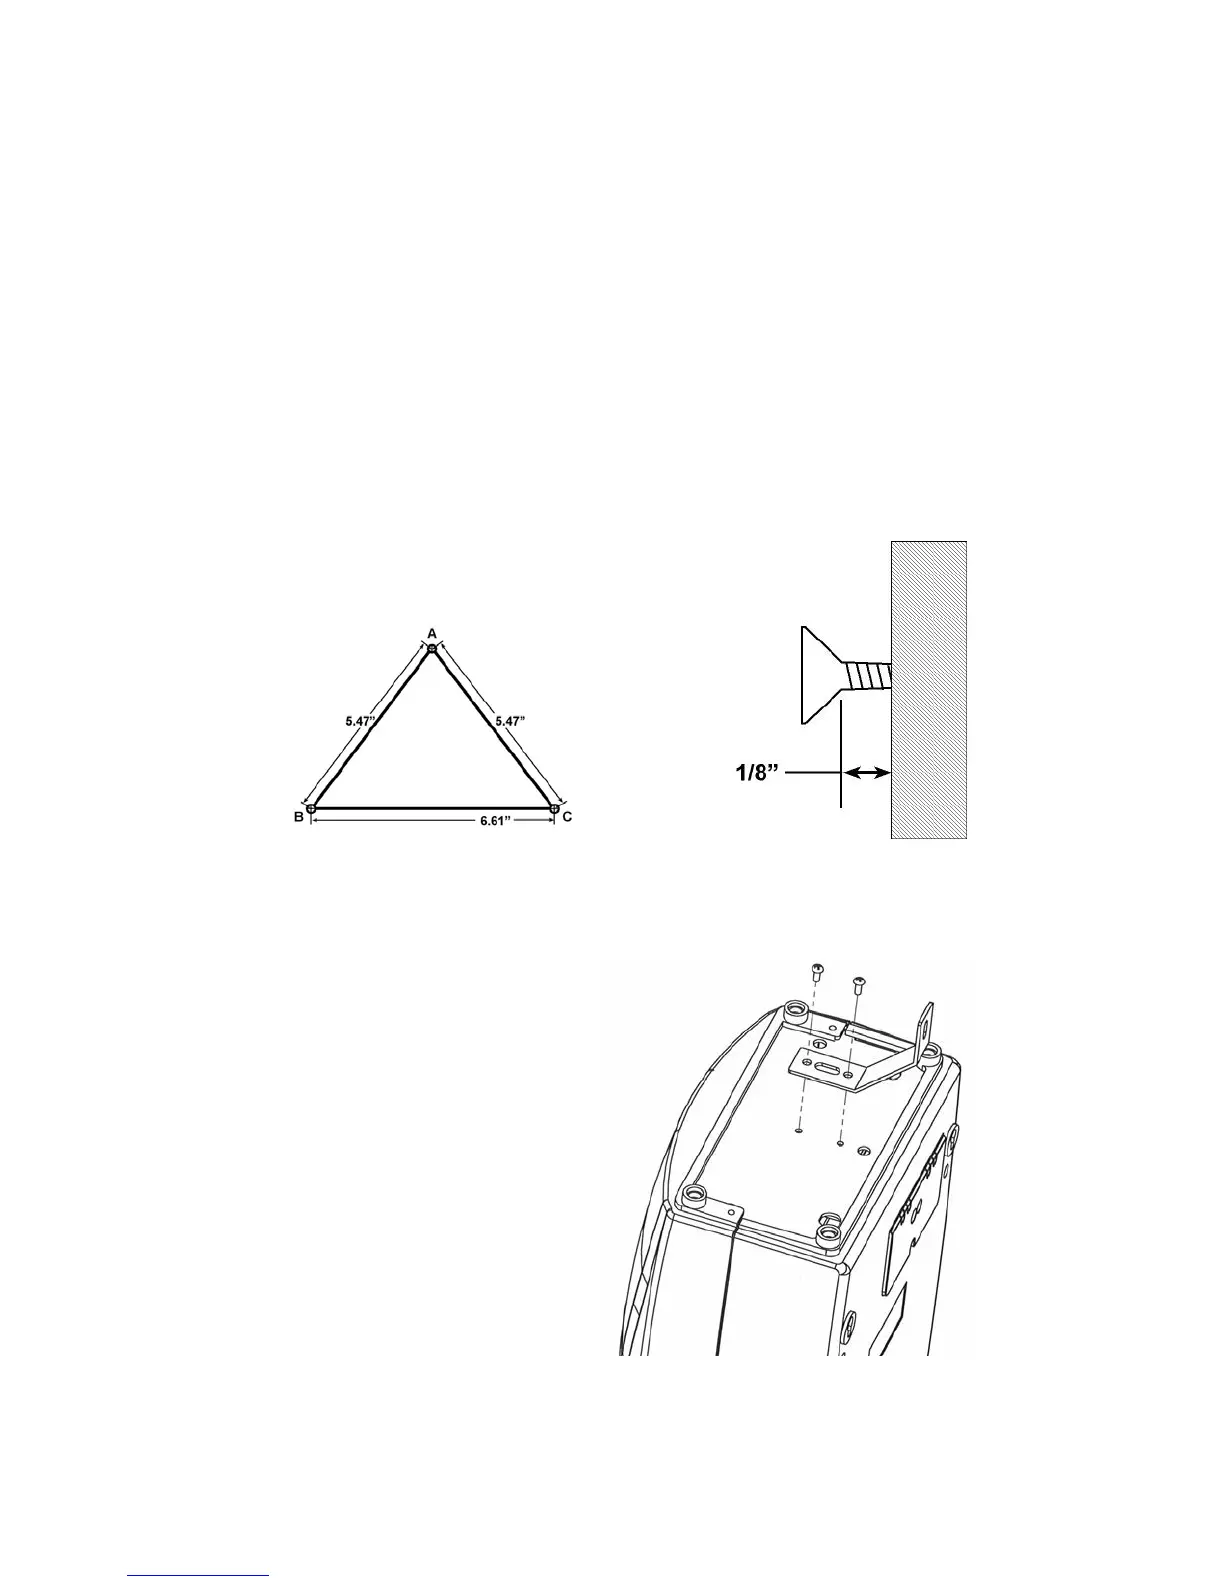
1.
Using Wall Mounting Template install screw (included) in wall at
position A, 37” to 49” above floor. Leave a 1/8” gap between the screw
head and wall. Use a screw anchor (included) if necessary.
2. Install screws (included) at positions B and C with 1/8” gap between the
screw head and wall. Install screw anchors (included) if necessary.
3. Use two M4X10 screws
(included) to attach the
wall-mounting bracket to the
bottom of the T100.
Wall Mounting
Template