Rack Control Module
TM
Product Manual
Rev. 1.2, May 9, 2014 Page 13
* The following installation instructions provide detail for steps 8, 10, 16 and 17 in the
table above. Refer to the TD80 Installation and Operation Manual, TPM 001 for full
TD80 Level Gauging and Overfill Prevention System installation steps 1 through 17.
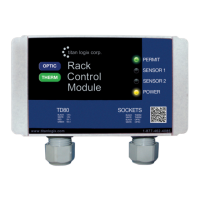
Step 8: Mount the Alarm Accessories, Including the RCM
1. Position the RCM where indicated by the manufacturing or installation drawings.
Typical locations are near the Finch display for viewing both the loaded volume or
alarm information and RCM indicators.
2. Bolt the RCM to the panel, bracket or protective box.
Ensure that the bolts are not torqued to the extent that
the plastic mounting tabs are crushed.
3. Position and bolt all remaining alarm accessories.
Step 10: Install the Electrical wiring
1. The TD80 transmitter is provided with a 50’ or 75’ cable kit. It is recommended to use
the kit with included sealing fitting for connection to the Finch Display.
2. All electrical grounding is to the vehicle or trailer electrical ground connection and not
to the chassis.
3. For trailers, connect the TD80 system power and ground to the nose box electrical
connector. For trucks, connect TD80 system power to a switched accessory power
connection from the battery.
4. Wire splices should be made inside a weather proof enclosure or junction box to
prevent premature failure due to corrosion.
5. Secure all wires and cabling with clips or cable ties
6. Tighten all compression fittings
7. Refer to the specific installation wiring diagrams and instructions for details. See the
figures below for sample electrical wiring installation. Single compartment
installations have both Sensor 1 and 2 RCM wiring connected to the single SV Bus
wire from the TD80 transmitter. The RCM Black/ White cable pairs are to be wired to
the dummy and booster of each socket. It does not matter which Black/ White pair
goes to which.
Warning: It is not code compliant to mix Intrinsically Safe (IS) wiring with Non-Intrinsically Safe
wiring. IS wiring needs to be kept separated from Non-IS wiring by a physical barrier (conduit or
other). Do not use Sockets that contain IS circuits as junction boxes, as doing so may compromise
the safety of the entire system.
NOTE: For more complex installations w here
several options are also installed (lights,
horns, pump shutdow n, external ACK sw itch),
the number of w ires/cables being terminated
inside the Finch might be a problem. It may be
advantageous to use a junction box to simplify
the w iring; this option is also show n below.
NOTE: Ensure all retrofit installations meet current
Titan Logix recommended installation practices
and current safety regulations regarding
components appropriate for the area classification,
use of ABS pow er and compliance to all industry,
national, state/provincial and local codes.
See TPM 001; TD80 Product Manual, for details.