Rack Control Module
TM
Product Manual
Rev. 1.2, May 9, 2014 Page 38
Symptom 2: Terminal rack controller does not deny loading. A
PERMISSIVE signal is always sent to the terminal rack
controller. Confirm with the UTT.
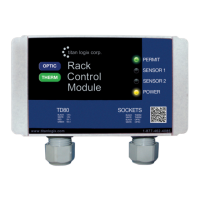
For Single or Dual TD80 Systems:
Permit: RED
Sensor 1: OFF
Sensor 2: OFF
Power: SOLID YELLOW
If both optic and
thermistor sockets
continue to permit
a. Check the sockets for shorted terminals and wires
b. Check the wiring between
the RCM and the sockets
Repair or replace the wiring
If only one socket
continues to permit
a. Check the socket(s) for loose or shorted wiring
b. Replace the affected optic or thermistor terminator module
c. Check the wiring between
the RCM and affected
socket
Repair the wiring or replace
the RCM