Performance Series 450e 11
Cleaningtheunit(shuttingdown)
8.2 Suction lter
A clean suction lter always guarantees
maximum feed quantity, constant spraying
pressure and problem-free functioning of the
unit.
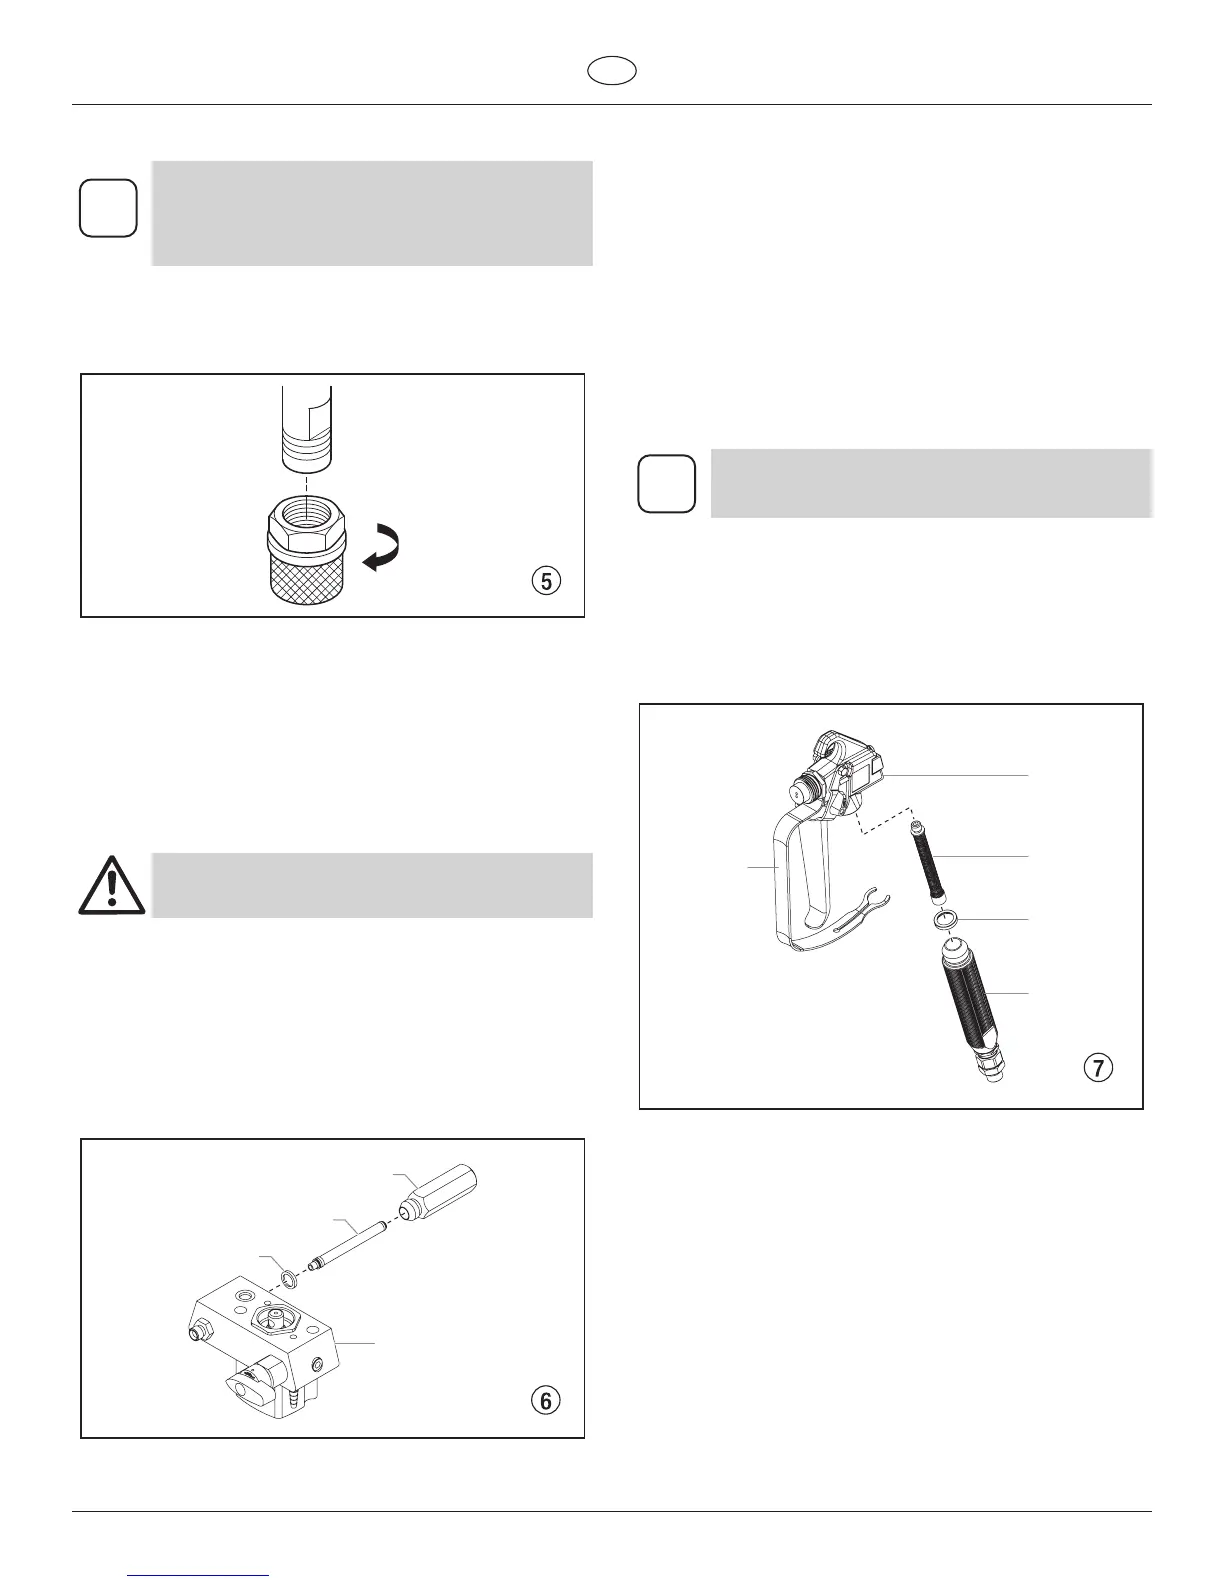
1. Screwoffthelter(Fig.5)fromsuctionpipe.
2. Cleanorreplacethelter.
Carry out cleaning with a hard brush and an appropriate cleaning
agent.
8.3 Cleaning the high-pressure lter
Cleantheltercartridgeregularly.
Asoiledorcloggedhigh-pressureltercancauseapoorspray
pattern or a clogged tip.
1. Turn the pressure control knob counterclockwise to
minimum pressure.
2. Open the relief valve, valve position PRIME
(kcirculation).
3. Switch the unit OFF.
Unplug the power plug from the outlet.
4. Unscrewthelterhousing(Fig.6,Item1).withastrap
wrench.
5. Pulltheltercartridge(2)fromthemanifold(3).
6. Clean all the parts with the corresponding cleaning agent.
Ifnecessary,replacetheltercartridge.
7. ChecktheO-ring(4),replaceitifnecessary.
8. Pushtheneworcleanedlterintothepumpmanifold.
9. Screwinlterhousing(1)andtightenitasfaraspossible
with the strap wrench.
8.4 Cleaning the Airless spray gun
1. Rinse Airless spray gun with an appropriate cleaning
agent.
2. Clean tip thoroughly with appropriate cleaning agent so
that no coating material residue remains.
3. Thoroughly clean the outside of the Airless spray gun.
Intake lter in Airless spray gun
1. Pullthebottomofthetriggerguardforward(1)sothatit
comesloosefromthehandleassembly(5).
2. Loosenandremovethehandleassembly(5)fromthegun
head(2).
3. Turningclockwise,unscrewthelter(4)fromthegunbody
(2).
Left-handed threads require turning the lter
clockwise to remove.
4. Turningcounterclockwise,screwtheneworcleanedlter
into the gun body.
5. Makesureallthepartsarecleanandthehandleseal(3)
is in position inside the gun head.
6. Threadthehandleassembly(5)intothegunhead(2)until
secure.
7. Snapthetriggerguard(1)backontothehandleassembly
(5).
 Loading...