16
IOM - FFDE
Redefine your comfort zone. ™ | www.titus-hvac.com
IOM
FFDE / FFDER / FFDERA
Service: FFDE and FFDER Motor Removal and Installation
Tools Required: Phillips Head Driver, Battery Operated Drill, (2) 8”
adjustable wrenches, 10 mm hex head wrench, #2 screwdriver, and slip
joint pliers.
Step 1. To gain access to the motor, remove the ceiling panel next to the
unit, if applicable.
Step 2. Switch the ON-OFF switch to the off position.
Step 3. Loosen the electrical box cover screws (2), and slide/lift off cover.
Step 4. Make note of all wire routing and locations for later reinstallation.
Step 5. Disconnect 5-pin and 16-pin wire harnesses from the electrical
box housing and remove the tubing for test port, if installed.
Step 6. Remove the eight mounting screws to free the motor/blower
assembly from the lid assembly. If using power drivers, set the unit to a
low torque setting to avoid stripping the sheet metal screws. Carefully
remove housing assembly, paying attention to wire routing.
Step 7. Using an adjustable wrench loosen the two set screws that attach
the blower wheel to the motor shaft.
Step 8. Mark the location of the motor support bracket (belly band), then
loosen the bolt just enough to allow the motor support bracket to slid off
the motor.
Step 9. Using the removed motor, mark the new motor with the location of
the motor support bracket.
Step 10. Replace with the new motor and reassemble by reversing the
above steps 1-8. Set the spacing at 0.25” (6.35 mm) clearance between
the blower and the upper motor plate/prefilter frame. This will give a 0.11”
overlap between the venturi ring and the blower.
WARNING
DISCONNECT THE UNIT FROM THE ELECTRICAL
POWER SOURCE BEFORE ATTEMPTING
ANY SERVICE
WARNING
ELECTRICAL SERVICE SHOULD ONLY BE PERFORMED
BY A LICENSED OR QUALIFIED ELECTRICIAN
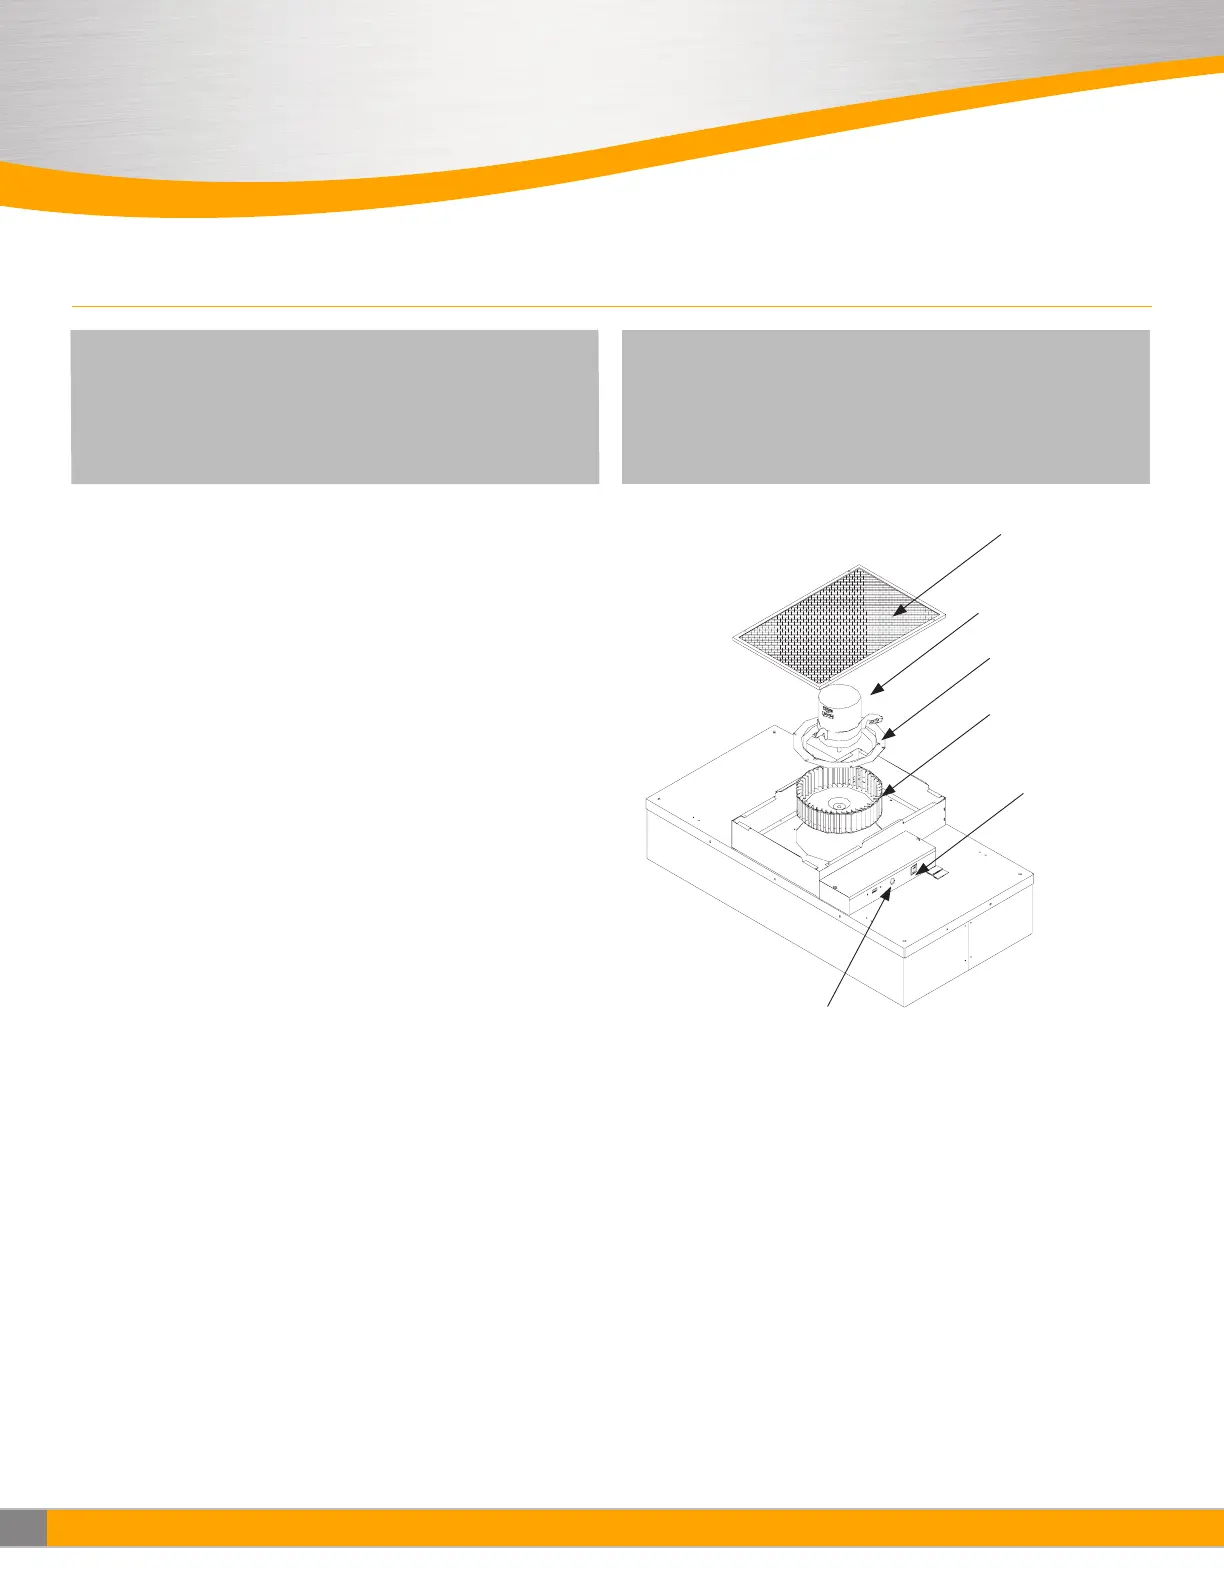
Motor/Electrical Removal
Prefilter
Motor
Venturi Ring
Blower Wheel
ON/OFF Switch
Power Entrance