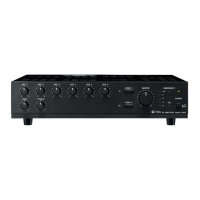
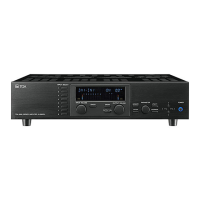
6
[MP3 Panel]
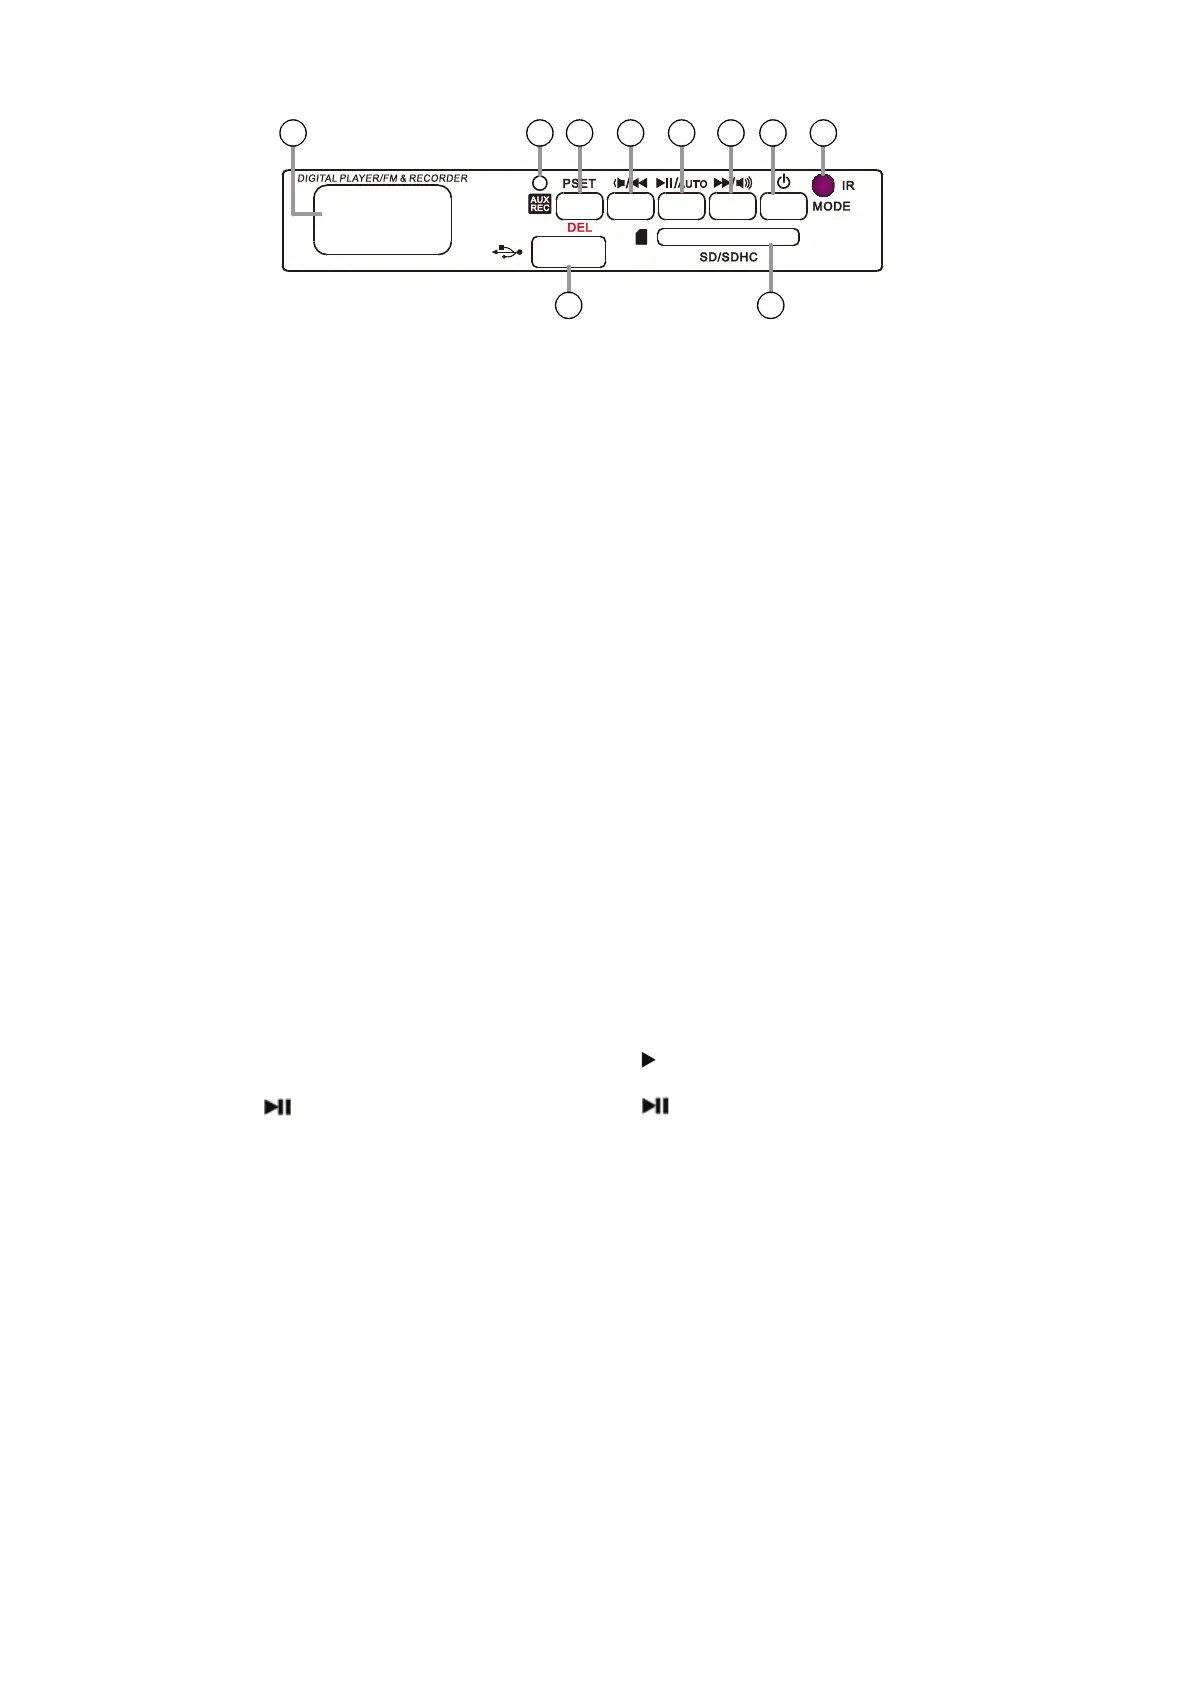
32. AUX REC/PSET
n Au mode pressing this button ill record to SD
card. f SD card is not inserted to the slot the unit
ill record to inserted US. f pressing this button
hile recording the unit ill stop recording and
trac that as being recorded ill be saed in the
last space of the folder. D is turned O hen
recording begins and ill O hen recording ends
(on anel M3). Display tet appear and
time. n M mode pressing this button enter the
station saing mode. hen press play to sae the
current freuency as a station.
n M3 mode press this button to choose the trac
that the user ants to delete and then pressing it for
3 seconds to actually delete the trac. et appear
D.
33. Volume Decrease/Skip to Last Track
eep pressing this button ill decrease the
olume (display: U32ĺU00).
n M3 mode pressing this button ill sip to the
last trac.
n M mode pressing this button ill tune don -
ards in freuency ith each segment of 50 .
ressing this button for 3 seconds ill search
stations donards in freuency and the search
ill automatically stop at the freuency here
there is station aailable.
34. Play/Pause
n M3 mode pressing this button A ill sitch
to AUS. ressing again AUS ill sitch to
A. Display ill appear and time indicator
blining. f the unit has been SOD it ill sitch
to A. n M mode pressing this button ill sip
to the channel reuency has been saed.
n M mode pressing this button for 3 seconds ill
automatically search and sae aailable station in a
maimum number of 30 station. Display 01
02 ...30.
35. Volume Increase/Skip to Next Track
eep pressing this button ill increase the
olume (display: U00ĺU32).
n M3 mode pressing this button ill sip to the
net trac.
n M mode pressing this button ill tune
upards in freuency ith each segment of 50
. ressing this button for 3 seconds ill
search stations upards in freuency and the
search ill automatically stop at the freuency
here there is station aailable.
36. Mode
hen the unit is turned O pressing this button
for 3 seconds ill turn off the unit. hen the unit
is turned O pressing this button ill turn on the
unit. Display ill play to the last mode.
hen the unit is turned O pressing this button
ill sitch beteen the modes. Display tet ill
appear AU ĺ M ĺ US ĺ SD ĺ.
37. Display Indicator
ndicator 188:88. his indicator illuminates by
countingincreasing hen operating M3 layer
or olume displayed (U-00 ĺU-32) ith - 1
or M adio in increase - decrease ol mode is
displayed (87.50 ĺ108.00)ith - 50
or M adio in playpause mode can be saed
and displayed (01 ĺ30)
USB Indicator : hen US connected this indica -
tor lights up and blining on the display file is
ready to operate.
SD Indicator : hen SD connected this indicator
lights up and blining on the display file is ready
to operate.
FM Indicator : hen M mode selected or hen
its turned on this indicator lights up and blining
on the display file is ready to operate.
BT Indicator : hen connected pairing this
indicator lights up ith blining on the display file
is ready to operate.
Play Indicator : in M3 mode illuminated ith
blining display indicating operated A.
Pause Indicator : in M3 mode illuminated
ith blining display indicating operated AUS.
AUX Indicator : hen AU mode selected input
from AU M connected to M3
REC Indicator : AU mode selected then press
S then start recording. n display this indica -
tor blin and result saed to installed USD or SD.
38. AUX REC Indication
ights hen playing recording result.
39. IR Receiver
Signal receier from optional remote control.
40. SD Card Input
Socet for SD ard nput
41. USB Card Input
Socet for US nput.
Note : -not recommended for charging
blining display indicating operated A.
37 38 32 33 34 35 36 39
41 40
 Loading...