Notes
• Remove 4 plastic feet on the bottom surface when mounting the unit in a rack.
• Rack mounting screws are not supplied with the unit. Use the screws that are appropriate for the rack.
• When mounting the unit in an equipment rack, the inside
of the rack must be sufficiently ventilated.
To achieve sufficient ventilation, also mount the optional
PF-511 Perforated Panel (1U*):
(1) at the top and the bottom of the rack, and
(2) above and below the unit.
* 1U size = 44.5 mm or 1.75" (reference size)
14
12. CONTROL SETTINGS
Output levels are adjustable with individual volume controls.
For music play or announcement, adjust the corresponding
volume control so that the peak indicator lights intermittently.
Note that the sound quality is downgraded when the peak
indicator remains lit.
To prevent the accidental change of the settings of input volume
controls, remove their knobs after setting them to the desired
position and attach the volume control covers instead.
11. RACK MOUNTING BRACKET ATTACHMENT
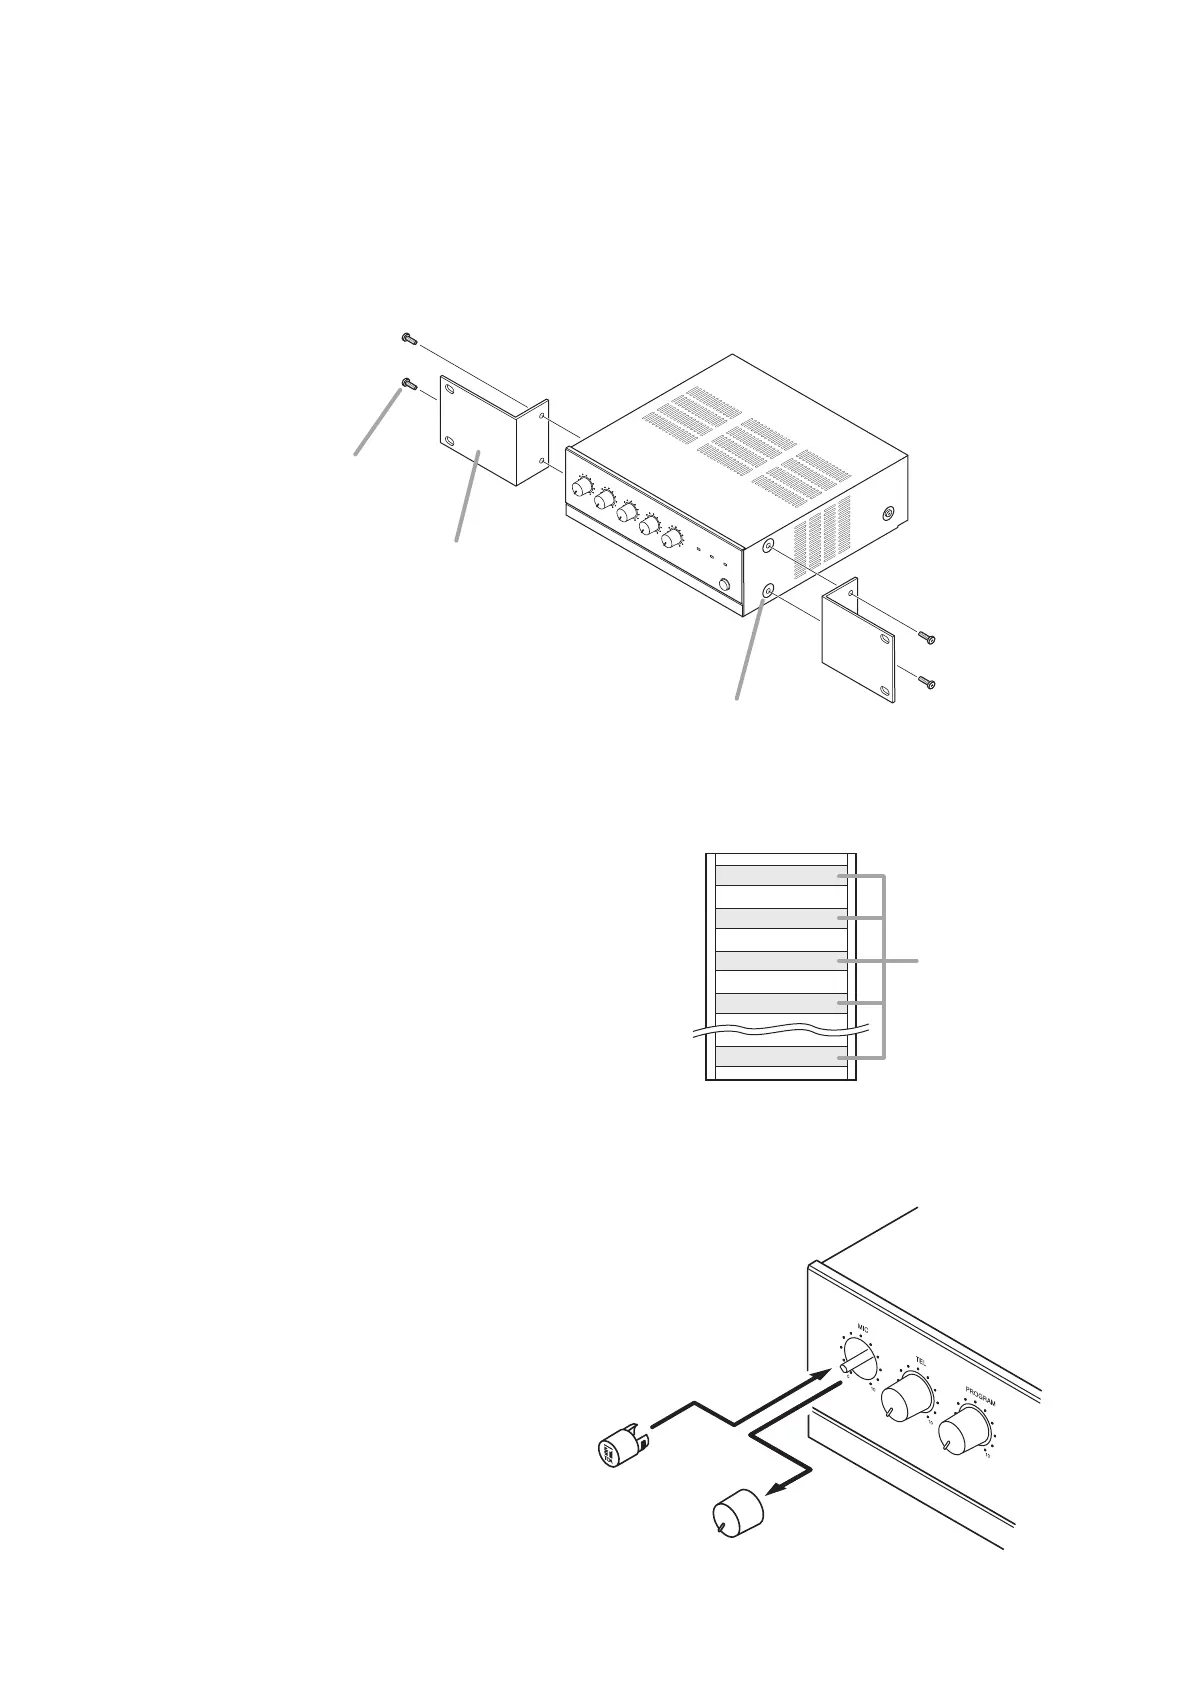
To mount the amplifier in a standard 19" equipment rack, use the optional MB-1000 Rack Mounting Bracket.
Attach the MB-1000 to the amplifier using the 4 supplied screws. When using other screws, ensure that each
screw is shorter than 16 mm (0.63").
Step 1. Remove four M4 x 8 screws on both sides of the unit. The removed screws are not used.
Step 2. Attach the MB-1000 to the unit using four M4 x 16 Machine screws supplied with the MB-1000.
Screws removed in Step 1 are not used.



 To Next Page