EasyManua.ls Logo

Toa M-9000M2 - User Manual

Toa M-9000M2
160 pages
Print Icon
To Next Page IconTo Next Page
Loading...
9000M2 SERIES AMPLIFIERS M-9000M2
A-9060DHM2
A-9120DHM2
A-9060SM2
A-9120SM2
A-9240SHM2
Thank you for purchasing TOA's 9000M2 series Amplifier.
Please carefully follow the instructions in this manual to ensure long, trouble-free use of your equipment.
This manual is intended for those who use the 9000M2 Series Amplifier.
Please also read the separate instruction manual for the programming software in conjunction
with this manual.
INSTALLATION AND
OPERATING INSTRUCTIONS

Table of Contents

Other manuals for Toa M-9000M2

Questions and Answers

  • D
    deannakingAug 13, 2025
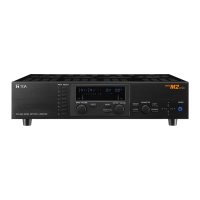
    Why is there excessive noise coming from my Toa Amplifier?
    • S
      Sarah Nguyen MDAug 13, 2025
      Excessive noise in the Toa Amplifier can occur due to an incorrect module input sensitivity setting. The unit digitizes audio signals and varies the input level with a digital volume control. If the input or output volume control is set higher than 0 dB while the AD converter input remains low, noise may increase. Adjusting the input sensitivity setting can resolve this issue.
  • P
    Parker ReeseAug 17, 2025
    What to do if the sound from my Toa M-9000M2 Amplifier is distorted?
    • J
      Jacob MyersAug 17, 2025
      Sound distortion in the Toa Amplifier is often due to an incorrect module input sensitivity setting. The unit digitizes audio signals, and if an extremely large input is fed into the AD converter, the sound remains distorted even when the volume is decreased. Adjusting the input sensitivity setting can resolve this issue.
  • J
    jperezAug 21, 2025
    Why is my Toa M-9000M2 Amplifier malfunctioning?
    • M
      Mario NorrisAug 21, 2025
      If your Toa Amplifier isn't working as expected, it might be due to an incorrect item or parameter setting. Review the related settings and their contents to ensure they are properly configured.
  • M
    michael47Aug 25, 2025
    How to fix phantom power not working on Toa Amplifier?
    • M
      Marcus BrownAug 26, 2025
      If phantom power is not being supplied by your Toa Amplifier, it could be due to a couple of reasons: 1. The D-001T module mounting screw might not be securely tightened. Make sure the screw is tightened. 2. The phantom power might be set to OFF in the D-001T module input setting. In this case, set the phantom power to ON in the input setting.
  • B
    bettyramosAug 29, 2025
    Why are the Zone manager and Remote control panel not working on my Toa M-9000M2 Amplifier?
    • J
      Jodi JonesAug 29, 2025
      If the Zone manager and Remote control panel aren't working with your Toa Amplifier, check that the correct type of Zone manager or Remote control panel is selected and that the ID is set correctly. Also, a higher-priority broadcast might be in progress, indicated by the paging activation function SW flashing.
  • W
    watsonnicholasSep 1, 2025
    What to do if only some settings on my Toa M-9000M2 are not working correctly?
    • D
      david47Sep 1, 2025
      If only some settings are not working correctly on your Toa Amplifier, it could be due to an incorrect module type being selected or a module being inserted into the wrong slot. Verify the related setting items and their contents.
  • C
    Cathy TuckerSep 4, 2025
    Why is my condenser microphone not working correctly with my Toa M-9000M2?
    • M
      Michael RivasSep 5, 2025
      If your condenser microphone isn't operating correctly with the Toa Amplifier, and it requires over +24 V, the D-001T module's phantom power supplies +24 V. You'll need to separately prepare phantom power supply equipment recommended by the equipment manufacturer.
  • A
    April PowellSep 8, 2025
    Why is noise generated by my Toa M-9000M2?
    • W
      William BrownSep 9, 2025
      Noise generation in your Toa Amplifier might be due to a module mounting screw that is not securely tightened. Ensure that the screw is tightened to resolve this issue.

Summary

IMPORTANT SAFETY INSTRUCTIONS

SAFETY PRECAUTIONS

GENERAL DESCRIPTION AND FEATURES

INSTALLATION AND HANDLING PRECAUTIONS

NOMENCLATURE AND FUNCTIONS

9000 M2 Series Amplifier Front Panel

Explains the front panel layout, controls, and indicators of the 9000M2 Series amplifiers.

Optional Modules Overview

Details the specifications and functions of optional input, output, and control modules for the 9000M2 Series.

Optional Accessories Overview

Describes optional accessories like microphones and zone managers for system expansion and control.

OPERATION OUTLINE AND BASIC OPERATION

Using the Amplifier as Mixer or Paging Unit

Describes operational modes for mixer and paging amplifier applications.

Basic Operation and Navigation

Details front panel controls, basic power on/off, and channel adjustments.

Advanced Operation: Paging and Memory

Covers zone paging procedures, scene memory recall, and key lock functions.

SETTINGS AND CONFIGURATION MENUS

Setting Menu Navigation Flow

Explains how to access input, output, utility, and scene memory settings via the VFD.

Input and Output Setting Flow Charts

Provides detailed flow charts for configuring input and output parameters based on module types.

Utility and Key Lock Function Settings

Details utility settings and how to manage key lock, password, and other system functions.

Scene Memory Management Procedures

Covers procedures for loading, saving, erasing, and setting Scene memories for broadcast patterns.

STORING AND MANAGING SCENE MEMORY

Recalling and Storing Scene Memory

Describes the procedure to recall and save Scene memory settings.

Erasing and Power-On Scene Memory Setup

Details erasing Scene memory and configuring automatic recall at power-on.

RESTORING FACTORY DEFAULT SETTING

Default Setting Table Overview

Provides default values for input, output, and utility settings for quick reference.

MODULE INSTALLATION GUIDE

Module Combination and Slotting Rules

Explains how different modules can be combined and installed in the unit's slots.

Module Installation Procedures and Examples

Provides step-by-step instructions and examples for installing various modules into the amplifier unit.

CONNECTIONS AND WIRING DIAGRAMS

Control I;O and Remote Volume Terminals

Details connections for remote volume controls, zone managers, and contact inputs/outputs.

Speaker Output and Module Specific Connections

Explains speaker connections for different models and wiring for C-001T, ZM-9003, SS-9001.

Data, Communication, and Power Connections

Covers RC-001T connections, cable distances, RS-232C setup, and power source connections.

Power Source and Terminal Plug Connections

Covers power supply connections for SS-9001 and removable terminal plug usage.

PHYSICAL INSTALLATION AND DIMENSIONS

Rack Mounting and AN-9001 Installation

Instructions for rack mounting the unit and installing the AN-9001 microphone.

Dimensional Diagrams of Components

Provides physical dimensions for key accessories like AN-9001, ZM series, and SS-9001.

SOFTWARE, ERRORS, AND TROUBLESHOOTING

Setting Software Outline and System Requirements

Describes the purpose and system requirements for the 9000M2 series setting software.

Error Indications and Troubleshooting Guide

Lists potential errors, their causes, remedies, and common troubleshooting steps.

SYSTEM DIAGRAMS AND TECHNICAL SPECIFICATIONS

Block, Signal, and Level Diagrams

Illustrates the internal architecture, signal paths, and signal level adjustments of the amplifier system.

Compression Characteristics and Speaker Presets

Visualizes compressor function and lists EQ parameters for compatible TOA speakers.

Product Specifications Overview

Provides detailed technical specifications for all M-9000M2 and A-9000 series amplifiers and optional modules.

Toa M-9000M2 Specifications

General IconGeneral
Frequency range20 - 20000 Hz
Channels quantity8 channels
Digital sound processing24 bit
DJ mixerNo
Audio inputMax. 8 channels, modular (modules optional) Control input: 4 inputs, no-voltage make contact input, open voltage: 3.3V DC, short-circuit current: 1mA or less, removable terminal block (14 pins)
Product colorBlack
Rack mountingYes
AC input voltage220 - 240 V
AC input frequency50 / 60 Hz
Power consumption (typical)40 W
Built-in display-
Total Harmonic Distortion (THD)0.008 %
Weight and Dimensions IconWeight and Dimensions
Depth107.6 mm
Width420 mm
Height353 mm
Weight6000 g

Related product manuals