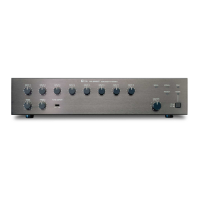
GENERAL PURPOSE BROADCAST REMOTE MICROPHONE
Remote Microphone
General Purpose Broadcast
4-2-2
ALL-ZONE
ZONE 2
GROUP 1
Zone 1
Group 1
(Selected)
Zone 2
Zone 3
Zone 4
Broadcast
Zones
Zone 1
Group 1
(Selected)
Group 2
(Selected)
Zone 2
Zone 3
Zone 4
Zone 5
Broadcast
Zones
(1) Simultaneous All-Zone Broadcast Operation
Step 1. Press the ALL-ZONE key.
The All-zone indicator and all zone indicators (1 – 5) will light. (Press the ALL-ZONE key
again to cancel.)
(2) Individual Zone Broadcast Operation
Step 1. Select the desired broadcast zone by pressing the ZONE key.
The corresponding zone indicator will light. It is also possible to simultaneously select 2 or
more zones. (To cancel the selection, press the ZONE key again.)
(3) Group Broadcast Operation
Step 1. Select the desired zone group by pressing the GROUP key.
Both the selected group's indicator and the indicators of the zones assigned to that group
will light. It is also possible to simultaneously select 2 groups.
TALK key
Live microphone
announcements
Operation Common to Simultaneous All-Zone/Individual Zone/Group Broadcast.
Step 2. Check the Busy indicator.
(1) When the indicator remains off, other connected equipment are not in use for broadcast.
(2) When the indicator flashes, other connected equipment are in use for broadcast.
Notes
• When the indicator flashes orange, you cannot make any broadcast.
• When the indicator flashes green, your broadcast is allowed to go through by interrupting other broadcast.
The Remote Microphone's TALK key is set for either "press-to-talk" or "lock" operation.
[Press-to-talk operation]
Step 3. Start of broadcast
3-1. Hold down the TALK key.
A start chime tone will be sounded over the broadcast zone.*
(If the chime function is disabled, the microphone announcement
can be made upon depression of the TALK key.)
The In-use indicator will light green.
*The unit is preset for one of 7 different types of chime tones. It is
also possible to disable the chime function.
3-2. After chime play completion, make an announcement using the microphone.
Step 4. End of broadcast
Releasing the Talk key will sound an end chime tone (only when the Up/Down 4-tone chime function is
employed by the unit), terminating the broadcast.
The In-use indicator goes out.
[Lock operation]
Step 3. Start of broadcast
3-1. One-touch press the TALK key.
A start chime tone will be sounded over the broadcast zone.* (If the chime function is disabled, the microphone
announcement can be made upon depression of the TALK key.)
The In-use indicator will light green.
*The unit is preset for one of 7 different types of chime tones. It is also possible to disable the chime function.
3-2. After the chime play is finished, make an announcement at the microphone.
Step 4. End of broadcast
One-touch pressing the TALK key again will sound an end chime tone (only when the Up/Down 4-tone chime
function is employed by the unit) and terminate the broadcast.
The In-use indicator goes out.
 Loading...