52
l) Temperature calibration and sleep timer
In this mode, you can perform temperature calibration for each of the 3 channels (correcting the difference between
the displayed and measured temperature) and can set the sleep timer (the period of time after which the channel
goes into sleep mode).
Using temperature calibration, you can correct the difference between the temperature shown in the display (tem-
perature is measured using the soldering nozzle built-in sensor) and the actual temperature (e.g. measured using a
measuring device).
Only perform a temperature calibration when the temperature of the soldering tool has stabilised.
Note that the 4-in-1 rework station saves the temperature calibration on channel 1 and 2 separately for
each connected soldering tool. This means that if you save a calibration value of +10 °C for the soldering
iron on Channel 1 and then connect the soldering tweezers on Channel 1 a different temperature calibra-
tion value (e.g. +5 °C) can be saved for these. When changing back to using a soldering iron on Channel
1 the temperature calibration value of +10 °C is used again.
When the pre-set time in the sleep timer expires, the temperature is reduced (desoldering gun to 300 °C, solder-
ing iron and soldering tweezers to 200 °C; the reduction is only possible if the respective channel is set at a higher
temperature). This not only reduces the power consumption of the 4-in-1 rework station (energy savings), but also
protects the soldering tips during longer work breaks.
Ifthechannelisinsleepmode(“SLP”display),sleepmodecanbeterminatedbybrieypushingthebutton
of the corresponding channel (1, 2 or 3). The warm-up process then begins, up to the pre-set temperature
for the channel (if this is higher than the sleep temperature of 200 °C).
Do the following:
• Brieypressthe“1”,“2”or“3”buttontoselecttherespectivechannel1,2or3,forwhichyouwanttoprovidea
setting (a soldering tool must be connected to the channel).
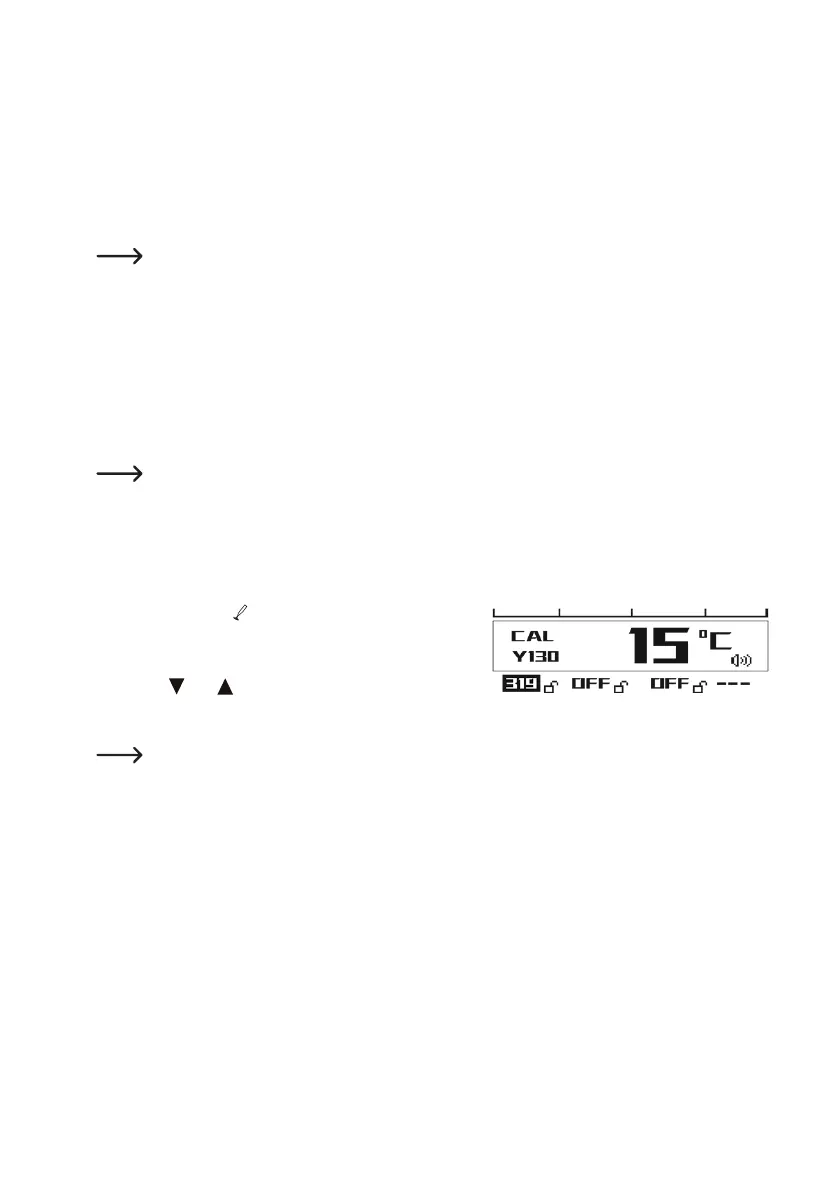
• Press and hold the “ ” button. Then press and hold the but-
ton of the currently selected channel for more than 3 seconds.
• The calibration display (“CAL”) is now shown in the display.
• With the “ ” or “ ” button, you can now change the calibra-
tion value (in the range between -50 and +50 °C). Hold down
the button to adjust the value more quickly.
Example of calibration value calculation:
T1 = 350 °C = measured temperature
T2 = 335 °C = temperature value in the display (measured using the internal temperature sensor)
Calibration Value = T1 - T2 = +15 °C
• Brieypressthebuttoncorrespondingtotheselectedchannel(1,2or3),inordertosavethecalibrationvalue.