14
7. SETTING UP THE INSTRUMENT
PROCEDURE
1. Perform the centering procedure.
"7.1 Centering"
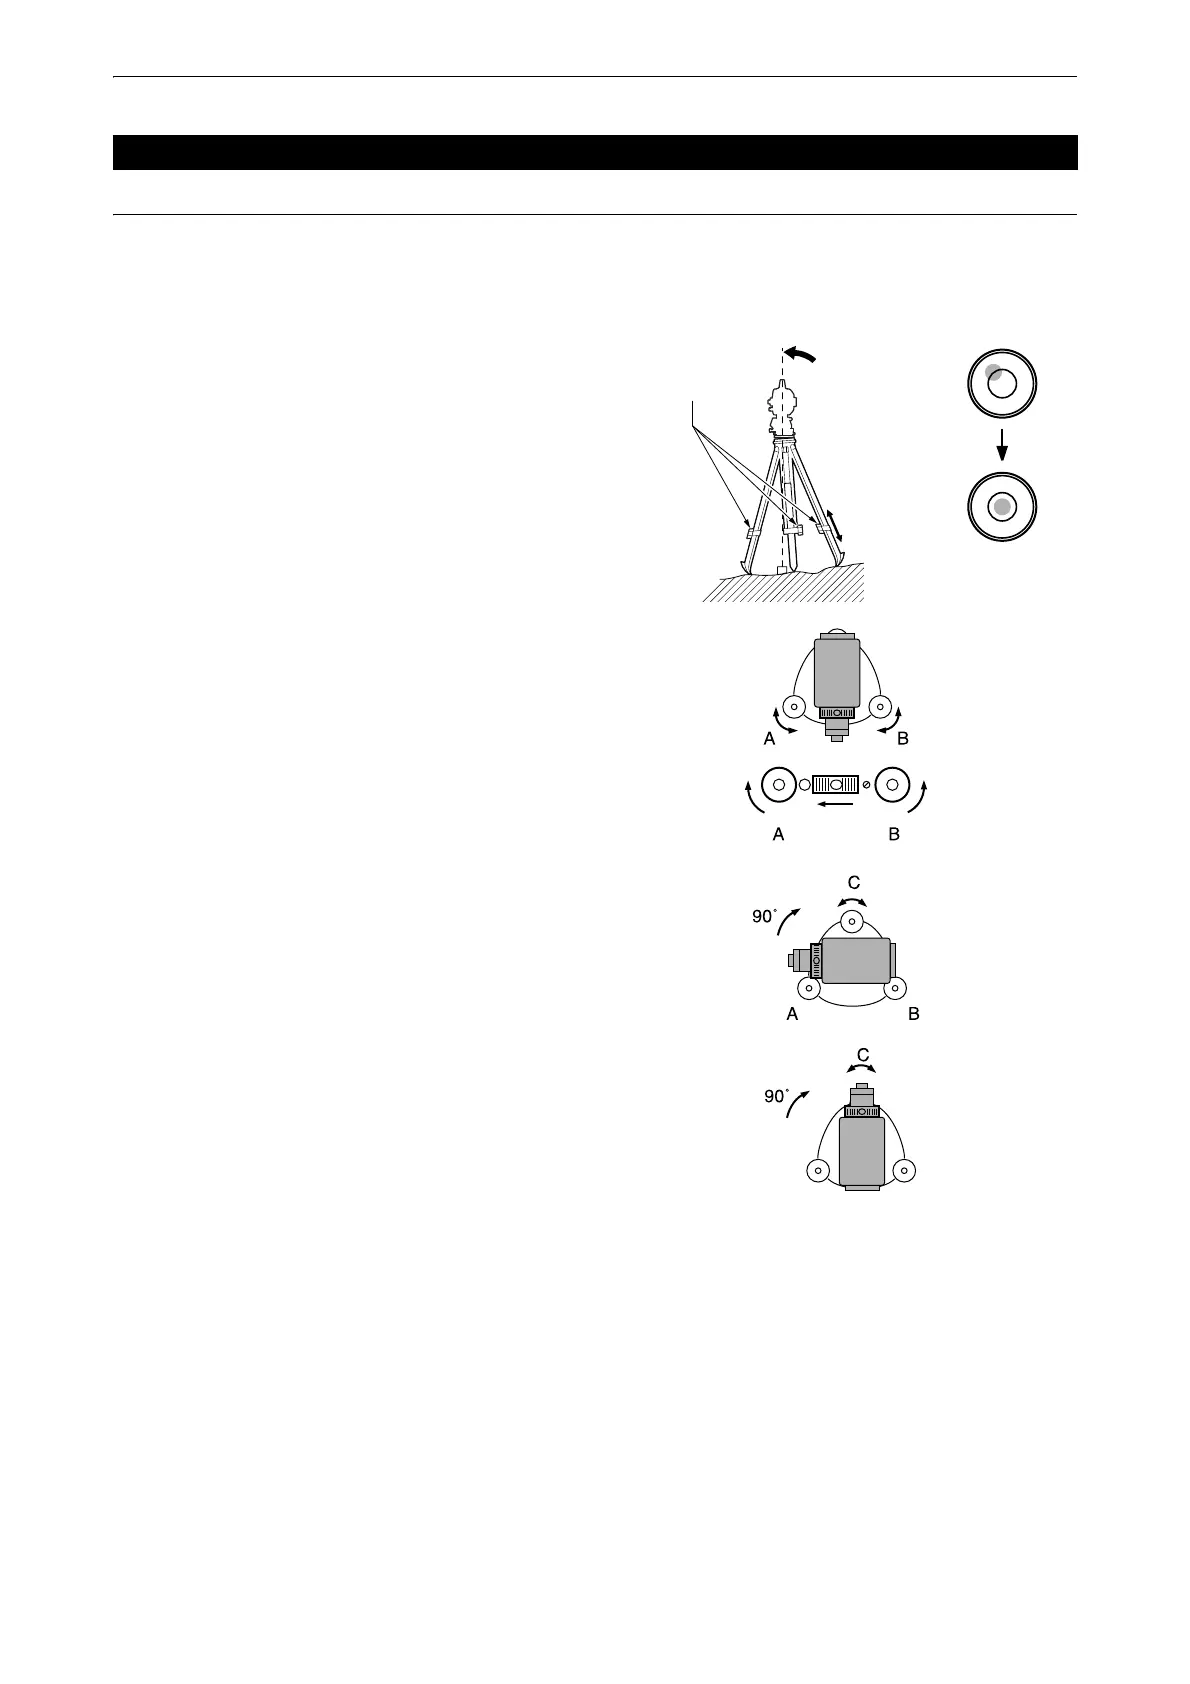
2. Roughly center the bubble in the circular level by
either shortening the tripod leg closest to the
offcenter direction of the bubble or by lengthening
the tripod leg farthest from the offcenter direction of
the bubble. Adjust one more tripod leg to center the
bubble.
3. Turn the upper part of the instrument until the plate
level is parallel to a line between levelling foot
screws A and B.
Center the air bubble using levelling foot screws A
and B simultaneously.
The bubble moves towards a clockwise rotated
levelling foot screw.
4. Turn the upper part of the instrument though 90°.
The plate level is now perpendicular to a line
between levelling foot screws A and B.
Center the air bubble using levelling foot screw C.
5. Turn another 90° and check bubble position.
Turn the upper part of the instrument a further 90°
and check to see if the bubble is still in the center of
the plate level. If the bubble is offcenter, perform
the following:
a. Turn levelling foot screws A and B equally in
opposite directions to remove half of the bubble
displacement.
b. Turn the upper part a further 90°, and use
levelling foot screw C to remove half of the
displacement in this direction.
Or adjust the plate level.
"13.1 Plate Level"
6. Turn the instrument and check to see if the air
bubble is in the center position in all directions.
If it is not, repeat the levelling procedure.
7.2 Levelling
 Loading...