service@toptro.com service@toptro.com
EN EN
8 9
1.Install 2 pieces of AAA batteries into the remote before using it. Do not
combine new batteries with old ones in remote controller, which can
cause operation failure due to insufficient power supply.
2.When using the remote controller, please make sure that the signal
transmitter of the remote controller aims at infrared signal receiver of the
projector.
3.If you are not using the remote controller for an extended period, please
take out batteries to prevent batteries leakage.
The projector can be hanged on the ceiling with special hanger frame,
and placed on the stable desk to project the image according to the
operating environment and requirements. The installation method is as
follows:
The recommended projection distance is about 8ft-10ft.
The image size depends on the distance between projector and screen,
there may be 3% deviation among above listed data. Different settings
cause various distances.
Note:
INSTALLATION
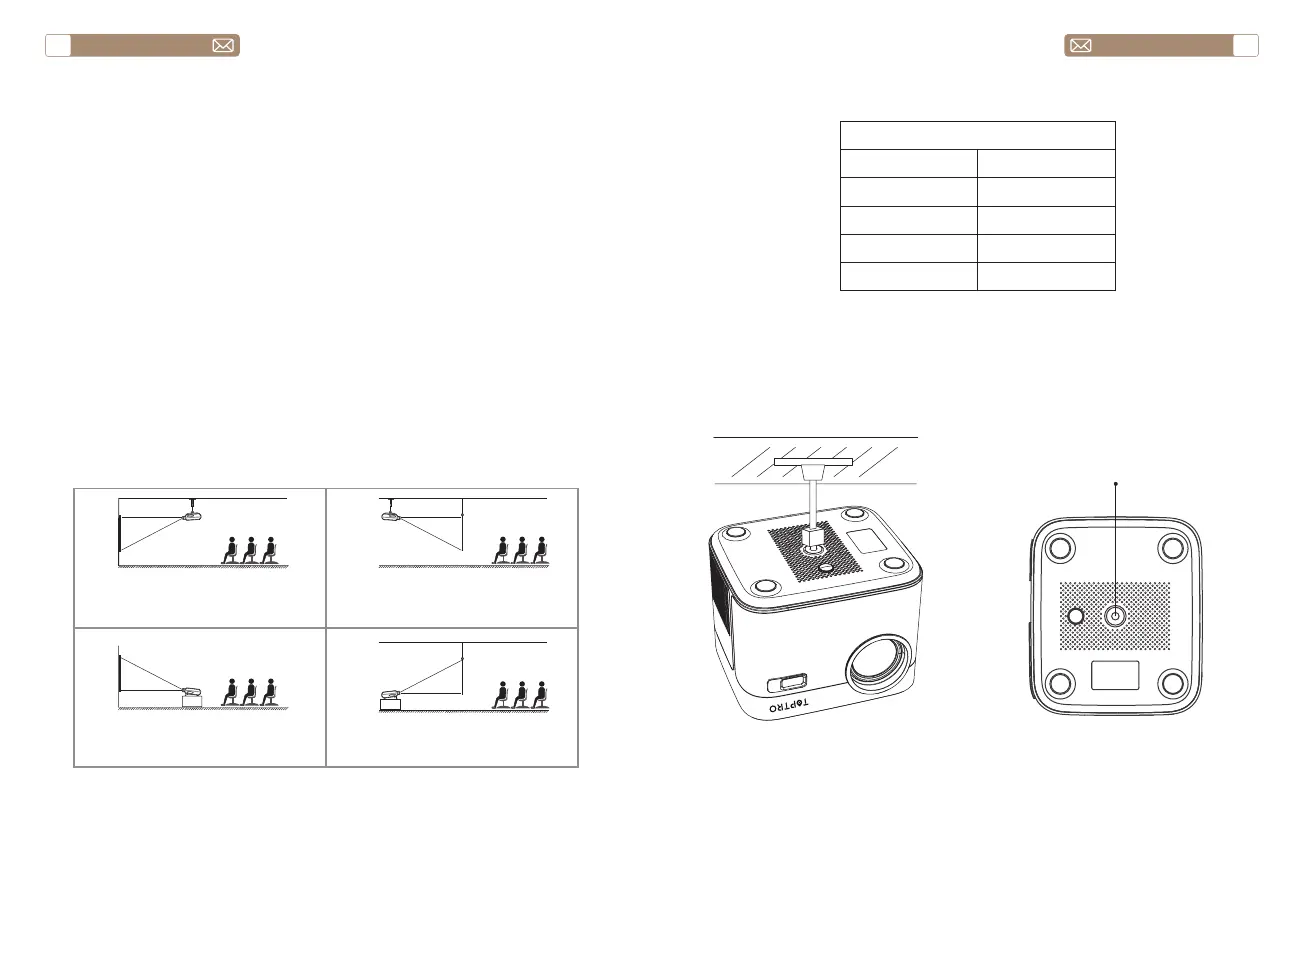
1.Installation Method
2.Projection Distance and Size
3.Install on the Ceiling
Projector
Projector
Projector
Projector
screen
screen
screen
screen
1. Front Projection Ceiling mount
3. Front Projection Table mount
2. Rear projection Ceiling mount
4. Rear projection Table mount
Aspect Ratio: 16:9
Distance (ft.) Screen Size
5 50"
8 80"
10 100"
12 120"
Bracket screw hole
Note: Please purchase an universal projector ceiling mount, attach the
projector with 1/4 inch screws.