8
1. Remove the VOLTA Series Torque Wrench from the application.
2. Disconnect the battery to the VOLTA Series Torque Wrench.
3. Remove and change the socket or accessory adaptor for the next project. Ensure the socket
or accessory is properly secured to the square drive with a locking pin and safety securing
o-ring.
CHANGING ACCESSORIES
TIGHTENING AND LOOSENING OF BOLTS OR NUTS
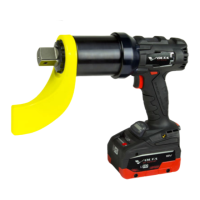
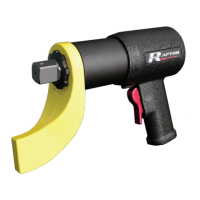
Fig. 1
1. Place your VOLTA Series Torque Wrench
completely over and on the fastener to be
tightened or loosened.
2. Ensure the reaction area / movement is taken
up by the Reaction Arm. Also, ensure the
reaction is stable and will support counter
torque.
3. Hold the VOLTA Series Torque Wrench
perpendicular to the fastener axis for
the complete duration of the rotation process for
tightening or loosening.
4. Ensure the direction switch is set to tighten.
Then, press the trigger on the pistol grip to
tighten the fastener. The tool will rotate
until the fastener becomes torqued, and the
VOLTA Series Torque Wrench will then stop/beep.
5. For loosening a fastener, place the direction
switch in reverse. Then, press the trigger on
the pistol grip to loosen the fastener.
The unit will continue to rotate until the fastener is removed OR once the fastener is loose it
can be removed by hand and you can move on to the next fastener.
6. Continue the process for tightening or loosening for each fastener you require.
7. If torque requirements necessitate the use of torque increments, set the VOLTA Series Torque
Wrench to your rst torque requirement. Tighten fastener as per your required tightening bolt
sequence. Then, reset for the next setting(s).
8. Your personnel can be trained by your TorcUP Representative or Distributor on use of this
product if so desired.