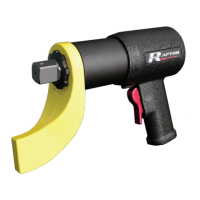
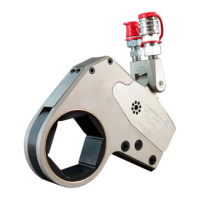
The provided document is an operation and maintenance manual for the TorcUP VT Series Battery-Powered Torque Wrenches. This series includes models VT-500, VT-1000, VT-1000-1, VT-2000, VT-3000, and VT-6000.
Function Description
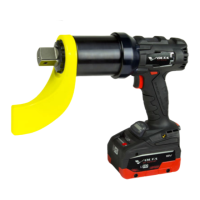
The TorcUP VT Series Battery-Powered Torque Wrenches are designed for the precise installation and removal of threaded fasteners. They provide high torque during bolt makeup (tightening) and maximum torque during bolt breakout (loosening). A key feature is their free joint execution, which allows for random positioning of the tool, enhancing versatility in various applications.
Important Technical Specifications
The VT Series offers a range of torque outputs and square drive sizes, along with varying weights and dimensions, as detailed in the technical specifications table:
| Model Number |
Square Drive |
Min. Torque (lbf-ft) |
Max. Torque (lbf-ft) |
Min. Torque (Nm) |
Max. Torque (Nm) |
Height A (w/ battery) (in) |
Length B (in) |
Diameter C (in) |
Weight (w/o reaction arm & battery) (lbs) |
Weight (w/ reaction arm & battery) (lbs) |
RPM at Min. Torque |
RPM at Max Torque |
| VOLTA 500 |
3/4" |
120 |
500 |
160 |
680 |
10.57 |
7.65 |
3.32 |
6.6 |
10.85 |
12.25 |
17.5 |
| VOLTA 1000-1 |
3/4" |
240 |
1000 |
330 |
1360 |
10.54 |
9.08 |
2.85 |
9.15 |
13.4 |
4.5 |
6.75 |
| VOLTA 1000 |
1" |
240 |
1000 |
330 |
1360 |
10.54 |
9.28 |
2.85 |
9.6 |
14.65 |
4.5 |
6.75 |
| VOLTA 2000 |
1" |
500 |
2000 |
680 |
2710 |
10.54 |
9.72 |
3.10 |
11.2 |
16.25 |
2.9 |
4.25 |
| VOLTA 3000 |
1" |
750 |
3000 |
1020 |
4070 |
10.76 |
12.49 |
3.75 |
17.7 |
22.75 |
1.5 |
2 |
| VOLTA 6000 |
1.5" |
1200 |
6000 |
1630 |
8130 |
11.38 |
13.17 |
5.00 |
33.5 |
43.3 |
0.9 |
1.2 |
Charger Requirements: The chargers operate on 110-120 V (50-60 Hz) and 230-240 V (50-60 Hz).
Battery Specifications:
- Nominal Voltage: 18V
- Typical Capacity: Available in 4 Ah (72Wh), 5.5 Ah (99Wh), and 8 Ah (144Wh) options.
- Chemical System: Lithium Transition Metal Oxide (Li[M]m[O]n)
- Designed for Recharge: Yes
Charger Specifications:
- Input: 110V or 220V
- Mains Frequency: 50-60 Hz
- Output: 18 VDC
- Charge Time: 30 minutes at 1.5 Ah
Vibration Information (All Tool Sizes):
- Vibration: < 2.5 M/s²
- Uncertainty: 1.5 M/s²
- In accordance with EN 60745.
Noise Information (All Tool Sizes):
- LpA / KpA: 76 / 3 dB(A)
- LWA / KWA: 87 / 3 dB(A)
- In accordance with EN 60745.
Environmental Specifications:
- Operating Temperature: 5-122 °F (-15-50 °C)
- Charging Temperature: 32-122 °F (0-50 °C)
- Storage Temperature: 50-86 °F (10-30 °C)
- Humidity: 10% - 90% non-condensing
- Required Operating Conditions: Non-explosive atmosphere, dry location.
Usage Features
Setting the Torque:
- Activation: Press the Volta trigger momentarily to activate the LCD display, which remains illuminated for approximately 30 seconds after release.
- Torque Adjustment: Use the up and down arrows to set the desired torque. Pressing and holding an arrow button cycles through the settings.
- Unit Switching: Simultaneously pressing both arrows switches the display between lbf-ft and Nm. Note that transitioning units automatically resets the torque to the lowest possible value.
- Setting Retention: The torque setting remains active even after the LCD times out, until manually changed.
Torque Consistency:
- Temperature Effects: Continuous or rapid use that causes the tool to heat up may temporarily diminish accuracy and slightly increase torque. Accuracy returns to normal once the tool cools.
- Battery Life: It is recommended to change the battery before its charge drops below 25%. Torque output remains consistent until the last few fastenings before the battery fully depletes.
- Reverse Bias: The tool has a 15% reverse bias to assist with bolt breakout. For left-hand thread fasteners, TorcUP should be consulted.
Placing the Tool in Service:
- Reaction Arm: Ensure the reaction arm is properly attached and secured to the splined section of the torque tool.
- Socket Selection: Choose the appropriate square drive size and impact socket (or hex-drive socket) for the bolt/nut AF size.
- Socket Securement: Secure the impact socket onto the tool's square drive using a safety pin and a safety o-ring.
Tightening and Loosening of Bolts or Nuts:
- Positioning: Place the torque wrench completely over and on the fastener.
- Reaction Arm: Ensure the reaction arm is positioned against a stable, positive stop to absorb counter torque. Avoid positioning the arm such that it tilts the tool off the bolt's axis.
- Tool Alignment: Hold the tool perpendicular to the fastener axis throughout the rotation process.
- Tightening: Set the direction switch to "tighten." Press the trigger; the tool will rotate until the fastener reaches the set torque, then stop and beep.
- Loosening: Set the direction switch to "reverse." Press the trigger; the tool will rotate until the fastener is loose enough to be removed by hand or fully removed.
- Incremental Torque: For applications requiring incremental torque, set the tool to the first torque requirement, tighten, then reset for subsequent settings.
- Training: TorcUP representatives or distributors can provide training on product use.
Changing Accessories:
- Remove the tool from the application.
- Disconnect the battery.
- Remove and replace the socket or accessory adaptor, ensuring it is properly secured with a locking pin and safety o-ring.
Maintenance Features
General Maintenance:
- Inspection: Regularly inspect, maintain, operate, and install the tool according to all applicable standards and regulations.
- Labels: Do not remove labels; replace any damaged labels immediately.
- Lubrication: Only use TorcUP recommended lubricants. Do not use flammable or volatile liquids like kerosene, diesel, or jet fuel.
- Cleaning: Use only proper cleaning solvents that meet current safety and health standards, in a well-ventilated area.
- Work Area: Keep the work area clean, uncluttered, ventilated, and illuminated.
Battery Use and Care:
- Charging: Recharge only with the manufacturer-specified charger.
- Battery Packs: Use only specifically designated battery packs.
- Storage: When not in use, keep battery packs away from other metal objects to prevent shorting terminals.
- Liquid Exposure: Avoid contact with battery liquid. If contact occurs, flush with water and seek medical help if it contacts eyes.
- Protection: Protect battery packs from water, moisture, and open flame.
- Disposal: Do not expose battery packs to open flame. Do not dispose of battery packs with household waste; observe national regulations for proper disposal.
Battery Troubleshooting:
The tool features automatic protection modes that activate if issues arise, indicated by a continuous beeping sound.
- Battery Almost Empty: If one LED is flashing, the battery pack is almost depleted. The electronics protect against total discharge. Recharge the battery.
- Long Continuous Overloading: This activates a temperature cut-out. Allow the tool or battery pack to cool. Operating at idling speed can help cool the tool faster.
- Safety Shutdown: The tool switches off automatically if the current slew rate is too high (e.g., due to sudden seizing or kickback). Switch the tool off at the trigger, then on again to resume work. Try to prevent the tool from seizing.
Service and Repair:
- Authorized Personnel: Repairs should only be made by authorized personnel. Using non-genuine TorcUP replacement parts may lead to safety hazards, decreased performance, increased maintenance, and could invalidate warranties.
- Degrading Performance: After extended use, if the tool shows degrading performance or apparent damage, it must be sent to TorcUP Inc. or a local representative/distributor for service. The unit must be properly packaged for shipping.
- Damaged Tools: Never use a damaged or malfunctioning tool or accessory.
- Modifications: Do not modify the tools, safety devices, or accessories.