nsiindustries.com/tork
800.321.5847
LI-1125(C)
FOR TECHNICAL SUPPORT
888.500.4598
©2024 NSI Industries
TRK_458Z_MTM_ProdInstall
PROGRAMMING INSTRUCTIONS
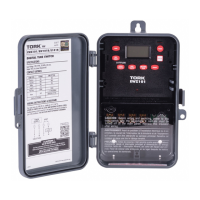
458Z
SUNSET
SECURITY TIMER
Before initial use, plug the timer in for at least 30 minutes to charge
the internal battery. Aer the screen displays, the unit is ready for
programming.
The LCD display might turn o aer a long time without use. Plug the
timer into an outlet once every 3 months to keep the battery charged.
1. Plug the timer into an AC outlet.
2. In case of a display failure, press RESET button to restart the timer.
3. Unplug the timer from AC outlet for setting
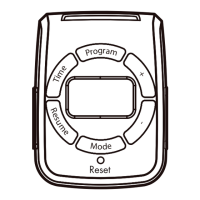
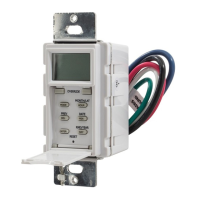
1. Button Layout
Time - Setting the Clock
Resume - Erase Program
Mode - Choose Dierent Mode
Program - Setting Program
(+) - Adjust UP
(-) - Adjust DOWN
2. Setting the Clock
1. Press the Time button to set the current year. Press “+” or “-”
button to adjust the flashing number from 2013 to 2099.
2. Press the Time button again to set the month. Press button
“+” or “-“ to adjust the number from 01 to 12.
3. Press the Time button again to set the date. Press button “+”
or “-“ to adjust the number. The maximum date will depend on
which mnth your choose.
4. Press the Time button again to set the Day Light Savings
Time (DST) fuction. Press button “+” or “-” to setting AUTO
mode or OFF mode. When DST setting is on AUTO: Timer
schedule will automatically move ahead 1 hour on the
Sunday of the second week in March at 02:00 am every year. The
timer will automatically adjust back 1 hour on the Sunday of the
first week in November at 02:00 am every year.
5. Press the Time button again to set the hour. Press button “+”
or “-” to adjust the number from 12AM-11AM to 12PM-11PM.
6. Press the Time button again to set the minutes. Press button
“+” or “-” to adjust the number from 00 to 59.
7. Press the Time button again to set the Astronomic function.
Press button “+” or “-” to adjust three dierent areas to your current location.
The map below will determine what zone the timer is being used.
Manual Option:
Press the Time button again to adjust the Sunrise time.
Press “(+)” or “(-)“ button to adjust ±2 hours to set the device to
power OFF aer or before sunrise.
Press RESUME button if you want to resume the originally
sunrise time.
Press the Time button again to adjust the Sunset time.
Press “(+)” or “(-)“ button to adjust ±2 hours to set the device to
power ON aer or before sunset.
Press RESUME button if you want to resume the originally sunset
time.
8. Press the Time button again to finish and the setting will
go back to current time.
3. Setting the Program
1. Press the Program button to begin setting the event.
2. Press Time button to set the first On event.
The setting will begin from the begining of the week.
Press button “+” or “-“to adjust dierent week event:
a. Every day (7 Days of the week).
b. Weekday (Mon-Fri).
c. Weekend (Sat-Sun).
3. Press Time button to set the hours.
Press (+) or (-) to set hours. Hours setting mode:
a. 12-hour clock AM/PM
b. Sunrise/Sunset
Press Time button to set the minutes.
Note: If you select Sunrise or Sunset as the event.
Please press PROGRAM button to select “ON” or “OFF”.
Press button (+) or (-) to adjust from 00-59.
Note: If you press button “RESUME” that will cancel the setting.
1
1
2
3
2
3
4
5
6
Once the zone is
determined the time will
automatically set the
sunrise and sunset time.