EasyManua.ls Logo

Tornado TS120-S53-U - User Manual

Tornado TS120-S53-U
20 pages
Print Icon
To Next Page IconTo Next Page
Loading...
TORNADO INDUSTRIES, LLC
3101 WICHITA COURT
FORT WORTH, TX 76140
PHONE 800-VACUUMS
FAX 817-551-0719
WWW.TORNADOVAC.COM
Operations & Maintenance Manual
For Commercial Use Only
Form No. T-OM680LT 05/21 ©Tornado Industries, LLC. All rights reserved
AUTOMATIC SCRUBBER
MODEL NO: TS120-S53-U
Save These Instructions

Table of Contents

Question and Answer IconNeed help?

Do you have a question about the Tornado TS120-S53-U and is the answer not in the manual?

Summary

Notes

Protect the Environment

Advice on environmentally safe disposal of packaging materials and recycling.

General Safety Rules

Machine Usage Guidelines

Instructions on correct use, handling, and general safety precautions for the machine.

Storage and Disposal

Guidelines for storing the machine at appropriate temperatures and environmentally sound disposal of materials.

Correct Use and Maintenance Precautions

Details on proper operating procedures, avoiding specific hazards, and general maintenance advice.

Battery Safety and Handling

Technical Specifications

Machine Symbols Guide

Manual Symbols Guide

Instrument Board and Controls

Machine Component Identification

Before First Use

Handling and Unpacking

Instructions for safely handling the packed machine and unpacking it from its packaging.

Battery Installation and Type Setting

Steps for installing batteries and setting the correct battery type for optimal performance.

Battery Recharger Operation

Battery Recharging Procedures

Step-by-step guide for recharging the machine's batteries, including safety precautions.

Battery Disposal Guidelines

Instructions on the proper and legal disposal of used batteries as hazardous waste.

Battery Charge Level Indicator

Squeegee Assembly and Adjustment

Squeegee Assembly

Step-by-step guide to correctly attach the squeegee to the machine.

Squeegee Height Adjustment

How to adjust the squeegee's vertical position based on rubber wear for effective drying.

Squeegee Inclination Adjustment

Method for adjusting the squeegee's angle to improve drying performance on different floor areas.

Splash Guard Assembly

Brush Assembly and Components

Brush Assembly

Detailed steps for mounting and securing the brush onto the machine's brush holder.

Recovery Tank and Solution Tank

Recovery Tank Checks

Verification of the recovery tank cover and hoses to ensure proper operation.

Detergent Solution Tank

Details on the detergent solution tank, including its inspection opening and cap security.

Floor Cleaning Operation

Connecting Batteries

Procedure for connecting the machine's battery power supply.

Starting the Machine

Step-by-step instructions to power on and initiate the floor cleaning operations.

Operational Procedures

Overflow Device Function

Explanation of the overflow device that stops suction when the recovery tank is full.

Emptying Detergent Solution

Instructions on how to drain the detergent solution tank for cleaning or refilling.

Forward Movement and Stopping

How the machine moves forward and how to stop its operation using the control levers.

Stopping and Daily Maintenance

Stopping Machine After Cleaning

Steps to safely shut down the machine after completing a cleaning cycle.

Daily Maintenance Procedures

Covers cleaning of recovery tank, suction filter, and brush disassembly.

Weekly Maintenance

Brush and Squeegee Cleaning

Procedures for cleaning the brush and the squeegee for effective drying.

Rear Squeegee Rubber Replacement

Guide for replacing the rubber on the rear squeegee to maintain drying efficiency.

Two-Monthly Maintenance

Squeegee Hose and Tank Cleaning

Procedures for cleaning the squeegee hose and the solution tank with its filter.

Front Squeegee Rubber Replacement

Guide for replacing the rubber on the front squeegee for optimal drying performance.

Six-Monthly Maintenance

Splash Guard Replacement

Instructions for replacing the rubber on the splash guards.

Troubleshooting Guide

Suction Motor Issues

Diagnosing and resolving problems where the suction motor is not working.

Brush Motor and Water Flow Issues

Resolving brush motor problems, insufficient water, and poor cleaning performance.

Squeegee Drying and Foam Issues

Addressing squeegee drying problems and excessive foam production.

Programmed Maintenance

Periodic Ordinary Maintenance Chart

A schedule of routine maintenance interventions and their frequency.

Recommended Brushes

Brush Selection and Application

Guidance on selecting and using brushes based on floor conditions, materials, and usage.

Overview

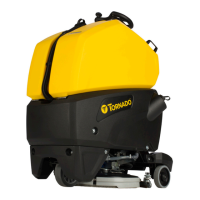
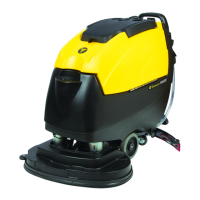
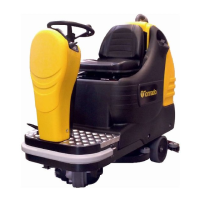
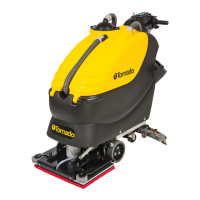
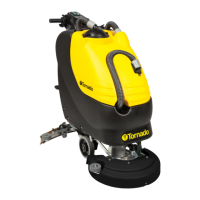
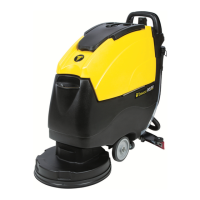
This document describes the Tornado TS120-S53-U automatic scrubber, a high-quality, precision-made product designed for floor cleaning in commercial environments. It emphasizes safe operation, proper maintenance, and the use of original spare parts and brushes to ensure optimal performance and longevity.

Function Description

The Tornado TS120-S53-U is an automatic scrubber designed to simultaneously wash and dry floors. It operates by dispensing a detergent solution, scrubbing the floor with a brush, and then recovering the dirty solution through a squeegee and suction motor, leaving the floor clean and dry. The machine is equipped with a brush base group, a recovery tank, a solution tank, and a squeegee assembly. It features an instrument board with controls for ignition, battery charge level, brush motor, suction motor, and solenoid valve. The machine is designed for forward movement, driven by the brush working on an inclined axle.

Usage Features

Before use, the machine requires careful setup, including battery installation and, if necessary, adjustment for GEL batteries by authorized technical assistance. The battery cables must be connected by specialized staff, ensuring correct polarity to prevent damage to electrical components. The machine is equipped with two 12V batteries connected in series, located under the recovery tank.

To begin operation, the detergent solution tank, located in the rear left part of the machine, must be filled with clean water at a maximum temperature of 122°F (50°C) and the recommended percentage of liquid detergent. Low-foam detergent is advised to prevent issues with the suction motor, and a minimum quantity of anti-foam product should be introduced into the recovery tank before starting.

The operation sequence involves:

  1. Pressing the ignition switch.
  2. Checking the battery charge level on the display.
  3. Activating the brush motor, suction motor, and solenoid valve switches.
  4. Lowering the brush base using the pedal.
  5. Opening and adjusting the detergent solution flow with the solution valve lever. The water flow automatically starts when the brush motor is activated.
  6. Activating the levers drive control to initiate machine movement, brush rotation, water flow, and squeegee drying.

During the initial meters of operation, it is crucial to verify that the detergent solution flow is appropriate and that the squeegee adjustment ensures perfect drying. The machine is not equipped with a parking brake, so it should not be left on slopes. When moving the machine backward, the squeegee must be lifted.

The squeegee assembly requires adjustment based on rubber wear to guarantee perfect drying. The lower blade of the rear squeegee rubber should be slightly bent backward uniformly along its entire length. The squeegee inclination can also be adjusted to increase rubber bending in the central part or at the extremities.

Maintenance Features

Regular maintenance is crucial for the machine's performance and longevity. The manual outlines daily, weekly, two-monthly, and six-monthly maintenance tasks.

Daily Maintenance:

  • Recovery Tank Cleaning: The recovery tank should be emptied when full, indicated by a float device that stops suction to prevent damage to the suction motor. The drain hose, located at the front of the machine, is used for this purpose. After draining, the suction cover, filter, and filter protection should be removed, and the tank rinsed with a water jet.
  • Suction Filter Cleaning: The suction filter should be cleaned by removing the suction cover, filter, and filter protection, then washing all parts with a water jet, focusing on internal surfaces and the filter bottom.
  • Brush Disassembly and Cleaning: The brush base group is lifted using a pedal, and the electric supply to the brush motor is disconnected by unplugging the battery connector. The brush is then turned in its rotating sense until it is released from its holder plate seat. The brush should be cleaned with a water jet.
  • Squeegee Cleaning: The squeegee hose is disconnected, and the squeegee is disassembled from its support by rotating a lever and sliding out the stud bolts. The internal part of the squeegee inlet and the squeegee rubbers should be carefully cleaned to ensure optimal drying.

Weekly Maintenance:

  • Rear Squeegee Rubber Replacement: The squeegee rubber wear should be checked, and it should be turned to a new side or replaced if necessary. This involves lifting the squeegee, uncoupling the hook of the rubber holder blade, releasing the extremities from the squeegee body, and removing the rubber.
  • Squeegee Hose Cleaning: The squeegee hose should be checked for obstructions and cleaned with a water jet if necessary. This involves taking off the hose from its coupling and releasing the guide spring of the suction hose.
  • Solution Tank Cleaning: The solution tank should be drained by unscrewing the tank cap and the exhaust plug. The solution filter should be unscrewed, cleaned, and the tank rinsed with a water jet.

Two-Monthly Maintenance:

  • Front Squeegee Rubber Replacement: Similar to the rear squeegee rubber, the front squeegee rubber's wear should be checked and replaced if needed. This involves disconnecting the squeegee hose and disassembling the squeegee from its support.

Six-Monthly Maintenance:

  • Splash Guard Replacement: The splash guard rubbers should be replaced. This involves unscrewing knobs and nuts to remove the metal strips and old rubbers, then installing new ones according to the assembly instructions.

General Rules for Safety and Maintenance:

  • Always use suitable acid-proof gloves and glasses when working on batteries.
  • Avoid smoking or free flames near batteries.
  • Ensure a fire-extinguisher is available on site.
  • Be cautious of corrosive liquid leakages from batteries.
  • Do not place metallic tools on batteries to prevent short circuits.
  • Exhaust batteries must be handed over to an authorized institution for disposal as dangerous waste.
  • Do not remove protections requiring tools.
  • Do not wash the machine with direct water jets or corrosive materials.
  • Have the machine checked by an authorized service department every 200 working hours.
  • Ensure all panels and coverings are in place before use.
  • Do not mix different detergents to avoid harmful odors.
  • Avoid brush operation when the machine is stationary to prevent floor damage.
  • Ensure the recovery tank is empty before lifting it.
  • For any cleaning or maintenance, disconnect the power supply from the machine.
  • Use only ORIGINAL spare parts and brushes recommended in the manual.

Troubleshooting:

The manual provides a troubleshooting guide for common issues such as the suction motor not working, the brush motor not working, insufficient water on the brush, the machine not cleaning properly, the squeegee not drying perfectly, and excessive foam production. For complex issues, authorized technical assistance should be contacted.

Tornado TS120-S53-U Specifications

General IconGeneral
ModelTS120-S53-U
CategoryScrubber
Solution Tank Capacity53 L
Recovery Tank Capacity53 L
Power SourceBattery
Water Tank Capacity53 L
Noise Level68 dB

Related product manuals