tothereelandcounterclockwiserotationmovethe
bedknifeedgeawayfromthereel.Donotovertighten
theadjustingscrews.
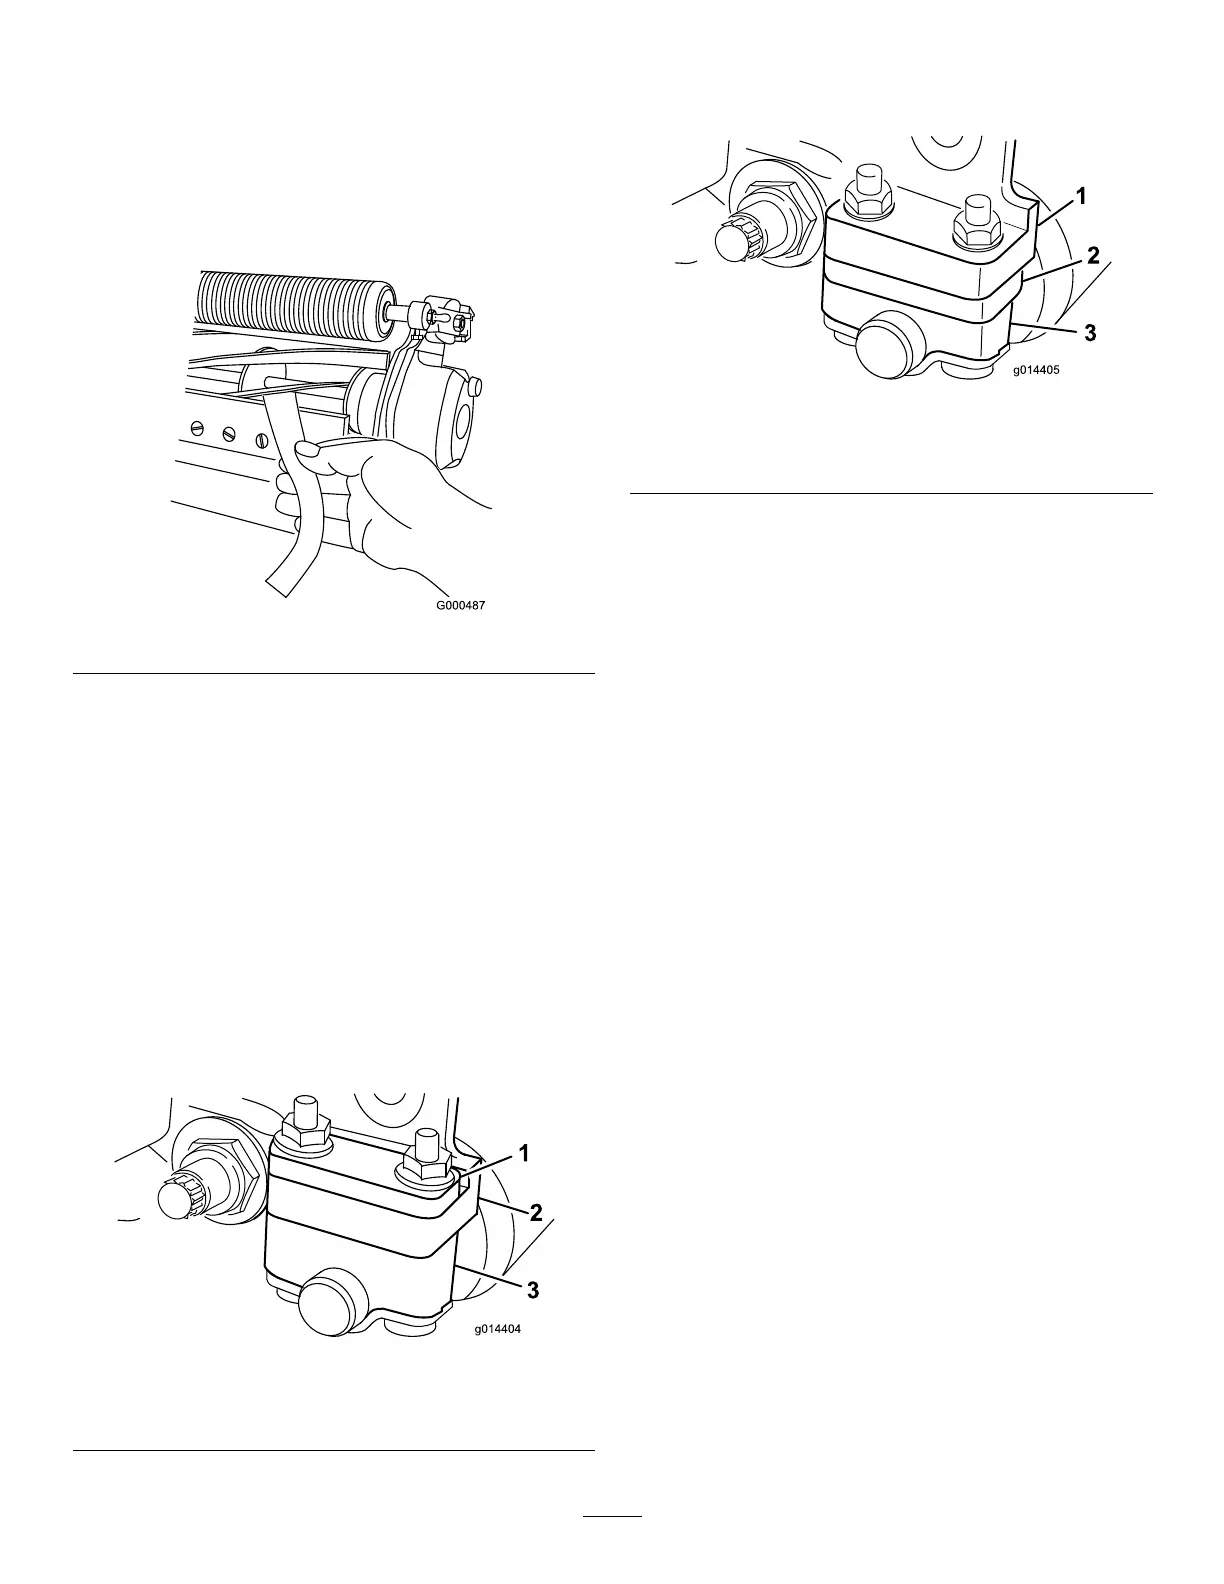
11.Testthecuttingperformancebyinsertingalongstrip
ofcuttingperformancepaper(Toropartnumber
125-5610)betweenthereelandbedknife,perpendicular
tothebedknife(Figure5).Slowlyrotatethereel
forward;itshouldcutpaper
Figure5
Note:Ifexcessivecontact/reeldragisevidentitwill
beeithernecessarytobacklap,refacethefrontofthe
bedknife,orregrindthecuttingunittoachievethe
sharpedgesneededforprecisioncutting(Refertothe
ToroManualforSharpeningReelandRotaryMowers,
FormNo.09168SL).
AdjustingtheRearRoller
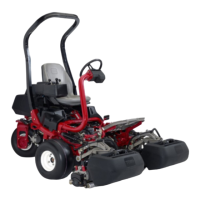
1.Adjusttherearrollerbrackets(Figure6orFigure7)
totheloworhighpositiondependingonthedesired
heightofcutrange.
Positionthespacerabovethesideplatemountingange
(factorysetting)whenheightofcutsettingsrangefrom
1.6to6mm(1/16to1/4inch)(Figure6).
Figure6
1.Spacer3.Sideplatemountingange
2.Rollerbracket
Positionthespacerbelowthesideplatemounting
angewhenheightofcutsettingsrangefrom3to25
mm(1/8to1inch)(Figure7).
Figure7
1.Spacer3.Sideplatemountingange
2.Rollerbracket
2.Toadjustrearrollerproceedasfollows:
A.Raisetherearofthecuttingunitandplaceablock
underthebedknife.
B.Removethe2nutssecuringeachrollerbracket
andspacertoeachsideplatemountingange.
C.Lowertherollerandscrewsfromthesideplate
mountingangesandspacers.
D.Placethespacersontothescrewsontheroller
brackets.
E.Securetherollerbracketandspacerstothe
undersideofthemountingangeswiththenuts
previouslyremoved.
Note:Thepositionoftherearrollertothereel
iscontrolledbythemachiningtolerancesofthe
assembledcomponentsandparallelingisnotrequired.
AdjustingtheHeightofCut
Note:Forheightsofcutgreaterthan1.270cm(0.500inch),
youmustinstallthehighheightofcutkit.
Important:Wheneverthecuttingunithastobetipped
toexposethebedknife/reel,propuptherearofthe
cuttingunittomakesurethenutsonthebackendof
thebedbaradjustingscrewsarenotrestingonthework
surface(Figure3).
1.Loosenthelocknutssecuringtheheight-of-cutarmsto
thecuttingunitsideplates(Figure8).
5