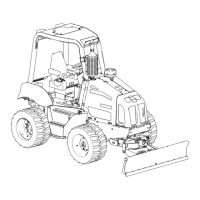
InstallingtheTilt-lockoutPin
1.Usethetiltswitchtoaligntheholeinthechassis-lockout
bracketwiththeholesintheaxle-lockoutbracket
(Figure49).
2.Removethehairpinfromthetilt-lockoutpin(Figure
50).
Note:Thetilt-lockoutpinshouldbestowedinthe
verticalholeintheaxle-lockoutbracket.
Figure50
1.Tilt-lockpin3.Axle-lockoutbracket
(verticalholes)
2.Hairpin
3.Removethetilt-lockoutpinfromthestowedposition.
4.Fullyinsertthetilt-lockoutpinthroughthehorizontal
holesinthechassis-lockoutbracketandaxle-lockout
bracket(Figure49).
5.Securethetilt-lockoutpintotheaxle-lockoutbracket
withthehairpin(Figure49).
StowingtheTilt-lockoutPin
1.Insertthetilt-lockpinthroughtheverticalholesinthe
axle-lockoutbracket(Figure50).
2.Securethepintothelockoutbracketwiththehairpin
(Figure50).
TiltingtheMachine
Usethemachinetiltfeaturetocompensateforside-to-side
tiltwhenoperatingthemachineacrossaslope.
•Pushtheupperpartofthisswitchdown(Figure51)totilt
themachinerightforinclinedterrain.
•Pushthelowerpartofthisswitchdown(Figure51)totilt
themachineleftforinclinedterrain.
Figure51
1.Tiltthemachineright
2.Tiltthemachineleft
Note:Usethetiltgauge(Figure52)todeterminethedegree
oftiltatwhichthemachineisoperating.
Figure52
1.Tiltgauge
PreparingtoOperatethe
Machine
Afterstartingtheenginebutbeforeoperatingthemachineat
theworksite,dothefollowing:
•EnsurethattheROPSandtheseatbeltareproperly
installedandingoodworkingorder.
•Ensurethatallinstrumentsareworkingproperly.
•Ensurethatallattachmentsareworkingproperlyina
clear,openarea.
1.Starttheengineandwarmitup.
2.Raisetheenginespeedtothedesiredlevel.
3.Raisetheattachments.
4.Releasetheparkingbrake.
39