22
1. Hold the blade end using a rag or thickly-padded
glove.
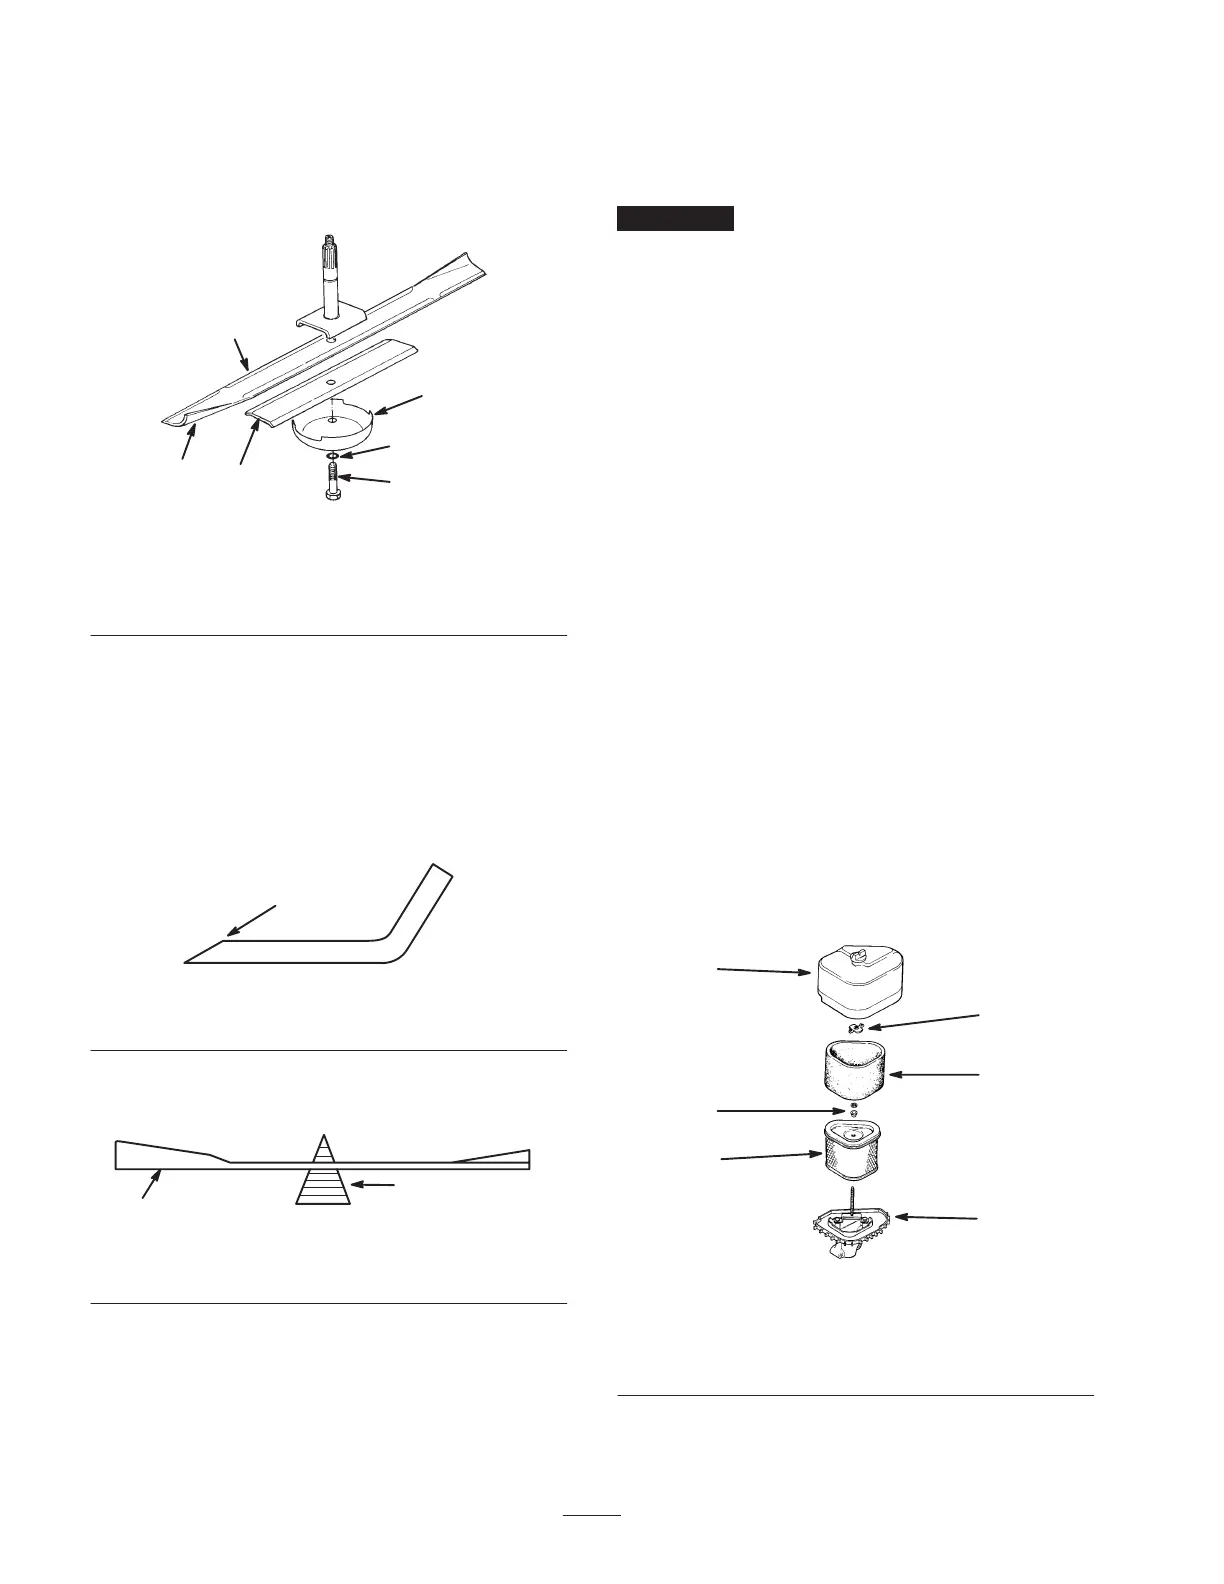
2. Remove the blade bolt, lock washer, anti-scalp cup,
blade, and spacer from the spindle shaft (Fig. 23).
1
2
4
5
6
m–4686
3
Figure 23
1. Sail area of the blade
2. Blade
3. Spacer
4. Anti-scalp cup
5. Lock washer
6. Blade bolt
Sharpening the Blade
1. Use a file to sharpen the cutting edge at both ends of
the blade (Fig. 24).
Note: Maintain the original angle. Remove an equal
amount of material from each side of the blade to
maintain the blade balance.
1
m–1854
Figure 24
1. Sharpen at original angle
2. Check the balance of the blade by putting it on a blade
balancer (Fig. 25).
1
2
m–1855
Figure 25
1. Blade 2. Balancer
3. If the blade stays in a horizontal position, it is
balanced and can be used.
4. If the blade is not balanced, file some metal off the
end of the sail area only (Fig. 23).
5. Repeat this procedure until the blade is balanced.
Installing the Blade
1. Install the spacer and blade onto the spindle shaft
(Fig. 23).
Important The curved part of the blade must be
pointing upward toward the inside of the mower to ensure
proper cutting.
2. Install the anti-scalp cup, lock washer, and blade bolt
(Fig. 23).
3. Torque the blade bolt to 85 to 110 ft.-lb. (115 to
149 N⋅m).
Servicing the Air Cleaner
Foam Element: Clean and oil it after every 25 operating
hours.
Paper Element: Replace it after every 100 operating
hours.
Note: Service the air cleaner more frequently (every few
hours) if operating conditions are extremely dusty or
sandy.
Removing the Foam and Paper Elements
1. Disengage the blade control (PTO), set the parking
brake, stop the engine, remove the key, and disconnect
the spark plug wire from the spark plug.
2. Clean around the air cleaner to prevent dirt from
getting into the engine and causing damage.
3. Unscrew the cover nut and remove the air cleaner
cover (Fig. 26).
1
2
m–2595
3
4
5
6
Figure 26
1. Cover and nut
2. Wing nut
3. Foam element
4. Washer and grommet
5. Paper element
6. Air cleaner base
4. Remove the air cleaner assembly (Fig. 26).