32
4. Pull the castor wheel fork out of the mounting tube,
leaving the spacer and thrust washer(s) on the bottom
of the fork.
Remember the location of the thrust washers and
spacer on each fork to ensure correct installation and
to maintain a level mower.
3
4
1
5
2
2
m–2504
Figure 50
1. Retaining ring
2. Thrust washer
3. Carrier frame mounting
tube
4. Spacer
5. Castor wheel fork
5. Insert a pin punch into the mounting tube and carefully
drive out the bushings (Fig. 51).
2
2
1
m–1076
Figure 51
1. Carrier frame mounting
tube
2. Bushing
6. Clean the inside of the mounting tube.
7. Grease the inside and outside of the new bushings.
8. Using a hammer and flat plate, carefully drive the
bushings into the mounting tube.
9. Inspect the castor wheel forks for wear and replace
them if necessary (Fig. 52).
10. Slide the castor wheel fork through the bushings in the
mounting tube.
11. Install the thrust washer(s) onto the fork and secure it
with the retaining ring (Fig 50).
Important The inside diameter of the bushings may
collapse slightly when installed. If the castor wheel fork
does not slide into the new bushings, ream both bushings
to an inside diameter of 1.126 in. (28.6 mm).
12. Grease the fitting on the carrier frame mounting tube
using No. 2 general purpose lithium base or
molybdenum base grease.
Servicing the Castor Wheels
and Bearings
The castor wheels rotate on a roller bearing supported by a
spanner bushing. If you keep the bearing well lubricated,
wear will be minimal. Failure to keep the bearing well
lubricated will cause rapid wear. A wobbly castor wheel
usually indicates a worn bearing.
1. Disengage the blade control (PTO), set the parking
brake, stop the engine, remove the key, and disconnect
the spark plug wire from the spark plug.
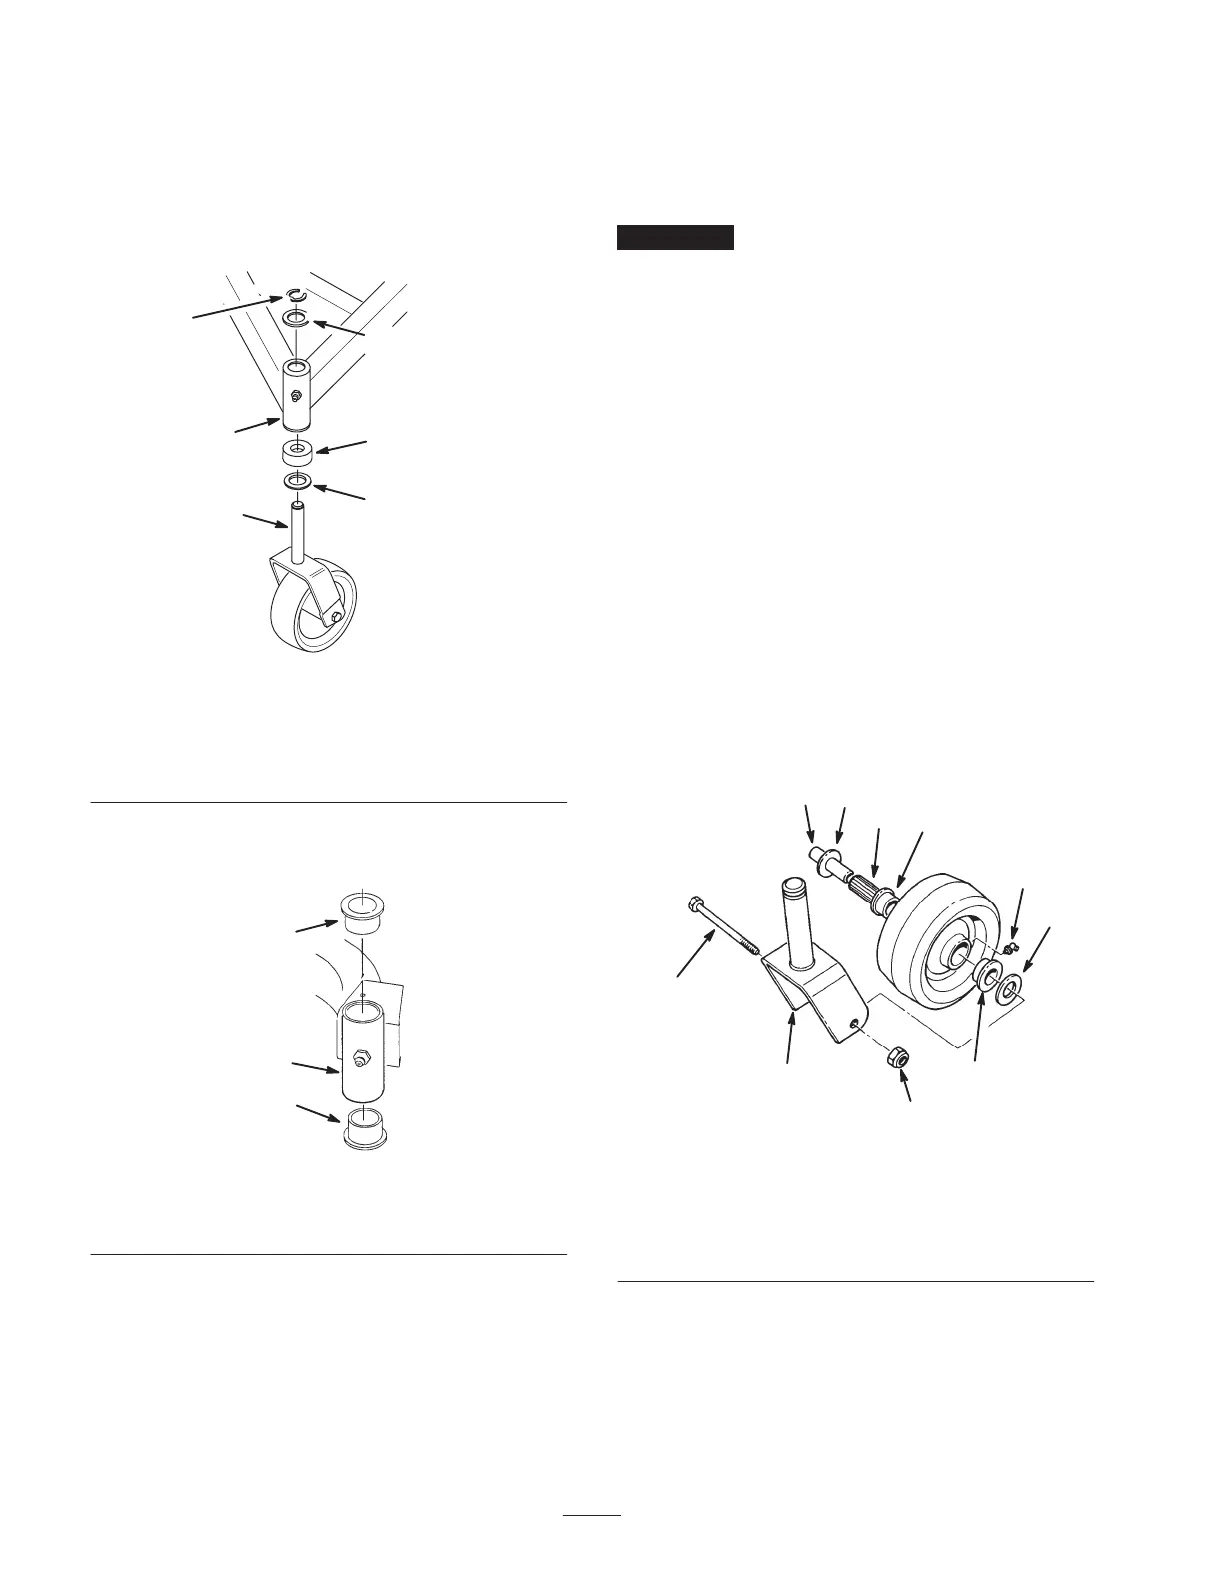
2. Remove the locknut and wheel bolt holding the castor
wheel to the castor fork (Fig. 52).
8
1
3
2
7
6
5
4
6
4
m-2621
Figure 52
1. Wheel bolt
2. Castor fork
3. Locknut
4. Bushing
5. Spanner bushing
6. Wheel spacer
7. Roller bearing
8. Grease fitting
3. Remove the wheel spacers and bushings, then pull the
spanner bushing and roller bearing out of the wheel
hub (Fig. 52).
4. Clean any grease and dirt from the wheel hub
(Fig. 52).