addshimsbetweenthespindlehousingandthebottom
ofthecuttingunit.
11.Removethebolts,atwashers,lockwashers,andnuts
fromtheouterspindleintheareawheretheshims
mustbeadded.
12.Toraiseorlowertheblade,addashim,PartNo.
3256-24,betweenthespindlehousingandthebottom
ofthecuttingunit.
13.Continuetocheckthealignmentofthebladesand
addshimsuntilthetipsofthebladesarewithinthe
requireddimension.
Important:Donotusemorethan3shimsatany
oneholelocation.Usedecreasingnumbersof
shimsinadjacentholesifmorethanoneshimis
addedtoanyoneholelocation.
14.Installthebeltcovers.
ReplacingtheDriveBelt
ServiceInterval:Every50hours
Every50hours
Thebladedrivebelt,tensionedbythespringloadedidler
pulley,isverydurable.However,aftermanyhoursofuse,
thebeltwillshowsignsofwear.Signsofawornbeltare:
squealingwhenbeltisrotating,bladesslippingwhencutting
grass,frayededges,burnmarks,andcracks.Replacethebelt
ifanyoftheseconditionsareevident.
1.Lowerthecuttingunittotheshopoor.Removethe
beltcoversfromthetopofthecuttingunitandsetthe
coversaside.
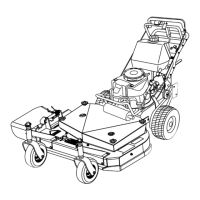
2.Usingatorquewrenchorsimilartool,movetheidler
pulley(Figure30)awayfromthedrivebelttorelease
thebelttensionandallowthebelttobeslippedoffthe
xedidlerpulley(Figure30).
Figure30
1.Idlerpulley2.Fixedidlerpulley
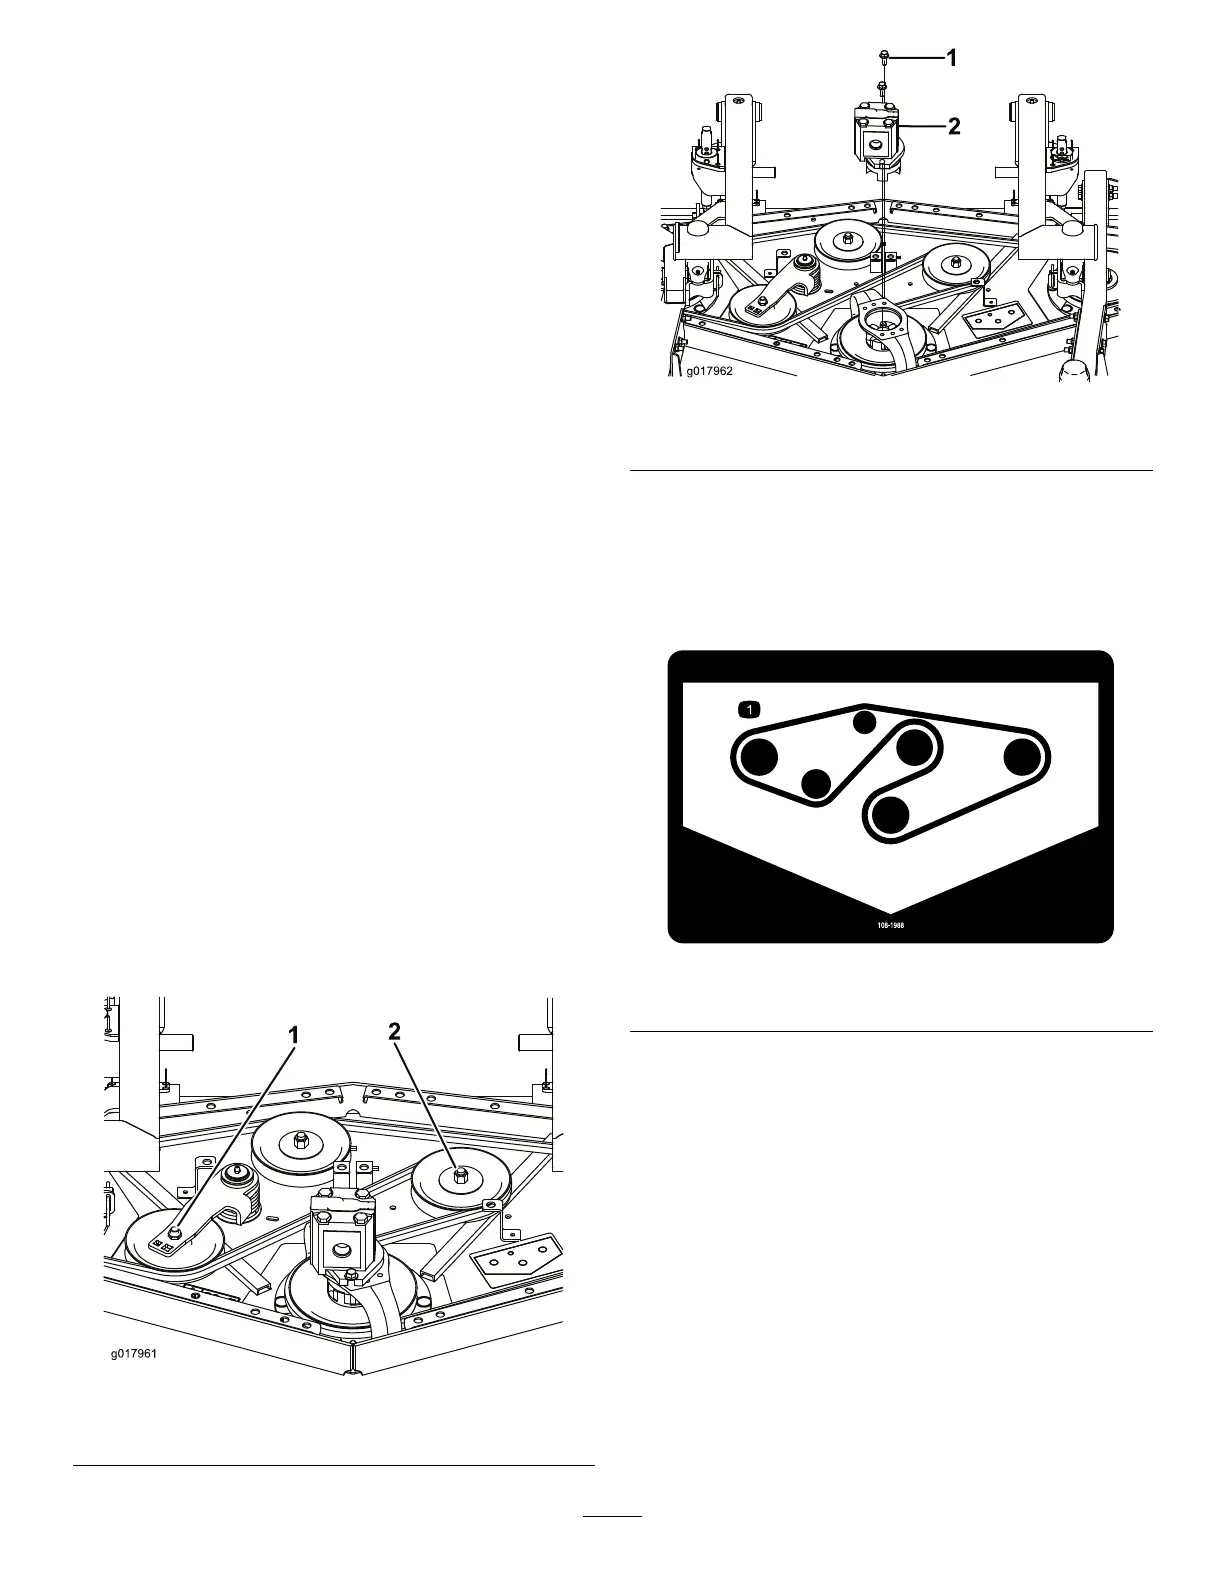
Figure31
1.Bolts2.Hydraulicmotor
3.Removetheboltsandhydraulicmotorasshownin
Figure31.
4.Removetheoldbeltfromaroundtheremainingpulleys.
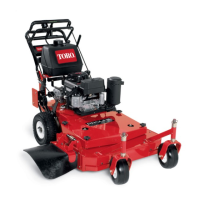
5.Routethenewbeltaroundthespindlepulleysandidler
pulleyassemblyasshowninFigure32.
Figure32
1.Beltrouting
6.Installthehydraulicmotorandsecureitwiththebolts
removedearlier(Figure31).
7.Installthebeltcovers.
22