12
Use a fuel stabilizer/conditioner regularly during
operation and storage. A stabilizer/conditioner cleans the
engine during operation and prevents gum–like varnish
deposits from forming in the engine during storage.
IMPORTANT: Do
not use fuel additives other than a
fuel stabilizer/conditioner
. Do not use fuel stabilizers
with an alcohol base such as ethanol, methanol, or
isopropanol.
1.
Clean the area around the fuel tank cap (Fig. 13).
2.
Remove the cap from the fuel tank.
3.
Using unleaded, regular gasoline, fill the tank to
within 1/4 to 1/2 in. (6 to 13 mm) from the top of the
tank.
IMPORTANT: Do
not fill the tank with gasoline into
the filler neck. This space is for expansion of fuel. Do
not fill the tank completely full.
4.
Install the fuel tank cap.
5. W
ipe up any spilled gasoline.
Operation
Controls
The following list contains descriptions of the
snowthrower controls:
•
Auger/Impeller Drive Contr
ol Lever
(Fig. 14)—T
o
engage both the auger and impeller
, press the lever
against the right handgrip. T
o disengage, release the
lever.
• T
raction Contr
ol Lever
(Fig. 14)—T
o engage the
traction (wheel drive), press the lever against the left
handgrip. T
o stop traction, release the lever
.
•
Speed Selector
(Fig. 14)—This control has four
positions: one reverse and three forward speeds. T
o
change speeds, move gear the shift to the desired
position. The lever locks in a notch at each speed
selection.
•
Discharge Chute Contr
ol
(Fig. 14)—Rotate the
dischar
ge chute control clockwise to move the
dischar
ge chute to the left and counterclockwise to
move the chute to the right.
•
Fuel Shut-off V
alve
(Fig. 14)—Close the valve by
rotating it to the right to stop fuel flow from fuel tank.
Open the valve by rotating it to the left. Close the
valve when you do not use the snowthrower
.
•
Chute Deflector Handle
(Fig. 14)—Move the
deflector handle forward to move the snow stream
down and rearward to move the snow stream up.
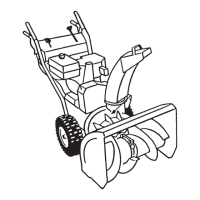
879
Figure
14
1. Auger
drive control lever
2. T
raction control lever
3.
Speed selector
4.
Discharge chute control
5.
Fuel shut-of
f valve
6.
Chute deflector handle
• Choke
(Fig. 15)—Rotate the choke to the Full choke
position to start a cold engine. As engine warms up,
move choke gradually to Of
f.
• Primer
(Fig. 15)—Press the primer to pump a small
amount of gasoline into the engine for improved cold
weather starting.
• Throttle
(Fig. 15)—Move the throttle upward to
increase engine speed and downward to decrease
engine speed.
•
Recoil Starter
(Fig. 15)—Pull the recoil starter to start
the engine.
•
Ignition Switch
(Fig. 15)—Insert the key before
starting the engine. T
o stop the engine, remove the
key.
725
Figure
15
1. Choke
2. Primer
3. Throttle
4. Recoil
starter
5.
Ignition switch
 Loading...