1
InstallingtheHandle
Partsneededforthisprocedure:
1Handleassembly
4Bolts
4Bellevillewashers
1Flangenut
Procedure
1.Removethetiestrapsthatsecurethecontrolrodsto
thehandle.
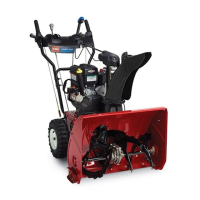
2.Removetheaxlepinsfrombothwheelsandslidethe
wheelsoutwardontheaxleapproximately1inch(3
cm)(Figure3).
Note:Savetheaxlepinssothatyoucaninstallthem
instep8.
Figure3
1.Axlepin(2)
3.Handle
2.Capscrewandcurved
washer(4)
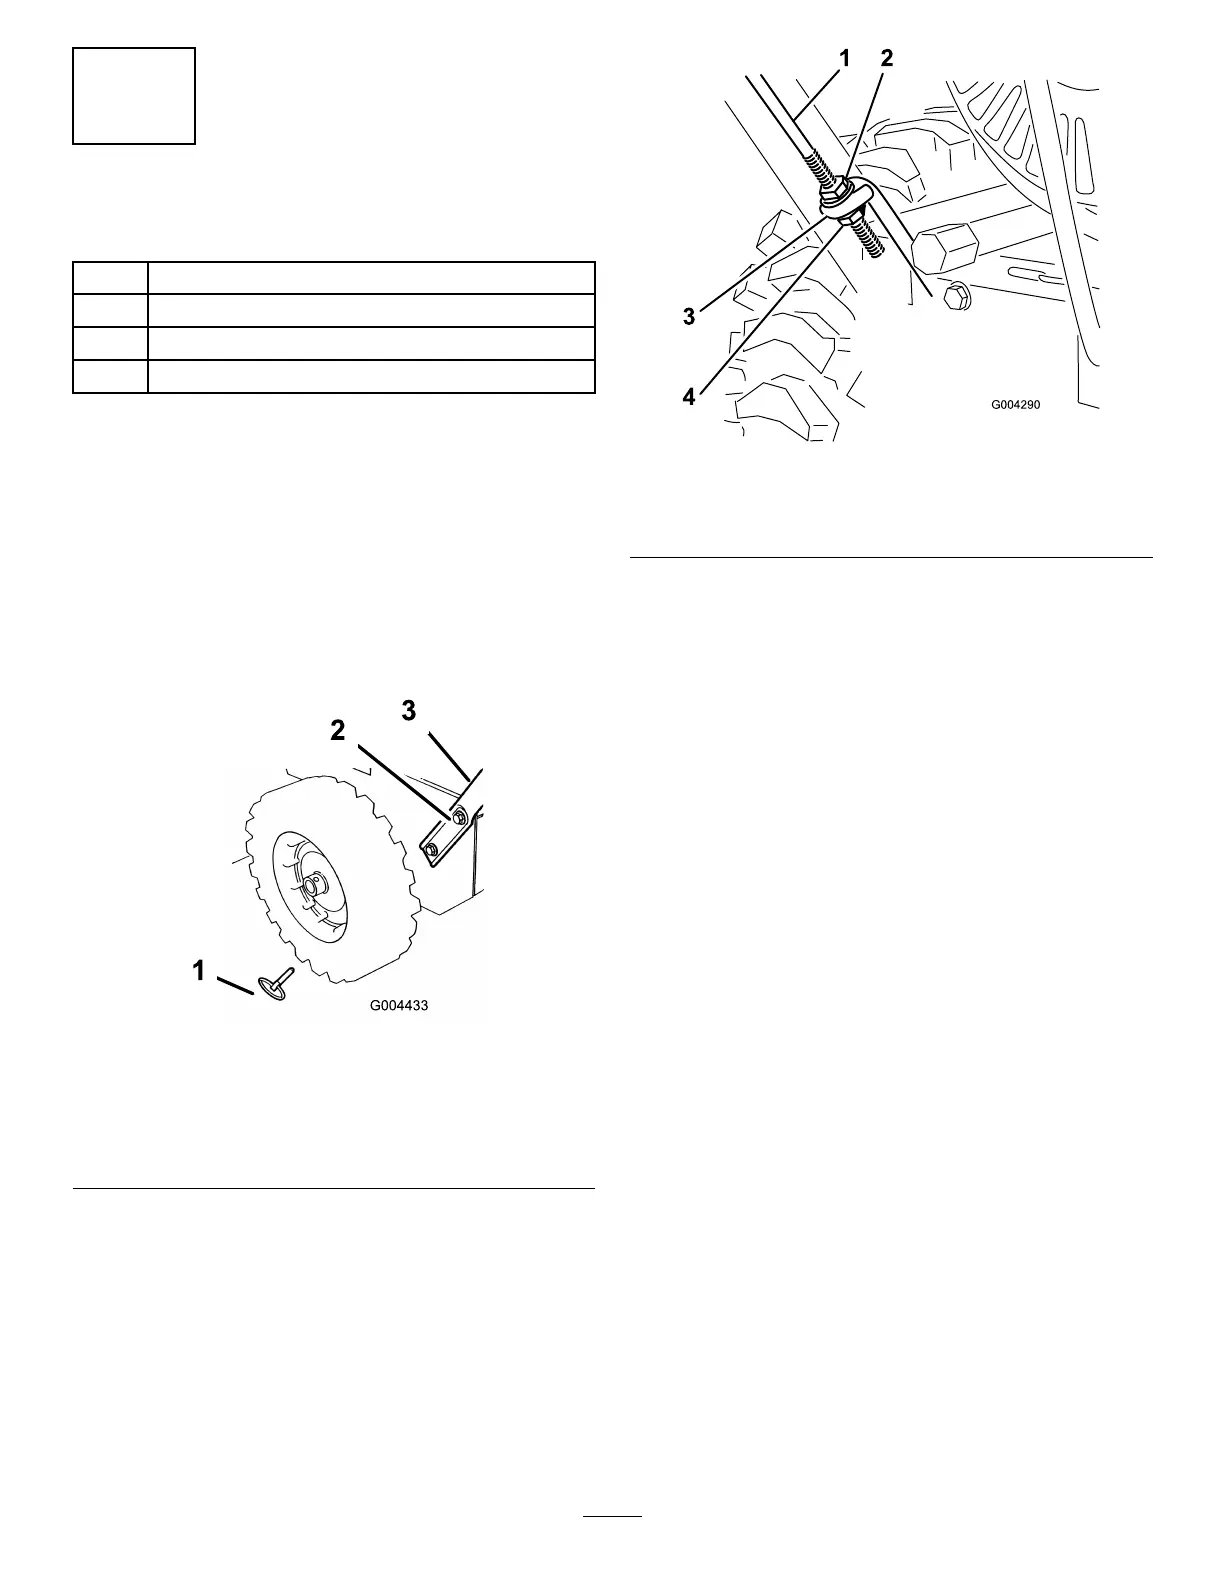
3.Threadaangenut(nottheangelocknut)withthe
angedownontothetractionrodattachedtotheleft
sideofthehandle(
Figure4).
Figure4
1.Tractionrod3.Lowertractionrodloop
2.Flangenut4.Flangelocknut
4.Positiontheleftsideofthehandleagainstthesideof
themachineandinserttheendofthetractionrod
throughthelowertractionrodloopFigure4).
5.Aligntheholesintheleftsideofthehandlewiththe
holesintheleftsideplate,andsecurethehandlewith2
capscrewsandBellevillewashersuntiltheyarenger
tight(Figure3).
Note:TheconcavesideoftheBellevillewashergoes
againsttheoutsideofthehandle.
6.Aligntheholesintherightsideofthehandlewith
theholesintherightsideplate,andsecurethehandle
with2capscrewsandBellevillewashersuntiltheyare
ngertight.
7.Ensurethatthehandlesareatthesameheight,then
tightenthehandlefastenerssecurely.
8.Slidethewheelsoutwardandinserteachaxlepin
throughtheholeineachwheelhubandthroughthe
outerholeoftheaxle(Figure5).
9