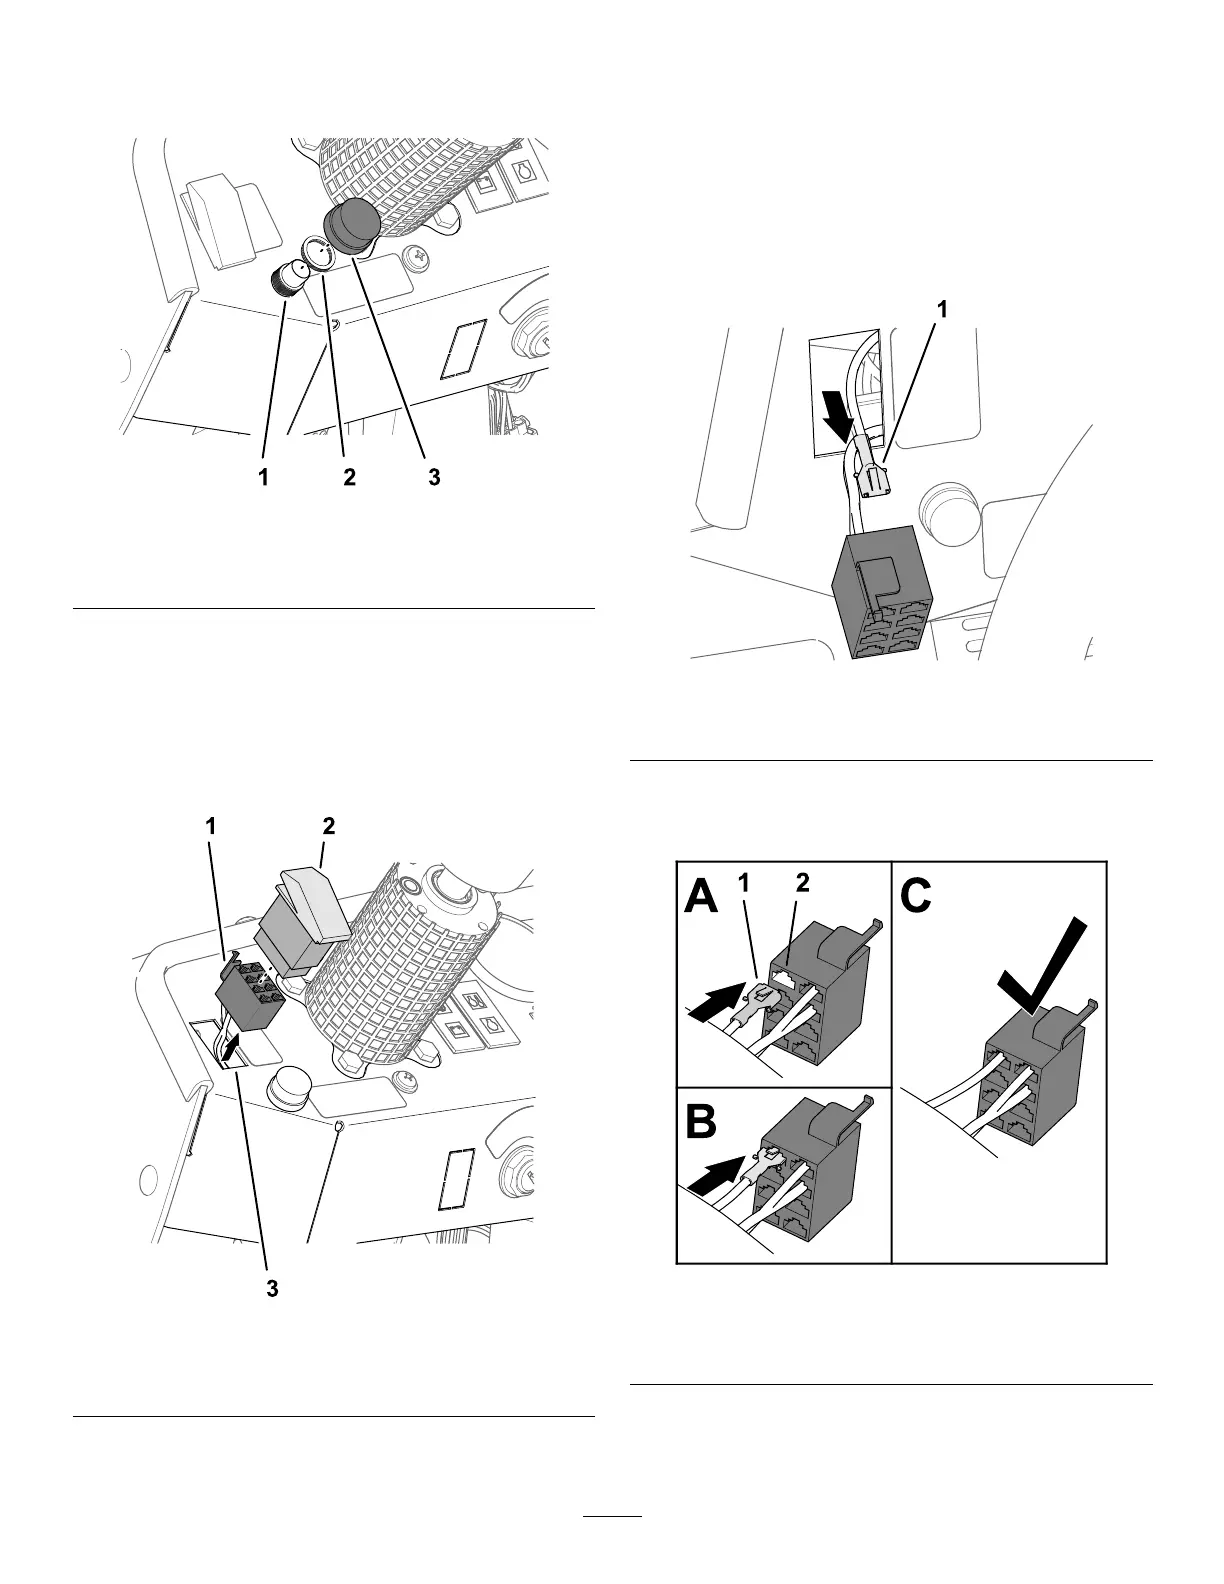
6.Assemblethehornswitchtodashpanelwiththe
knurlednut(5/8inch),andtightenthenutby
hand(Figure27).
g208260
Figure27
1.Hornswitch3.Button
2.Knurlednut(5/8inch)
7.Threadthebuttonontothethreadsofthehorn
switch(Figure27).
ReplacingtheLightSwitch
1.Removethelightswitchfromdashpanel(Figure
28).
g208264
Figure28
1.8-socketconnector
(HEADLIGHTSWITCH)
2.Lightswitch
2.Removethe8-socketconnectorlabeled
HEADLIGHTSWITCHfromtheheadlightswitch
(Figure28).
Note:Discardtheheadlightswitch.
3.Alignthesocketterminalattheendofthe108
cm(42-1/2inches)branchofthekitwireharness
labeledTOHEADLIGHTSWITCHPIN1totheback
ofthe8-socketconnectorfortheheadlight
switch(Figure29).
g208275
Figure29
1.Terminal(TOHEADLIGHTSWITCHPIN1)
4.Inserttheterminalintosocket1ofthe8-socket
connectorfortheheadlightswitchasshownin
Figure30.
g208276
Figure30
1.Terminal(TOHEADLIGHT
SWITCHPIN1)
2.8-socketconnector
(HEADLIGHTSWITCH)
5.Plugtherockerswitchfromthekitintothe
8-socketconnectorfortheheadlightswitch
(Figure31).
12

 Loading...


