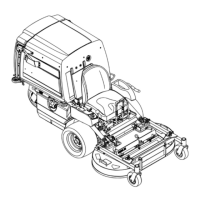
Figure54
Mowerdeckswith3Blades
1.Bladessidetoside
3.Outsidecuttingedges
2.Sailareaofblade4.Measurefromthetipofthe
bladetotheatsurface
here
5.Measurebetweentheoutsidecuttingedgesandtheat
surface(Figure53andFigure54).
Note:Ifbothmeasurementsarenotwithin5mm
(3/16inch),anadjustmentisrequired;continuewith
thisprocedure.
6.Supporttheweightofmowerdeckbyplacingwood
blocksundertheedgesofthemowerdeck.
Note:Avoidplacingthesupportsunderanyanti-scalp
rollersifpresentonthemowerdeck.
7.Movetotheleftsideofthemachine.
8.Checkifthesidecarriageboltisinthexedorslotted
position(Figure55).
Note:Ifthesidecarriageboltisinthexedposition,
removethesidecarriageboltandtheside-locking
nutfromthexedposition,andinstallitintothe
slotted-adjustmentposition(Figure55).
Note:Iftheboltisintheslottedposition,thecarriage
boltandsidelockingnutdonotneedtoberemoved.
Figure55
1.Hangerbracket
4.Sidelockingnut.
2.Slotted-adjustment
position
5.Sidecarriagebolt
3.Fixedposition
9.Loosentherearlockingnutonthehangerbracket
(Figure56).
Figure56
1.Hangerbracket
3.Sidelockingnut,slotted
position.
2.Rearlockingnut4.Adjustmentnotches
10.Loosenthesidelockingnutonthehangerbracketjust
enoughtoallowthehangertobeadjusted(Figure56).
11.Usethenotchesontheweldedbrackettomeasurethe
amountofadjustment.
Note:Eachnotchsurfaceisequivalentto6.35mm
(1/4inch),whileasinglesideis3.2mm(1/8inch)as
shownin
Figure57.
12.Adjusttheheightofthemowerdecktothedesired
height.
39