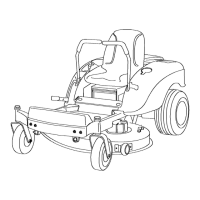
Figure 27
1. Rear access panel
3. Frame
2. Fastener
Installing the Engine Hood
1. T o install the hood, align the slot in the hood
with the frame and carefully lo w er it onto the
frame ( Figure 28 ). Mak e sure the frame seated
cor rectly in the engine hood g roo v e before
forcing the hood do wn. Push do wn g ently to
seat the retaining pin. R e place the fasteners
remo v ed previously .
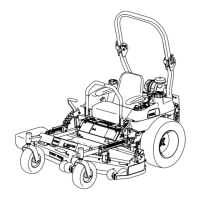
Figure 28
1. Engine hood 3. Frame mating with slot in
the hood.
2. Frame
4. Fastners
2. Install the collection bag; refer to Operation ,
pag e 14 .
Lubrication
Greasing the Bearings
Grease the front caster pi v ots and wheels
( Figure 29 ).
1. P ark the mac hine on a lev el surface and
diseng ag e the blade control switc h.
2. Mo v e the motion control lev ers to the brak e
position, stop the engine , remo v e the k ey , and
w ait for all mo ving par ts to stop before lea ving
the operating position.
3. Clean the g rease fittings ( Figure 29 and
Figure 30 ) with a rag . Mak e sure to scrape any
paint off of the front of the fitting(s).
Figure 29
1. Front caster tire
Figure 30
4. Connect a g rease gun to eac h fitting ( Figure 29
and Figure 30 ). Pump g rease into the fittings
until g rease begins to ooze out of the bearings .
5. Wipe up any ex cess g rease .
28