Figure 40
1. Center electrode insulator
3. Air gap (not to scale)
2. Side electrode
Installing the Spark Plug
1. Mak e sure that the air g ap is set cor rectly .
2. Install the spark plug b y hand to a v oid
cross-threading . Tighten new spark plugs
1/2 tur n with a spark plug wrenc h. W hen
reinstalling the spark plug previously remo v ed,
only tighten 1/8-1/4 tur n.
3. Push the wire onto the spark plug ( Figure 39 ).
4. Close the access panel and tighten the fasteners
to secure it shut.
Important: Al w ays mak e sur e the panel
is r eplaced and secur ed with the f astener s
bef or e operating the machine. Operating
the machine with the access panel open
w ould allo w clippings and other de bris
entering the engine compar tment possibl y
dama ging the machine.
Fuel System
Maintenance
Draining the Fuel Tank
In cer tain conditions, fuel is extr emel y
flamma ble and highl y explosi v e. A fir e or
explosion fr om fuel can bur n y ou and other s
and can dama ge pr oper ty .
• Drain fuel fr om the fuel tank when the
engine is cold. Do this outdoor s in an
open ar ea. W ipe up an y fuel that spills.
• Nev er smok e when draining fuel, and
stay a w ay fr om an open flame or wher e a
spar k may ignite the fuel fumes.
1. P ark the mac hine on a lev el surface and
diseng ag e the blade control switc h.
2. Mo v e the motion control lev ers to the brak e
position, stop the engine , remo v e the k ey , and
w ait for all mo ving par ts to stop before lea ving
the operating position.
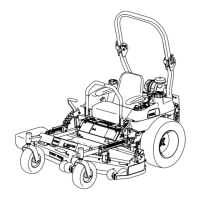
3. Close the fuel shut-off v alv e located under the
front of the fuel tank ( Figure 41 ).
Figure 41
1. Fuel tank cap 3. Fender
2. Fuel tank, inside fender 4. Fuel shut-off valve.
4. R emo v e the engine hood and engine duct to
access the engine components .
33