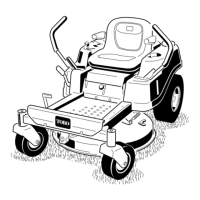
Maintenance
Note: Deter mine the left and right sides of the mac hine from the nor mal operating position.
Recommended Maintenance Schedule(s)
Maintenance Service
Interval
Maintenance Procedure
Before each use or daily
• Check the safety system.
• Check the engine oil level (more often in dirty or dusty conditions).
• Check the cutting blades.
• Clean the mower housing.
Every 25 hours
• Grease all lubrication points (more often in dusty, dirty conditions).
• Service the foam air cleaner (more often in dusty, dirty conditions).
• Service the paper air cleaner (more often in dusty, dirty conditions).
• Check the battery electrolyte.
• Check the tire pressure.
• Check belts for wear/cracks.
Every 100 hours
• Change the engine oil (more often in dusty, dirty conditions).
• Replace the air cleaner elements (more often in dusty, dirty conditions).
Every 200 hours
• Change the oil lter.
• Check the spark plug(s).
• Replace the fuel lter.
Before storage
• Perform all maintenance procedures listed above before storage.
• Drain the fuel tank.
• Charge the battery and disconnect the battery cables.
• Paint any chipped surfaces.
If y ou lea v e the k ey in the ignition s witch, someone could accidentl y star t the engine and
seriousl y injur e y ou or other bystander s.
R emo v e the k ey fr om the ignition and disconnect the wir e fr om the spar k plug(s) bef or e y ou
do an y maintenance. Set the wir e aside so that it does not accidentall y contact the spar k plug .
Lubrication
Lubricate the mac hine when sho wn on the Chec k
Ser vice R eference Aid decal ( Figure 18 ) located
beneath the seat. Grease more frequently when
operating conditions are extremely dusty or sandy .
Grease with No . 2 g eneral pur pose lithium base or
molybden um base g rease .
How to Grease
1. Diseng ag e the blade control switc h and mo v e
the control lev ers to the neutral loc k ed position
and apply the parking brak e .
2. Stop the engine , remo v e the k ey , and w ait for
all mo ving par ts to stop before lea ving the
operating position.
3. Clean the g rease fittings with a rag . Mak e sure
to scrape any paint off of the front of the
fitting(s).
4. Connect a g rease gun to the fitting . Pump
g rease into the fittings until g rease begins to
ooze out of the bearings .
5. Wipe up any ex cess g rease .
21