1. P ark the mac hine on a lev el surface , to ensure
that the fuel tank drains completely .
2. Diseng ag e the blade control switc h and mo v e
the control lev ers to the neutral loc k ed position
and apply the parking brak e .
3. Stop the engine , remo v e the k ey , and w ait for
all mo ving par ts to stop before lea ving the
operating position.
4. Close the fuel shut-off v alv e located under the
front of the fuel tank.
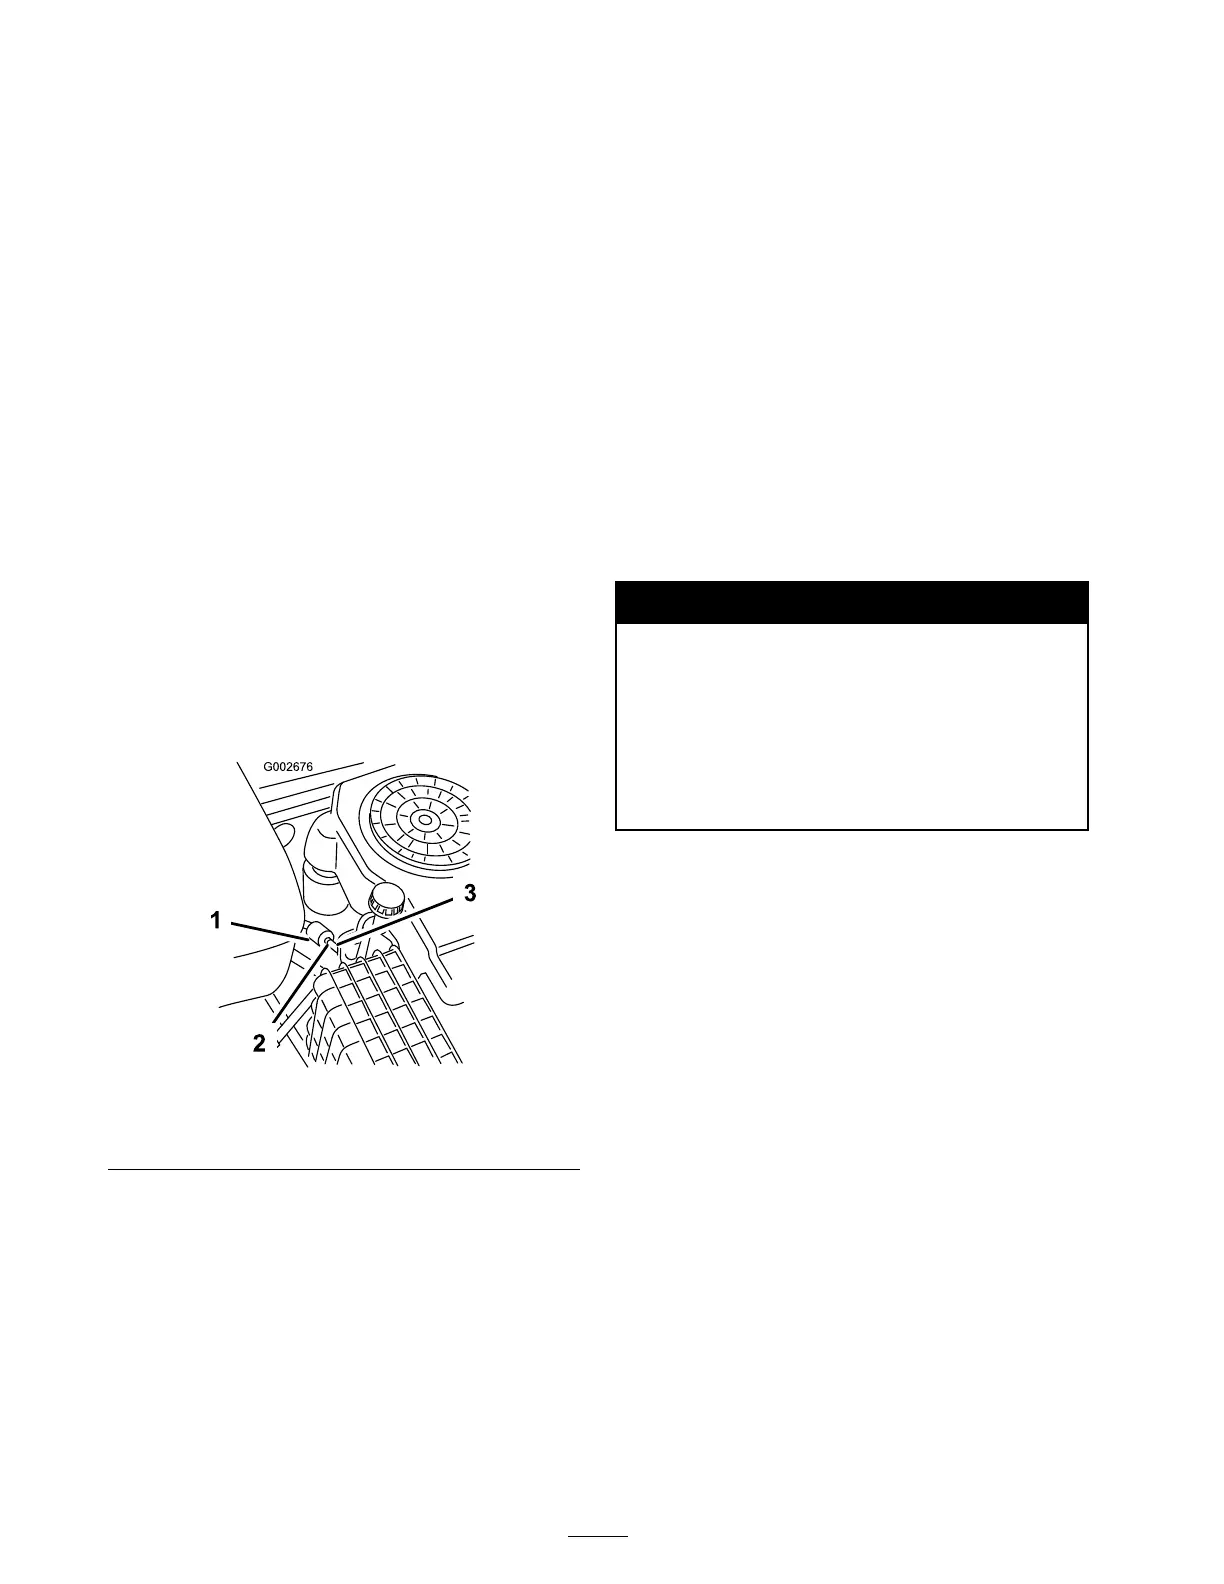
5. Loosen the hose clamp at the fuel filter and
slide it up the fuel line a w a y from the fuel filter
( Figure 29 ).
6. Pull the fuel line off of the fuel filter ( Figure 29 ).
7. Open the fuel shut-off v alv e . Allo w g asoline to
drain into a g as can or drain pan.
Note: No w is the best time to install a new
fuel filter because the fuel tank is empty .
8. Install the fuel line onto the fuel filter . Slide
the hose clamp close to the fuel filter to secure
the fuel line ( Figure 29 ).
Figure 29
1. Fuel lter 3. Fuel line
2. Hose clamp
Replacing the Fuel Filter
R e place the fuel filter after ev er y 200 operating
hours or yearly , whic hev er occurs first.
Nev er install a dir ty filter if it is remo v ed from the
fuel line .
1. Diseng ag e the blade control switc h and mo v e
the control lev ers to the neutral loc k ed position
and apply the parking brak e .
2. Stop the engine , remo v e the k ey , and w ait for
all mo ving par ts to stop before lea ving the
operating position.
3. Close the fuel shut-off v alv e located under the
front of the fuel tank.
4. Squeeze the ends of the hose clamps tog ether
and slide them a w a y from the filter ( Figure 29 ).
5. R emo v e the filter from the fuel lines .
6. Install a new filter and mo v e the hose clamps
close to the filter ( Figure 29 ).
7. Open the fuel shut-off v alv e .
Electrical System
Maintenance
Warning
CALIFORNIA
Pr oposition 65 W ar ning
Batter y posts, ter minals, and r elated
accessories contain lead and lead
compounds, chemicals kno wn to the State of
Calif or nia to cause cancer and r epr oducti v e
har m. W ash hands after handling .
Servicing the Battery
Chec k the electrolyte lev el in the batter y ev er y
25 hours . Alw a ys k ee p the batter y clean and fully
c harg ed. Use a paper to w el to clean the batter y
case . If the batter y ter minals are cor roded, clean
them with a solution of four par ts w ater and one
par t baking soda. Apply a light coating of g rease
to the batter y ter minals to prev ent cor rosion.
V oltag e: 12 v
26