Replacing the Grass
Deector
An unco v er ed discharge opening could
allo w the la wn mo w er to thr o w objects in
the operator’ s or bystander’ s dir ection and
r esult in serious injur y . Also, contact with
the blade could occur .
Nev er operate the la wn mo w er unless y ou
install a co v er plate, a mulch plate, or a g rass
chute and catcher .
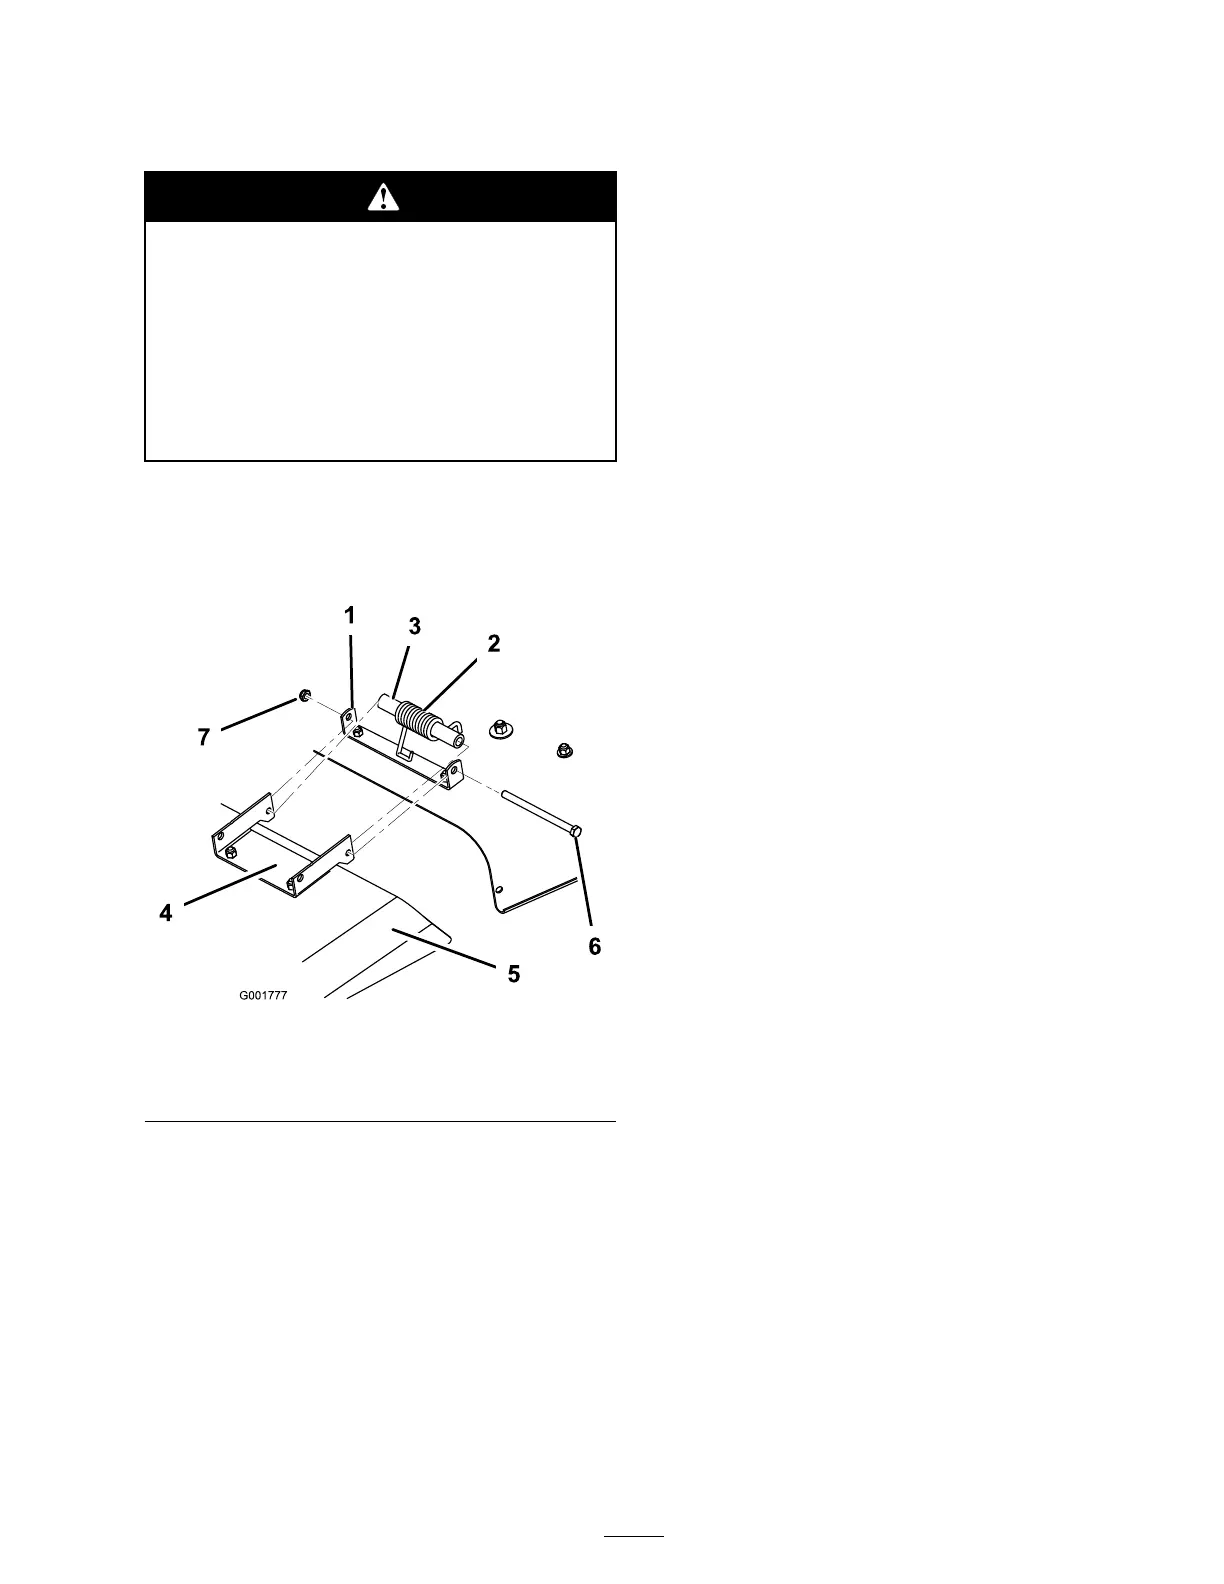
1. R emo v e the loc kn ut, bolt, spacer , and spring
holding the deflector to the mo w er brac k ets
( Figure 50 ). R emo v e the damag ed or w or n
g rass deflector .
Figure 50
1. Mower bracket 4. Grass deector
2. Spring hook end 5. Bolt
3. Space for spring 6. Locknut
2. Align the g rass deflector with the holes in the
brac k ets and the spring and spacer straight
ends in the space betw een the brac k ets and
abo v e the deflector ( Figure 50 ).
3. Place the spring and spacer so that the hook ed
ends of the spring are pointing do wn, with one
end contacting on the mo w er dec k and the
other o v er the deflector ( Figure 50 ).
4. Secure the deflector to the mo w er brac k et with
the bolt. T he bolt should pass through the
g rass deflector , spring, spacer , and brac k ets .
Secure with the loc kn ut.
Note: It ma y be helpful to press do wn near
the end of the bolt with a 9/16 inc h open end
wrenc h to align the bolt with the second hole
on the mo w er brac k et and g rass deflector .
5. Lift the g rass deflector and c hec k that it is
spring loaded and pi v ots freely to the full do wn
position.
Important: T he g rass deflector must be
spring loaded in the do wn position. Lift
the deflector up to test that it snaps to the
full do wn position.
Cleaning
Washing the Underside of
the Mower
After eac h use , w ash the underside of the mo w er
to prev ent g rass buildup , for impro v ed m ulc h
action, and clipping dispersal.
1. P ark the mac hine on a hard lev el surface .
2. Diseng ag e the blade control switc h and mo v e
the control lev ers to the neutral loc k ed position
and apply the parking brak e .
3. Stop the engine , remo v e the k ey , and w ait for
all mo ving par ts to stop before lea ving the
operating position.
4. Attac h the hose coupling to the end of the
mo w er w ashout fitting, and tur n the w ater on
high ( Figure 51 ).
Note: Spread petroleum jelly on the w ashout
fitting O-ring to mak e the coupling slide on
easier and protect the O-ring .
35