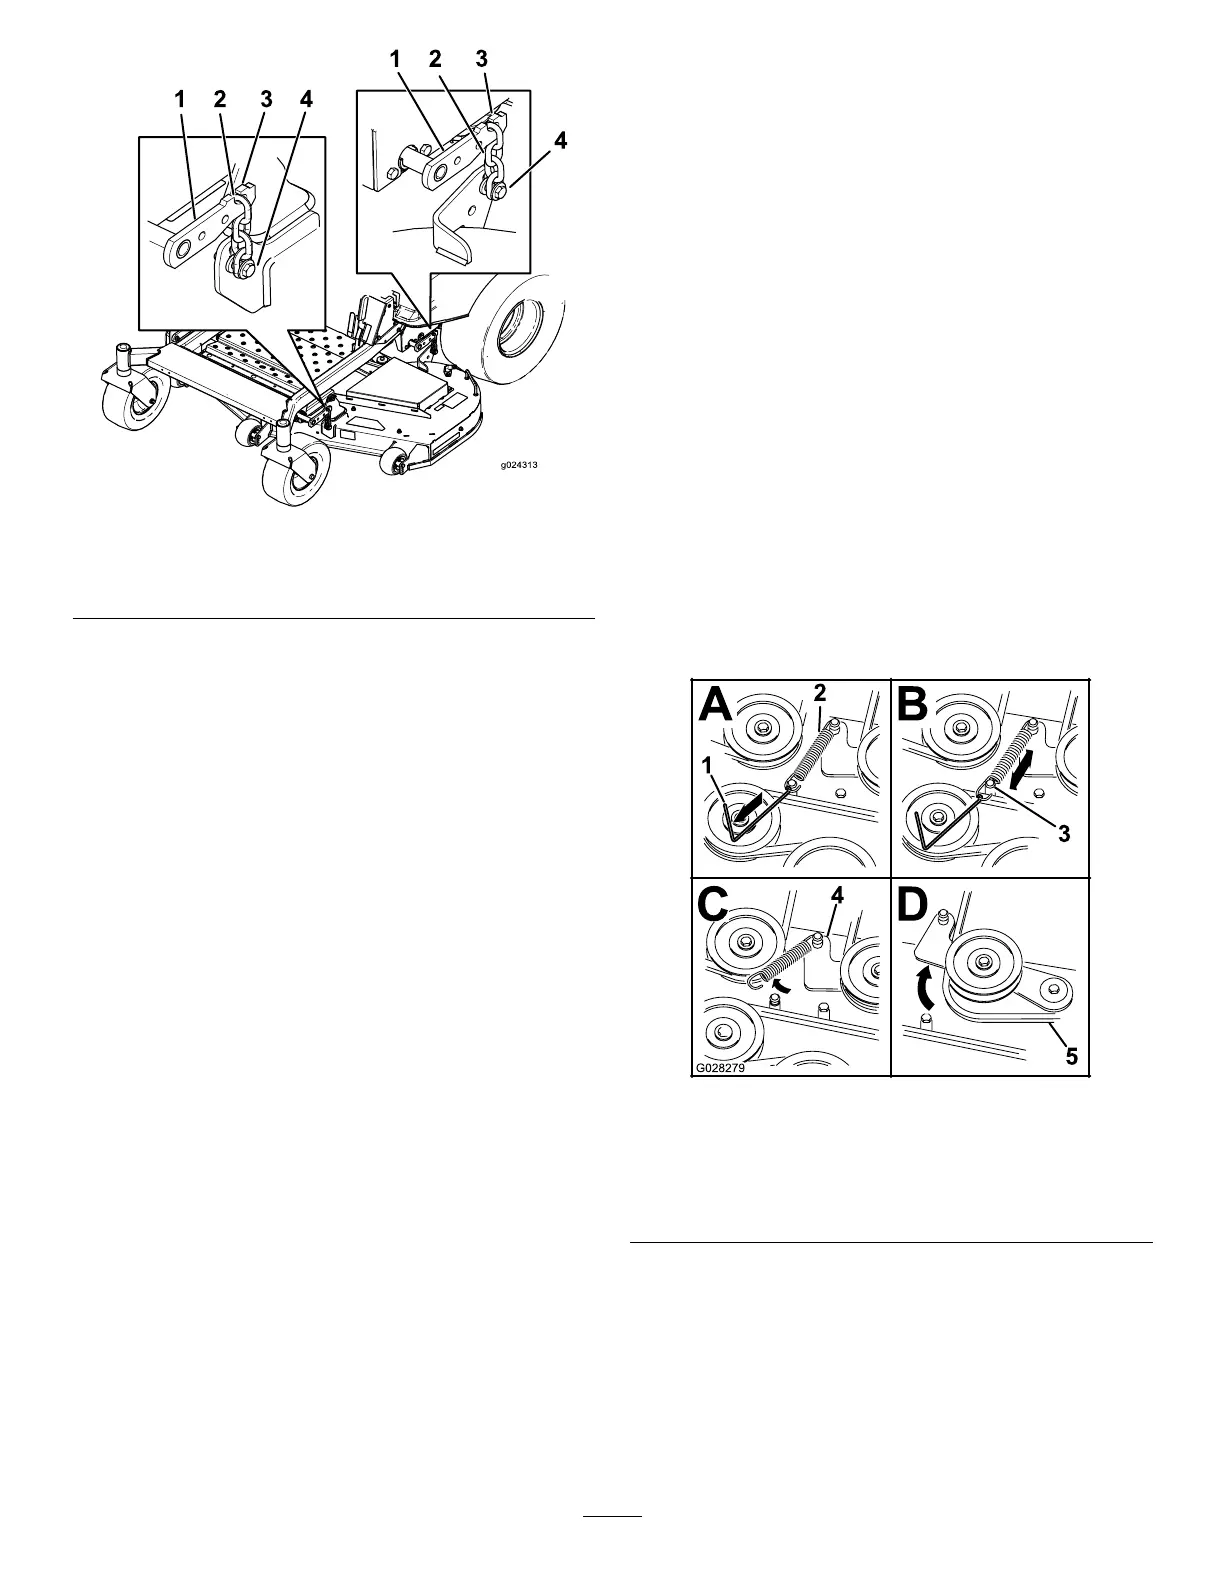
Figure65
1.Deck-liftarm
3.Hook
2.Chain
4.Adjustmentbolt
6.Ensurethatthereistensiononall4chains(Figure65).
7.Tightenthe4adjustmentbolts(Figure65).
8.Ensurethattheblockstsnuglyunderthedeckskirt
andthatallboltsaretight.
9.Verifythatthedeckislevelbycheckingtheside-to-side
levelandfront-to-rearbladeslope;repeatthedeck
levelingprocedureifnecessary.
InspectingtheBelts
ServiceInterval:Every50hours
Checkthebeltsforsquealingwhenthebeltisrotating,blades
slippingwhencuttinggrass,frayedbeltedges,burnmarksand
cracksaresignsofawornmowerbelt.Replacethemower
beltifanyoftheseconditionsareevident.
ReplacingtheMowerBelt
Squealingwhenthebeltisrotating,bladesslippingwhen
cuttinggrass,frayedbeltedges,burnmarks,andcracksare
signsofawornmowerbelt.Replacethemowerbeltifanyof
theseconditionsareevident.
1.Disengagetheblade-controlswitch(PTO),movethe
motion-controlleverstotheNEUTRAL-LOCKposition,
andsettheparkingbrake.
2.Shutofftheengine,removethekey,andwaitforall
movingpartstostopbeforeleavingtheoperating
position.
3.Lowerthemowertothe76mm(3inch)height-of-cut
position.
4.Foreachofthebeltcovers,loosenthe2bolts,butdo
notremovethem.
5.Slidethecoveruntilitisclearoftheboltsandliftit
upandouttoremoveit.
6.Removetheoorpantoaccesstheidlerpulley.
7.Usingaspringremovaltool,(ToroPartNo.92-5771),
removetheidlerspringfromthedeckposttoremove
tensionontheidlerpulley(Figure66).
Figure66
1.Spring-removaltool(Toro
PartNo.92-5771)
4.Idlerarm
2.Idlerspring5.Mowerbelt
3.Deckpost
8.Lowerthemowertothelowestheightofcutandplace
theheight-of-cutpininthelockpositionforthelowest
height-of-cut.
9.Removethebeltfromthemower-deckpulleysand
removetheexistingbelt.
10.Installthenewbeltaroundthemowerpulleysandthe
clutchpulleyundertheengine(Figure66).
44