WARNING
Thespringisundertensionwheninstalled
andcancausepersonalinjury.
Becarefulwhenremovingthebelt.
11.Usingaspring-removaltool,(ToroPartNo.92-5771),
installtheidlerspringoverthedeckpostandplacing
tensionontheidlerpulleyandmowerbelt(Figure66).
12.Ensurethatthebeltisproperlyseatedinallpulleys.
13.Toinstallthebeltcovers,insertthetabsontheeach
coverintothecorrespondingslotsonthedeckbracket,
ensuringthattheyseat.
14.Rotatethecovertothedeckandslidethenotches
undertheloosenedboltsuntiltheyareseated.
15.Tightentheboltstosecurethecovertothedeck.
RemovingtheMower
Parkthemachineonalevelsurfaceanddisengagethe
blade-controlswitch.Movethemotion-controllevers
outwardtotheNEUTRAL-LOCKposition,engagetheparking
brake,shutofftheengine,removethekey,andwaitforall
movingpartstostopbeforeleavingtheoperatingposition.
Lowerthemowertothelowestheightofcut.Selectoneof
thefollowingproceduresdependingonthemowerdecksize
installedtocompletetheremoval.
PreparingtoRemovetheMowerDeck
1.Lowerthemowertothe76mm(3inch)height-of-cut
position.
2.Removethemowerbeltfromtheenginepulley;refer
toReplacingtheMowerBelt(page44).
RemovingtheMowerDeck
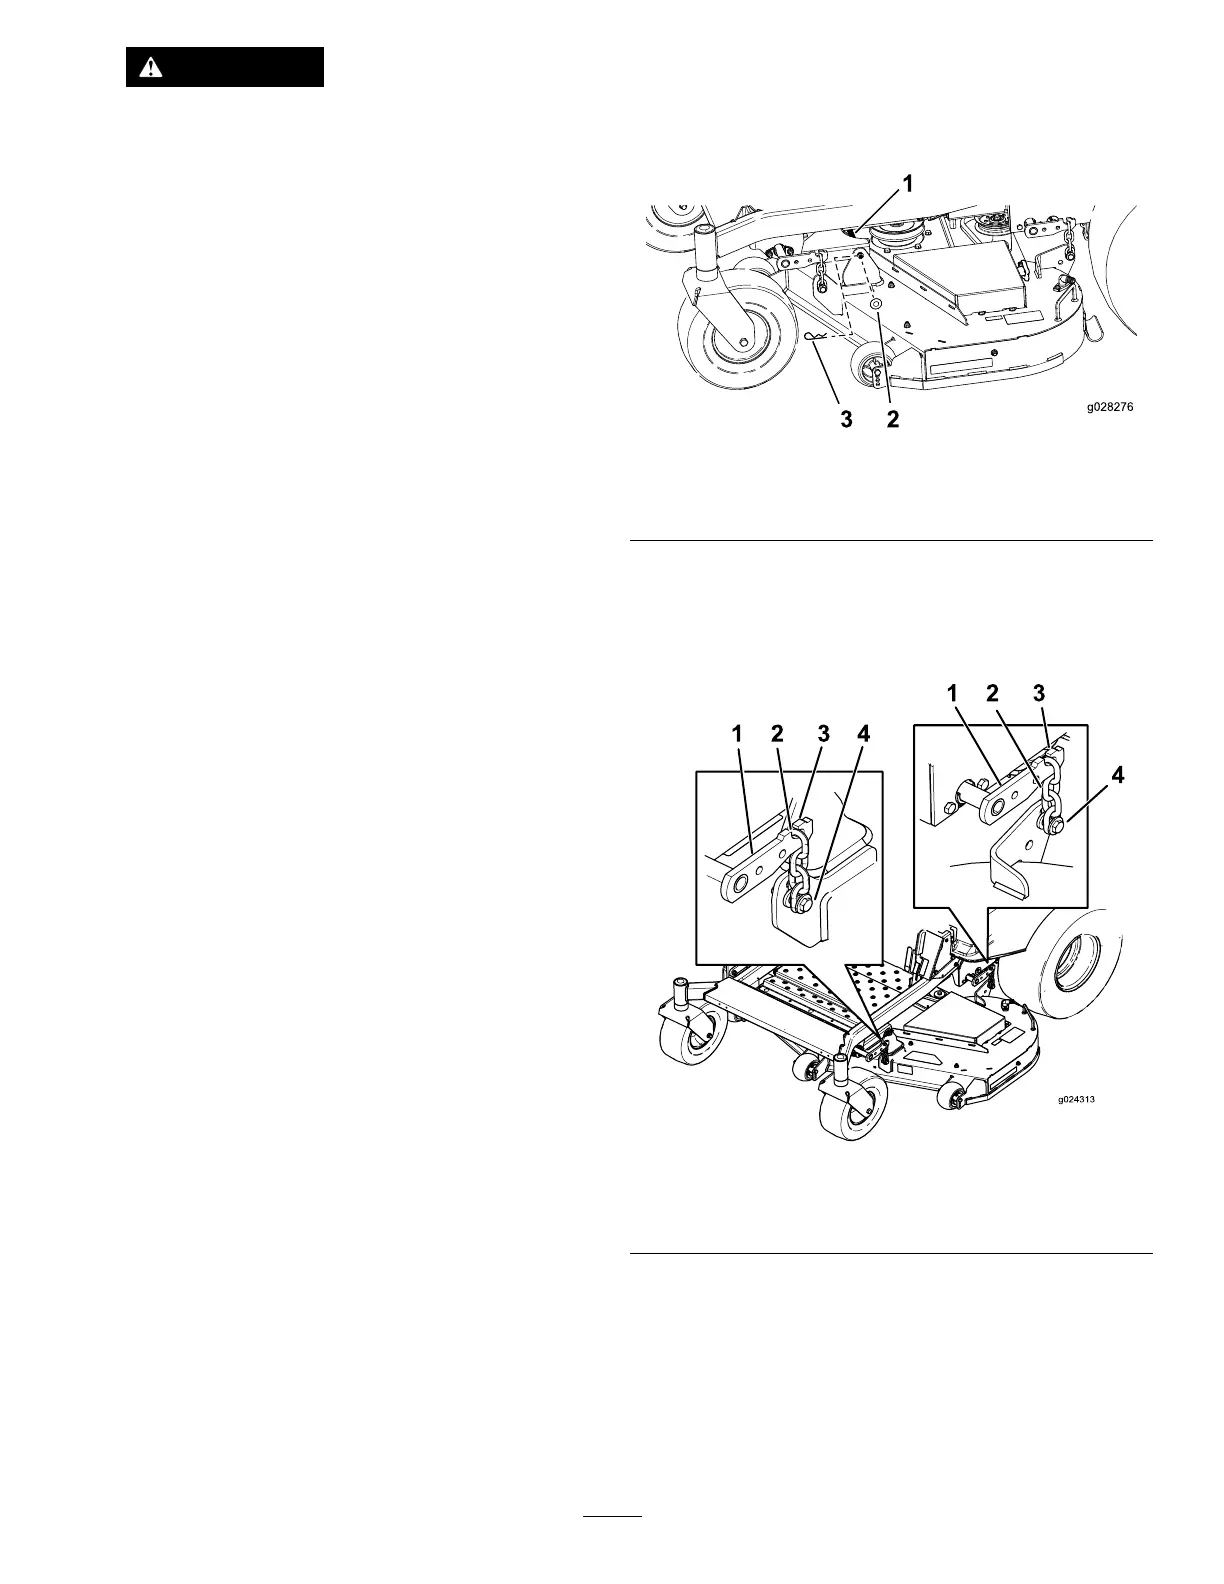
1.Removethehairpincotterandwashersecuringthe
linkpintotheframeanddeck,andremovethelink
bar(Figure67).
Figure67
1.Linkpin3.Hairpincotter
2.Washer
2.Liftupthemowerdecktorelievetensionfromthe
mowerdeck.
3.Removethechainsfromthehooksonthedeck-lift
arms(Figure68).
Figure68
1.Deck-liftarm
3.Hook
2.Chain
4.Adjustmentbolt
4.Raisetheheightofcuttothetransportposition.
5.Removethebeltfromtheclutchpulleyontheengine.
6.Slidethemoweroutfromunderneaththemachine.
Note:Retainallpartsforfutureinstallation.
45