InstallingtheBattery
1.Positionbatteryinthetraywiththeterminalposts
oppositefromthehydraulictank(Figure61).
2.Installthepositive(red)batterycabletothepositive
(+)batteryterminal.
3.Installthenegative(black)batterycableandground
wiretothenegative(-)batteryterminal.
4.Securethecableswith2bolts,2washers,and2
locknuts(Figure61).
5.Slidetheredterminalbootontothepositive(+)battery
terminal.
6.Installtheclampandsecureitwiththewingnut(Figure
61).
ChargingtheBattery
WARNING
Chargingthebatteryproducesgassesthatcan
explode.
Neversmokenearthebatteryandkeepsparksand
amesawayfrombattery.
Important:Alwayskeepthebatteryfullycharged(1.265
specicgravity).Thisisespeciallyimportanttoprevent
batterydamagewhenthetemperatureisbelow0°C
(32°F).
1.Chargebatteryfor10to15minutesat25to30Aor
for30minutesat10A.
2.Whenthebatteryisfullycharged,unplugthecharger
fromtheelectricaloutlet,thendisconnectthecharger
leadsfromthebatteryposts(Figure62).
3.Installthebatteryinthemachineandconnectthe
batterycables;refertoInstallingtheBattery(page46).
Note:Donotrunthemachinewiththebattery
disconnected;otherwise,electricaldamagemayoccur.
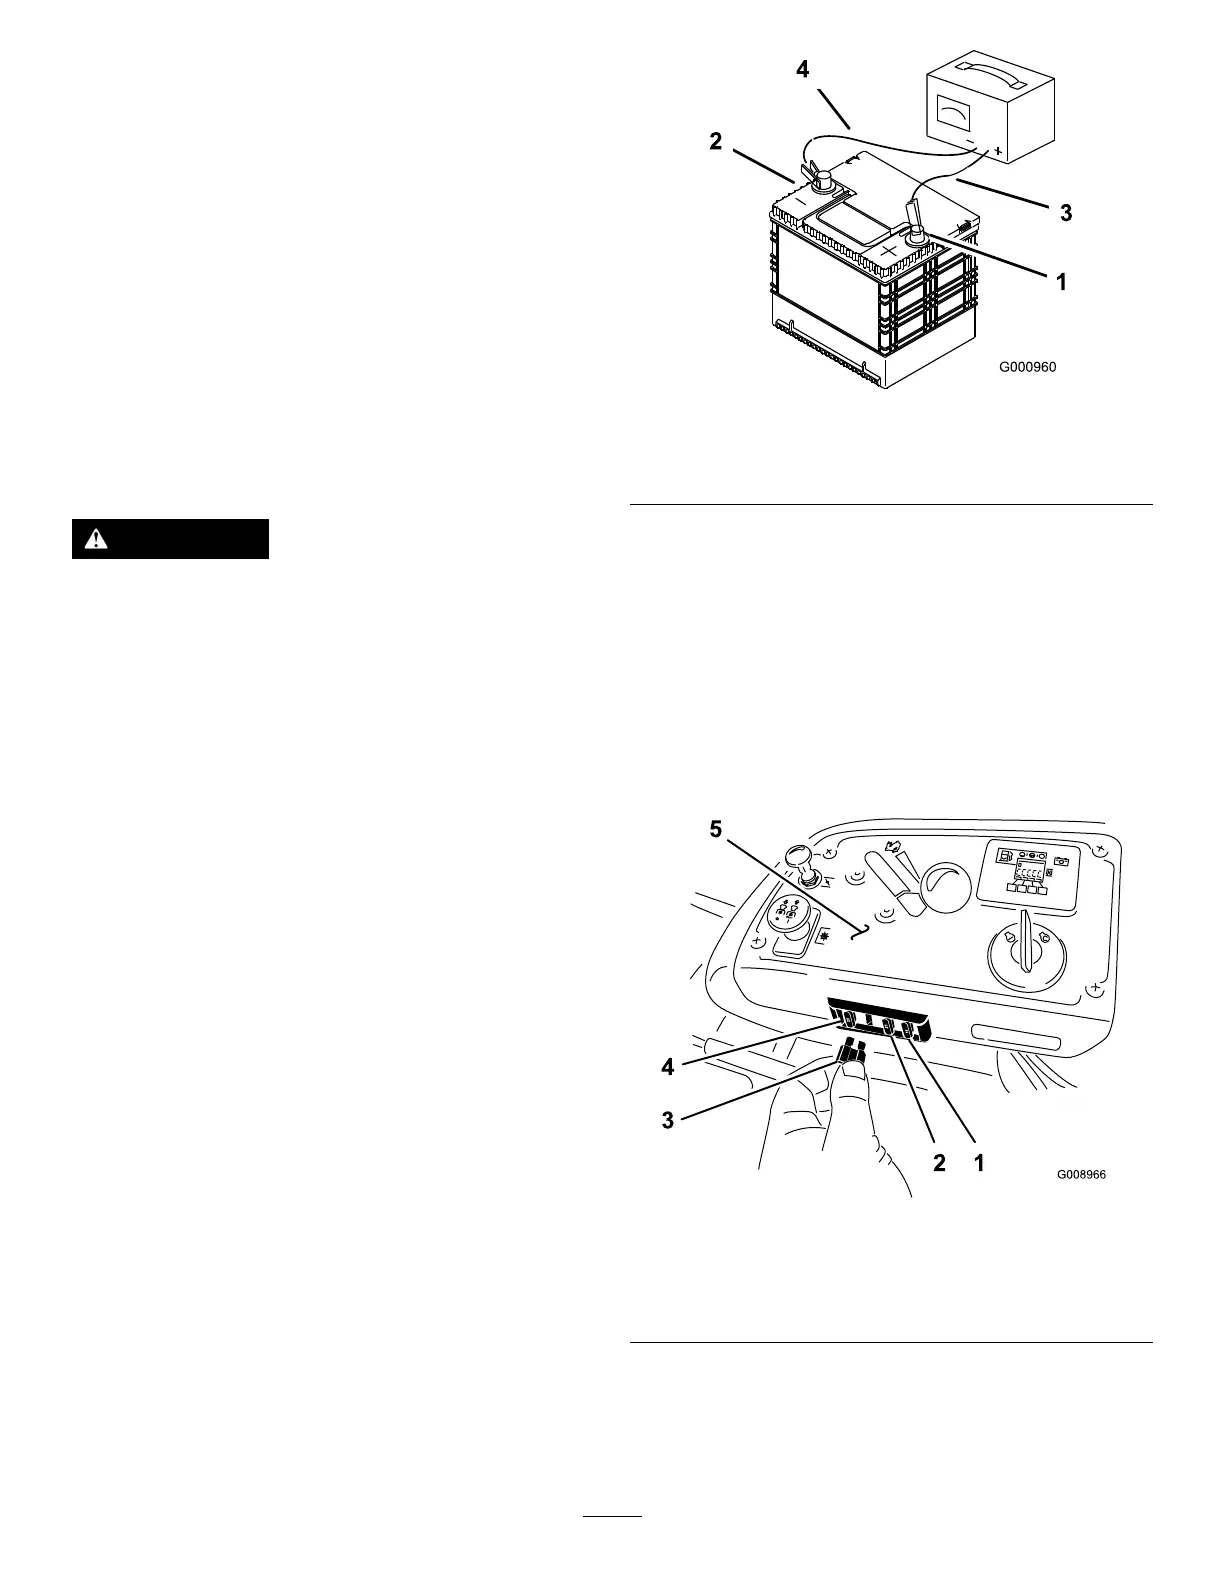
Figure62
1.Positivebatterypost
3.Red(+)chargerlead
2.Negativebatterypost
4.Black(-)chargerlead
ServicingtheFuses
Theelectricalsystemisprotectedbyfuses.Itrequiresno
maintenance,however,ifafuseblowscheckthecomponent
andcircuitforamalfunctionorshort.
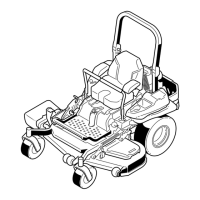
1.Thefusesarelocatedonrightconsolenexttotheseat
(Figure63).
2.Toreplacethefuses,pulloutthefusetoremoveit.
3.Installanewfuse(Figure63).
Figure63
1.Optionalaccessory(15A)4.Main(25A)
2.Charge(25A)5.Console
3.PTO(10A)
46