Installation
5
m–3463
1
22
3
4
5
6
7
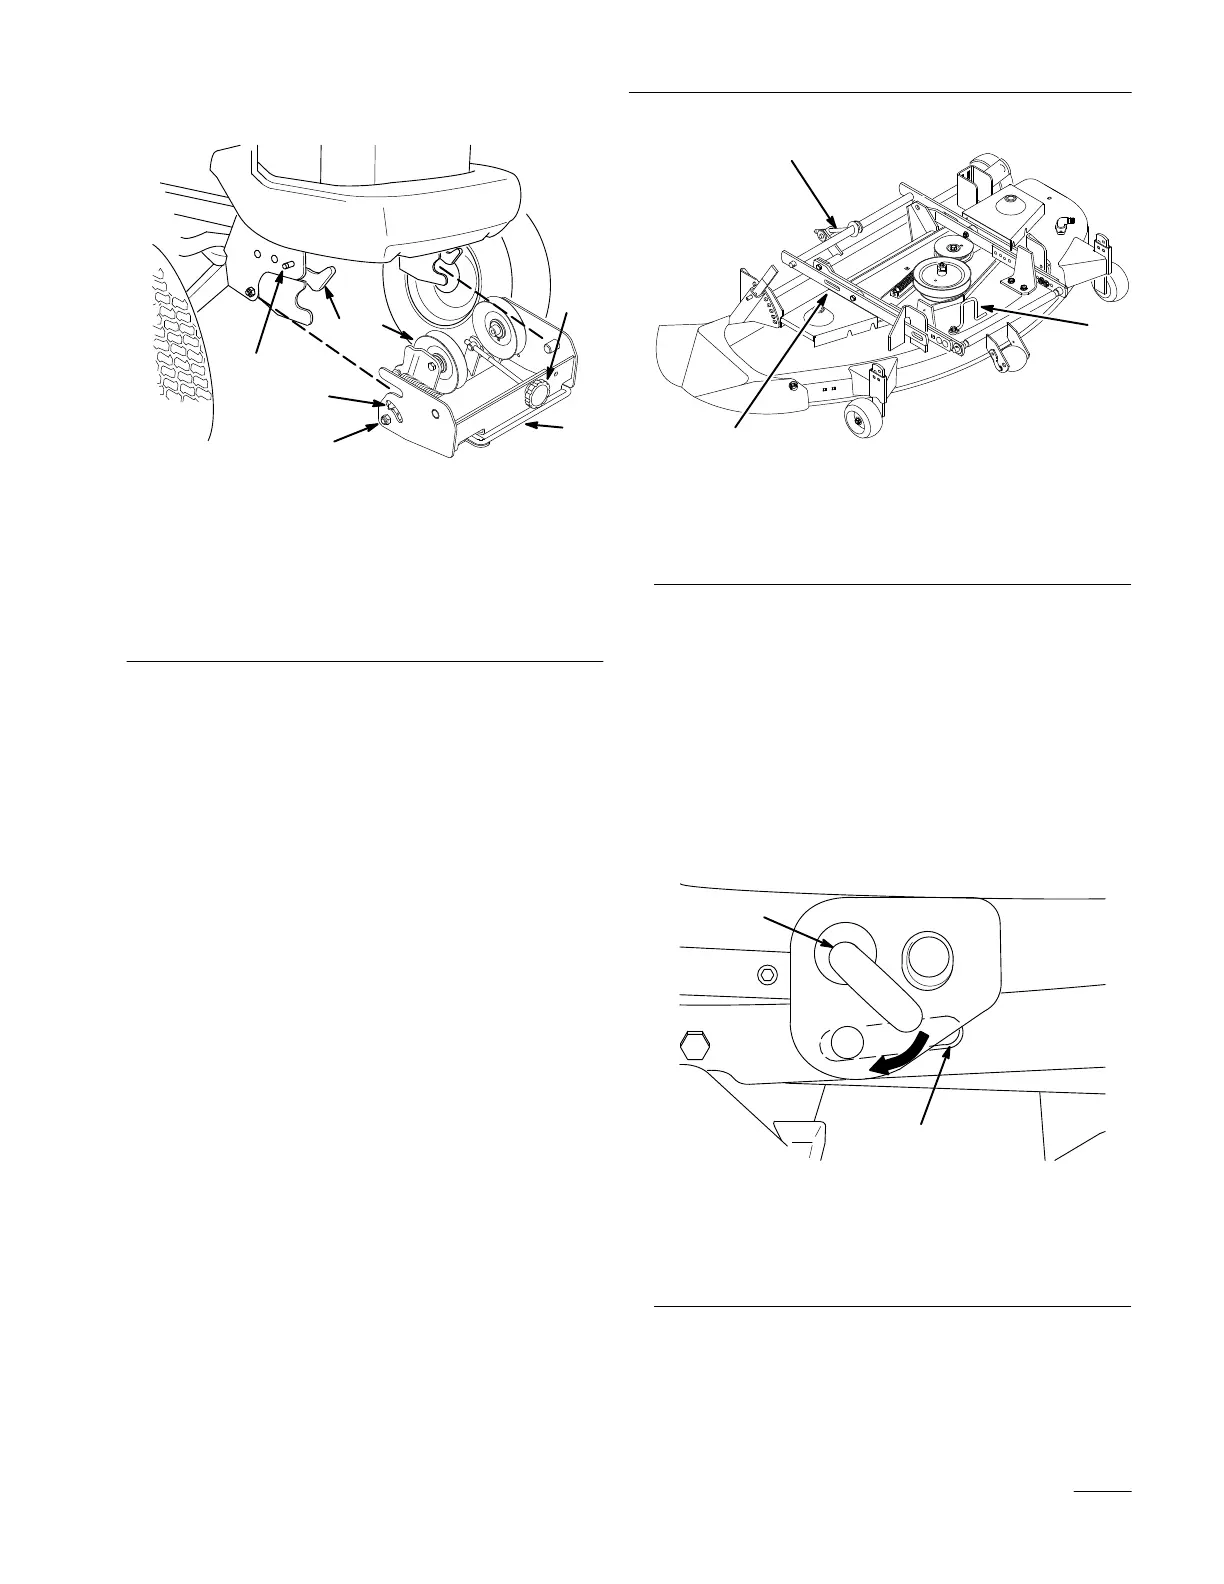
Figure 4
1. Attach–A–Matic
latches
2.
Pulley box
3.
Idler pulley
4.
Belt tension release arm
5.
Belt tension adjustment
knob
6.
Belt tension indicators
(one on each side)
7. Attach–A–Matic
button
(one on each side)
Attach the Mower
1. Make sure the mower wheels are set for low
height of cut.
2. Make sure the attachment lift is in the full up
position.
3. From the driver’s right–hand side of the tractor,
slide the mower under the tractor.
4. After sliding the mower under the tractor,
position it so that the slots in the side of each of
the mower’s mounting brackets (Fig. 5) are
aligned directly below the tractor’
s attachment
lift arm.
m–3519
1
2
3
Figure 5
1. Slots
in the side mounting
brackets (2)
2.
Belt guide
3.
Front–to–rear adjustment
rod
5. Start the tractor.
6. Lower the attachment lift arm fully and adjust
the deck’s position until you can pull out on the
J–pin of the lift arm and slide it into the slot in
the mounting bracket of the mower (Fig. 6).
7. On the driver’s left–hand side, pull out the
attachment lift J–pin and slide it into the slot on
the other mower mounting bracket.
m–3456
1
2
Figure 6
Left Side of Tractor Shown
1. J–pin 2. Mower
slot in side
mounting bracket.