Installation
9
5. Position the belt into the groove of the PTO
pulley (Fig. 14), making sure it is also under the
pulleys in the pulley box.
m–4231
1
3
2
Figure 14
1. Pulley
box pulley
2. PT
O pulley
3. PT
O drive belt
6. Loop the other end of the belt over the drive
pulley of the mower. Additional belt slack can
be obtained (if needed) by turning the belt
tension adjustment knob (Fig. 16).
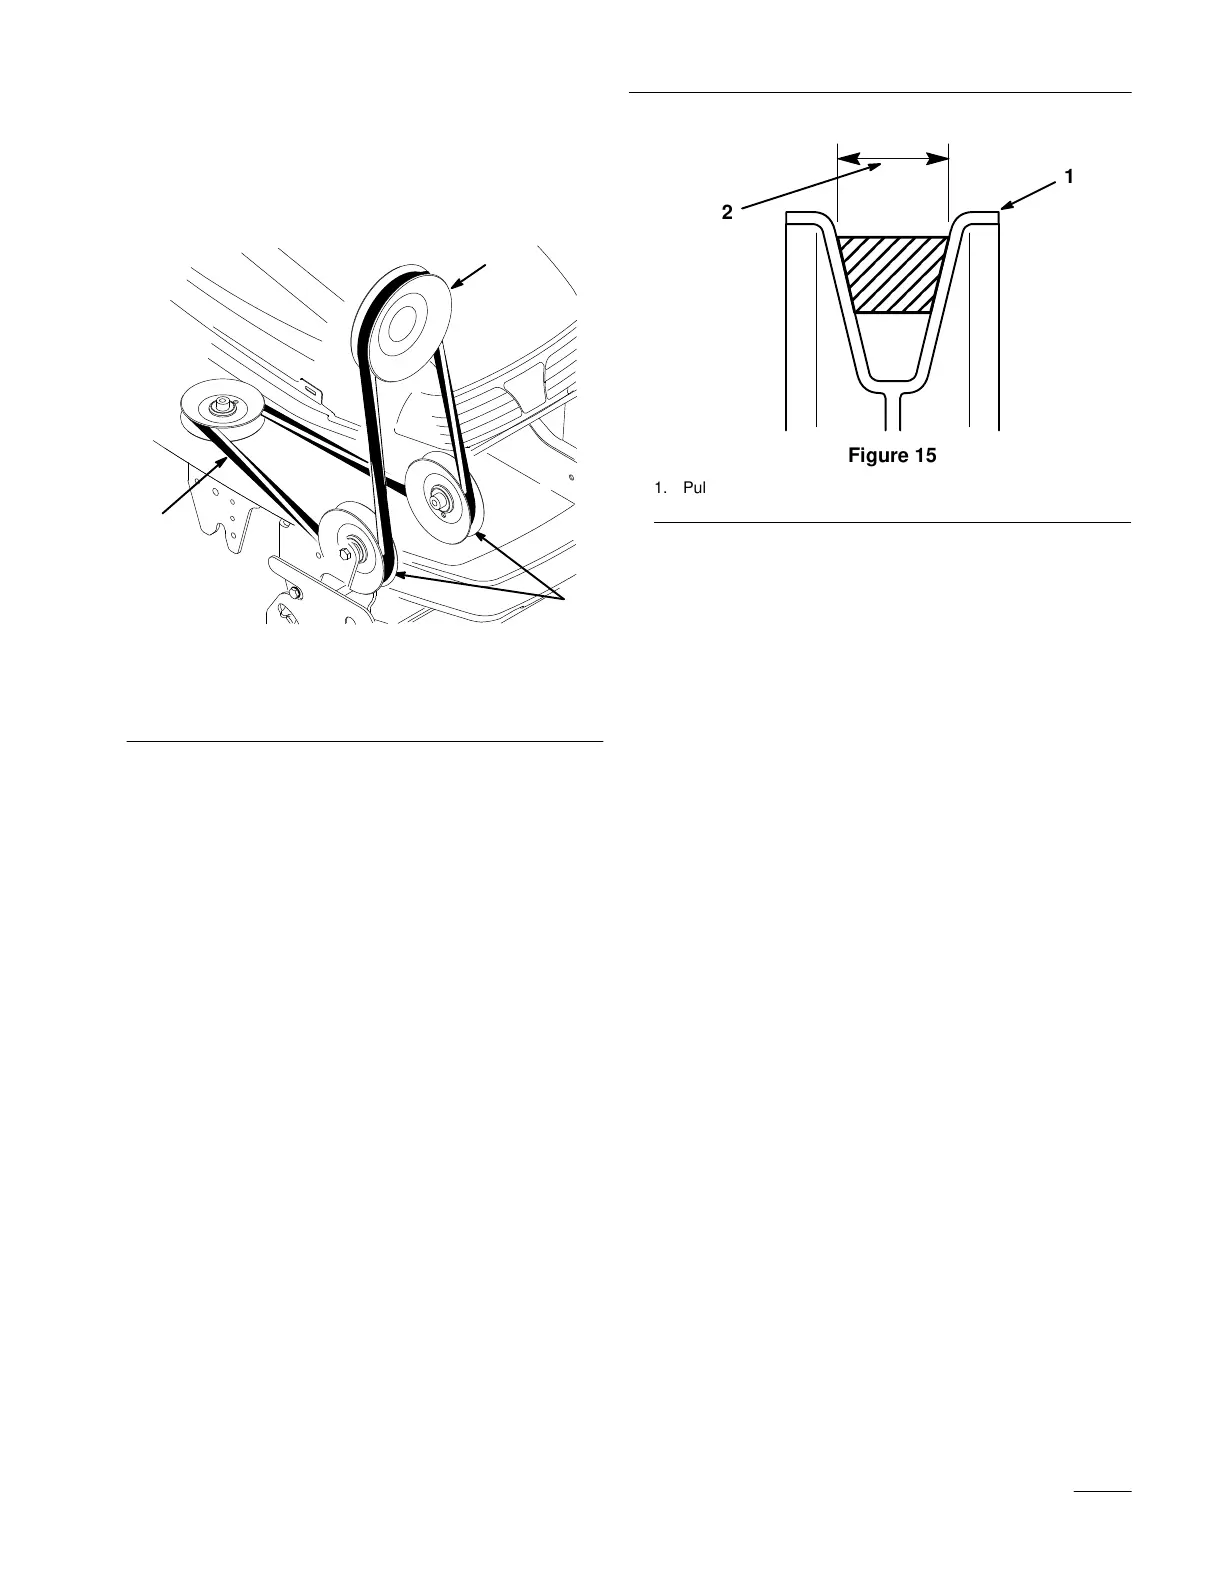
7. Make certain that the wide side of the PTO drive
belt is toward the outside diameter of all (four)
pulleys (Fig. 15).
m–4230
2
1
Figure 15
1. Pulley
outside diameter
2.
Wide side of belt
8. Now adjust the belt tension.
A. Push the belt tension release arm back
toward the pulley box to tension the belt.
B. Check the tension indicators on each side of
the pulley box.
C. If the tension indicators are not in the same
position on both the left and right sides,
release the belt tension, turn the adjustment
knob and repeat steps A and B until the
indicators move to the same position
(Fig. 16).
D. Once the indicators are in the same position
on both sides, swing the tension release arm
into the pulley box and seat it by moving it
into the position shown in Fig. 16.
 Loading...