Installation
8
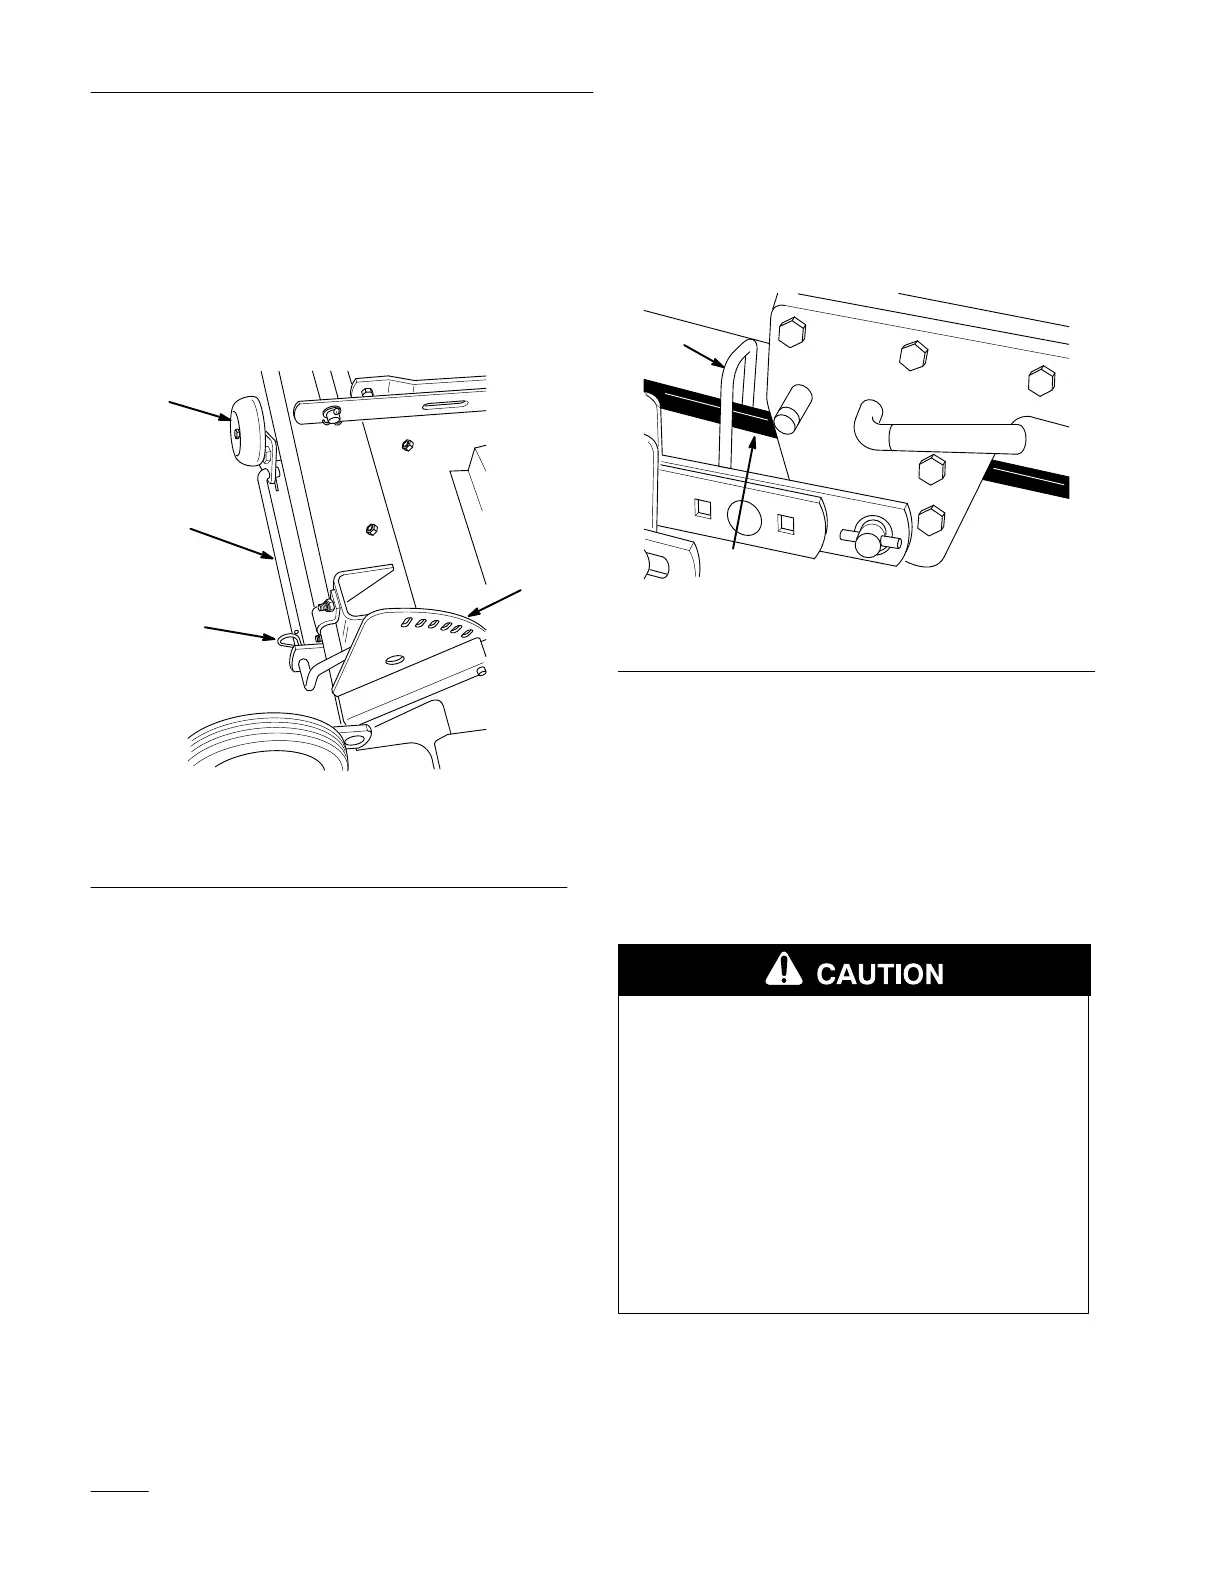
B. Slide the wheel rod back toward the center
wheel as far as it will go. The end of the
control rod should no longer be in the hole
in the height–of–cut plate (Fig. 12).
C. Then install the hairpin cotter into the
control rod hole closest to the height–of–cut
plate as shown.
m–3582
1
2
3
4
Figure 12
1. Wheel
rod
2.
Hairpin cotter
3.
Rear center wheel
4.
Height–of–cut plate
11. Turn the (2) front mower wheels parallel to the
tractor.
A. If the mower has not been leveled with the
tractor, set the height of the front wheels to
the highest position from the ground.
B. If the mower has been leveled with the
tractor, refer to Adjusting the Two Front
Wheels, page 17.
12. Set the parking brake, lower the attachment lift,
and turn the ignition key to “STOP” to stop the
engine. Then remove the ignition key.
Attach the PTO Drive Belt
1. Hang the belt over the mower, then thread it
forward through the belt guide (Fig. 13) on the
mower.
m–3457
1
2
Figure 13
1. Belt 2. Belt
guide
2. Extend the belt through the center of the pulley
box, between the two pulleys.
3. Release the belt tension release arm on the
pulley box housing and swing it out toward you
(Fig. 16).
4. Remove the tractor’s grille by pulling it straight
out toward you.
POTENTIAL HAZARD
• Components under the hood will be hot if
the tractor has been running.
WHAT CAN HAPPEN
• Touching hot components can cause burns.
HOW TO AV
OID THE HAZARD
• Allow the tractor to cool before performing
maintenance or touching components
under the hood.
 Loading...