Installation
10
m–3458
1
3
2
4
5
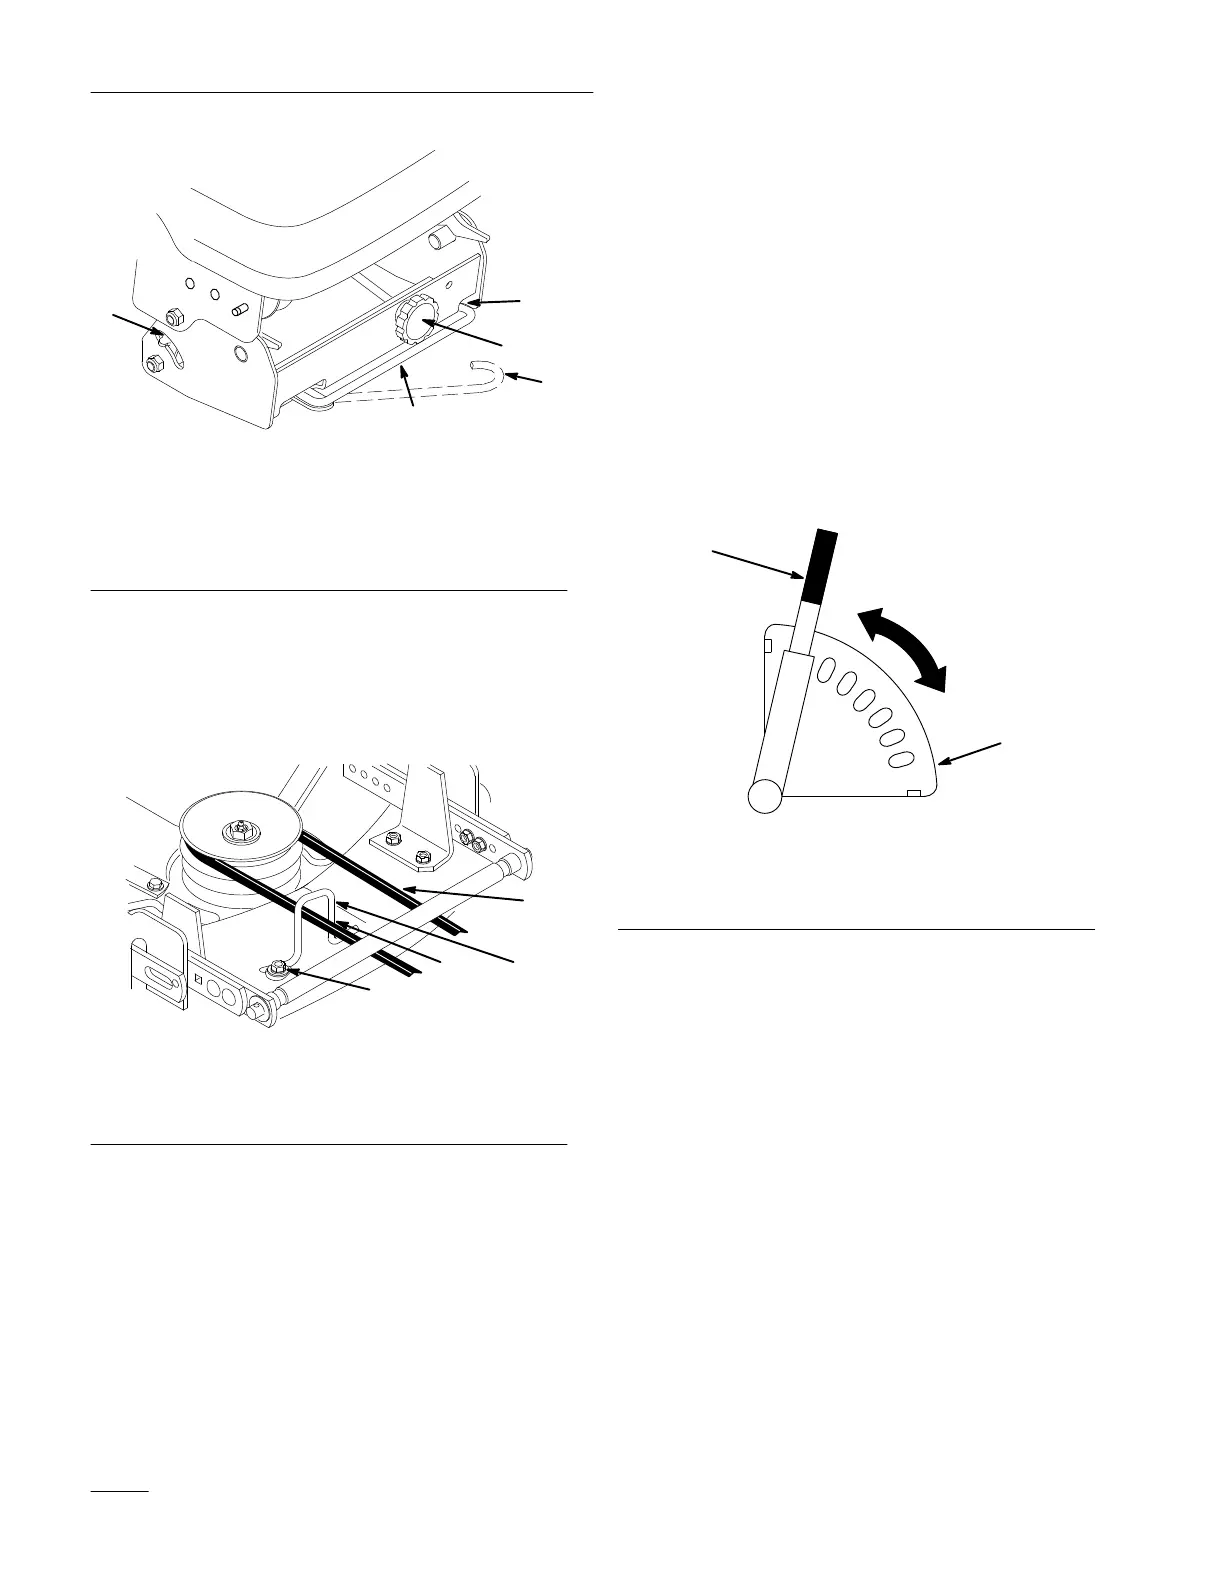
Figure 16
1. Belt
tension release arm
2.
Belt tension indicator (2)
3.
Belt tension adjustment
knob
4.
Seating position for
tension arm
5.
Belt tension released
9. Loosen the belt guide bolt (Fig. 17).
10. Adjust the belt guide so that it just touches the
belt on the inside arm of the guide (toward the
center of the deck) (Fig. 17).
m–3465
1
2
3
4
Figure 17
1. Belt
guide
2. Belt
3.
Belt touches here
4.
Belt guide bolt
11. Tighten the belt guide bolt.
12. Replace the front grille of the tractor.
Adjusting
the Mower
Adjusting the Height of Cut
The front gauge wheels are adjusted in different hole
locations for 1 1/2”–4” (4–10 cm) heights of cut.
1. Start the tractor, apply the parking brake, and
raise the deck. Get off the tractor. Pull the
height–of–cut lever out to disengage it from the
quadrant. Adjust the height of cut to the desired
level. Release the lever inward to lock into the
height–of–cut plate (Fig. 18).
m–3474
1
2
3
4
Figure 18
1. Height-of-cut
lever
2.
Height–of–cut plate
3. High
4. Low
Checking Mower Level
For optimum efficiency, the level of the mower
should be checked at the time of initial installation
and periodically as a check, to ensure that the blades
are 1/8” (3 mm) lower in the front than in the rear.
The mower must be checked and adjusted on a flat
level surface, preferably concrete. Before checking
the mower level, set the air pressure in the front and
rear tires as specified in the tractor operator’s manual.
Place the mower height–of–cut lever to the middle
cut position. Make sure the two adjustable front
wheels are off the ground.