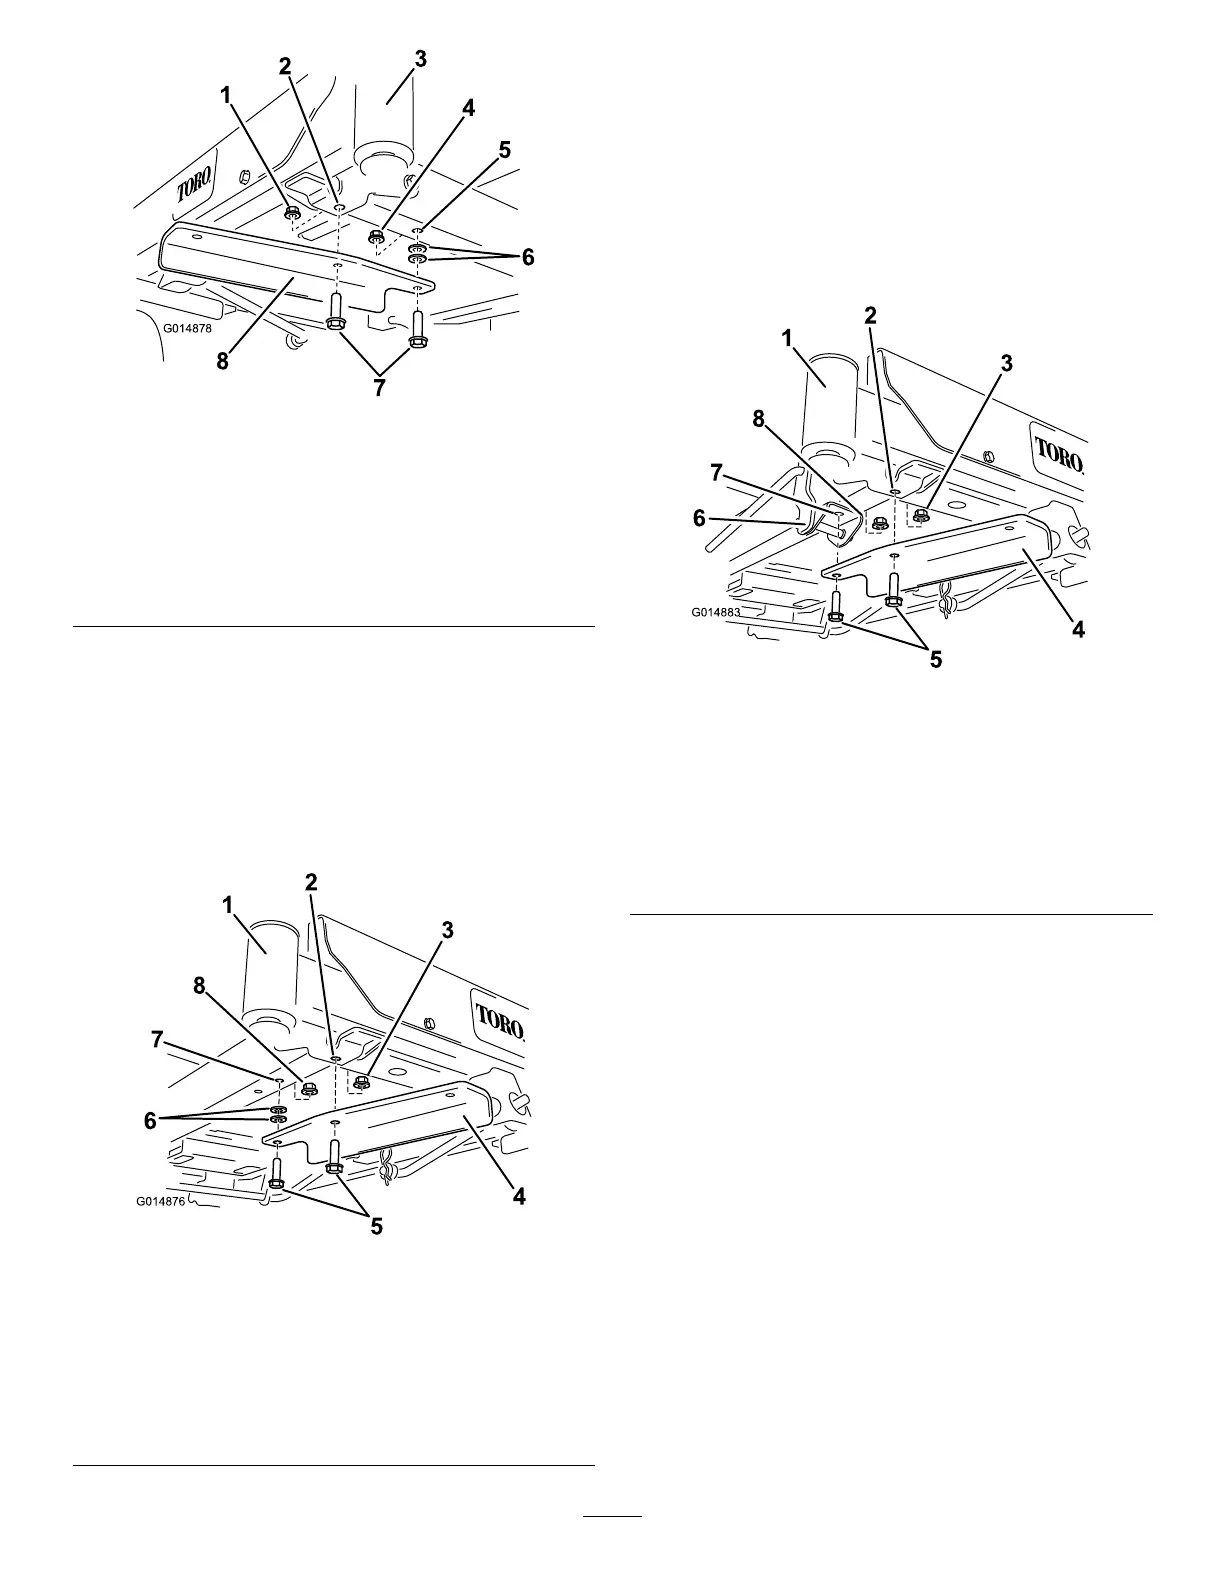
Figure5
1.Locknut(3/8inch),existing5.Hole,existinginframe
2.Forwardhole,leftside
6.Washer
3.Frontleftcaster(castor
forkandwheelnotshown
forclarity)
7.Bolt(3/8x1-1/4inches)
4.Locknut(3/8inch),loose
parts
8.Leftmountingbracket
5.Ontherightsideofthemachine,installtheright
weight-mountingbracketasfollows:
•Formachineswithoutafootassistliftpedal,secure
thebracketusing2bolts(3/8x1-1/4inches),2
washersand2locknuts(3/8inch)(Figure6).
Note:Use1locknutfromtheloosepartsandthe
otherfrom1ofthelocknutsthatyoupreviously
removed.
Figure6
1.Frontrightcaster(castor
forkandwheelnotshown
forclarity)
5.Bolt(3/8x1-1/4inches)
2.Forwardhole,rightside6.Washer
3.Locknut(3/8inch),existing7.Hole,existinginframe
4.Rightmountingbracket
8.Locknut(3/8inch),loose
parts
Note:Formachineswithafootassistliftpedal,
thewashersarenotused.
•Formachineswithafootassistliftpedal,Remove
theforwardfastenersinthefootassistliftpedal
bracketandsecurethebracketusing2boltsand2
locknuts(Figure7).
Note:Use1locknutfromtheloosepartsandthe
otherfrom1ofthelocknutsthatyoupreviously
removed.
Figure7
1.Frontrightcaster(castor
forkandwheelnotshown
forclarity)
5.Bolt(3/8x1-1/4inches)
2.Fronthole,rightside
6.Foot-assistliftpedal
bracket
3.Locknut(3/8inch),existing
7.Hole,existinginbracket
4.Rightmountingbracket
8.Locknut(3/8inch),loose
parts
6.Installtheweightbrackettothemountingbracketsby
aligningtheoutboardholesinthebracketwiththe
mountingbracketsinstalledpreviously(Figure8).
Note:Makesurethebracketiscenteredontheframe.
7.Securetheweightbracketwith2bolts(3/8x1inch)
and2locknuts(3/8inch)(Figure8).
6