WARNING
Incorrectbattery-cableroutingcoulddamagethe
machineandcablescausingsparks.Sparkscan
causethebatterygassestoexplode,resultingin
personalinjury.
•Alwaysdisconnectthenegative(black)battery
cablebeforedisconnectingthepositive(red)
cable.
•Alwaysconnectthepositive(red)batterycable
beforeconnectingthenegative(black)cable.
1.DisengagethePTOandsettheparkingbrake.
2.Stoptheengine,removethekey,andwaitforallmoving
partstostopbeforeleavingtheoperatingposition.
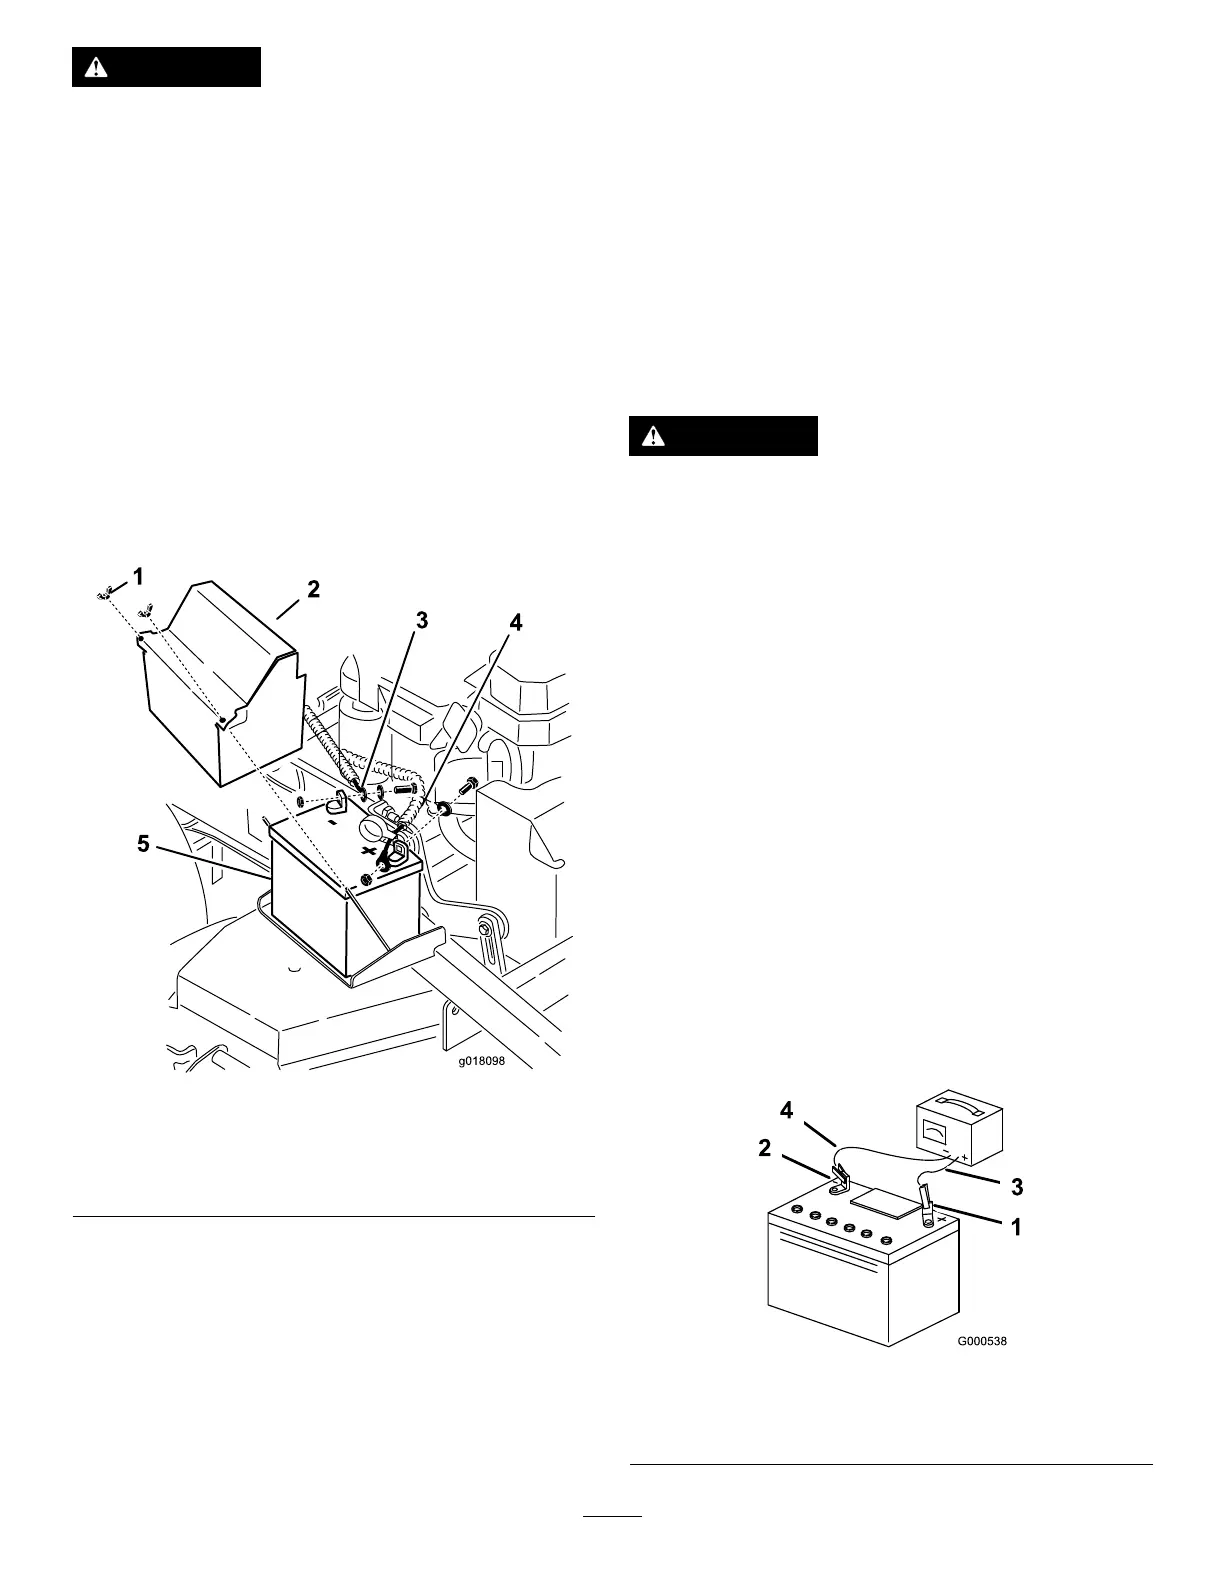
3.Lifttheblack,rubbercoveronthenegativecable.
4.Disconnectthenegativebatterycablefromthenegative
(-)batteryterminal(Figure53).
Figure53
1.Wingnut4.Positivebatterycable
2.Batterycover5.Battery
3.Negativebatterycable
5.Slidetheredterminalbootoffthepositive(red)battery
terminal.
6.Removethepositive(red)batterycable(Figure53).
7.Removethebatteryholddownplate(Figure53),and
removethebattery.
InstallingtheBattery
1.Placethebatteryontothemachine(Figure53).
2.Securethebatterywiththeholddownplate,j-bolts,
andlocknuts.
3.Installthepositive(red)batterycabletopositive(+)
batteryterminalwithanut,awasher,andabolt(Figure
53).
4.Slidetherubbercoveroverthepost.
5.Installthenegativebatterycableandthegroundwire
tothenegative(-)batteryterminalwithanut,awasher,
andabolt(Figure53).
6.Slidetherubbercoveroverthepost.
ChargingtheBattery
WARNING
Chargingthebatteryproducesgassesthatcan
explode.
Neversmokenearthebatteryandkeepsparksand
amesawayfrombattery.
Important:Alwayskeepthebatteryfullycharged
(1.265specicgravity)topreventbatterydamagewhen
thetemperatureisbelow32°F(0°C).
1.Removethebatteryfromthechassis;refertoRemoving
theBattery(page38).
2.Checktheelectrolytelevel.
3.Ensurethatthellercapsareinstalledonthebattery.
4.Chargethebatteryfor1hourat25to30ampsor6
hoursat4to6amps.
5.Whenthebatteryisfullycharged,unplugthecharger
fromtheelectricaloutlet,anddisconnectthecharger
leadsfromthebatteryposts(Figure54).
6.Installthebatteryontothemachineandconnectthe
batterycables;refertoInstallingtheBattery(page39).
Note:Donotrunthemachinewiththebattery
disconnected;electricaldamagemayoccur.
Figure54
1.PositiveBatteryPost
3.Red(+)ChargerLead
2.NegativeBatteryPost
4.Black(-)ChargerLead
39

 Loading...