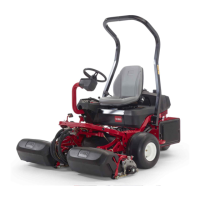
Greensmaster 3250--D Page 3 -- 11 Diesel Engine
4. If machine is equipped with optional hydraulic oil
cooler (Fig. 9), drain hydraulic reservoir and remove oil
cooler(seeOilCoolerintheServiceandRepairssection
of Chapter 4 -- H ydraulic System).
5. Remove the following hoses from the radiator:
A. Loosen hose clamp and disconnect breather
hose (item 24) from fitting on radiator.
B. Loosen hose clamps and disconnect upper and
lower radiator hoses (items 2 and 17).
6. Remove the radiator assembly (radiator, radiator
support and fan shroud) from the machine:
A. Remove flange head screw (item 18) and flange
nut (item 9) that secure upper rearcorner of radiator
support to frame.
B. Remove washer head screw (item 7) that se-
cures the upper front radiator support tab to the
frame.
C. Remove washer head screw (item 7) that se-
cures the front of the radiator supportto the footrest.
D. Carefullyremoveradiator assembly (radiator,ra-
diator support and fan shroud) from machine.
7. Remove four (4) flange head screws (item 18) and
flange nuts (item 9) securing the radiator support (item
8) to the radiator. Slide radiator out of the support.
8. Removefour(4)cap screws(item22)and flatwash-
ers (item 31) that secure the fan shroud (item 19) to the
radiator. Separate the shroud from the radiator.
Radiator Installation (Fig. 8)
1. Secure fan shroud (item 19) to radiator with four (4)
cap screws (item 22) and flat washers (item 31).
2. Slide radiator into the radiator support (item 8). Se-
curesupporttoradiatorwithfour(4)flangeheadscrews
(item 18) and flange nuts (item 9).
3. Install the radiator assembly (radiator, radiator sup-
port and fan shroud) to the machine:
A. Carefullypositionradiatorassembly(radiator,ra-
diator support and fan shroud) to machine.
B. Secure upper rear corner of radiator support to
frame with flange head screw (item 18) and flange
nut (item 9).
C. Securetheupperfrontradiatorsupporttab to the
frame with washer head screw (item 7).
D. Secure the front of the radiator support to the
footrest with washer head screw (item 7).
4. Connect the following hoses to the radiator:
A. Connect upperandlowerradiatorhoses (items2
and 17) and secure with hose clamps.
B. Connect breather hose (item 24) to fitting on ra-
diator and secure with hose clamp.
5. If machine is equipped with optional hydraulic oil
cooler (Fig. 9), install oil cooler to the radiator (see Oil
Cooler in the Service and Repairs section of Chapter 4
-- Hydraulic System). Fill the hydraulic reservoir with
new hydraulic oil.
6. Install screen (item 10) to radiator support.
7. Fill radiator with coolant. Check radiator and hoses
for leaks.
Figure 9
1. Hydraulic oil cooler
2. Tube
3. Oil filter
4. Hydraulic fitting
5. Hydraulic reservoir
6. Tube
7. Hydraulic fitting
6
7
4
1
2
5
3
Engine
Diesel
 Loading...