Greensmaster Flex 21
Page 6 – 12
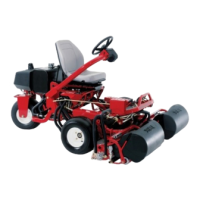
Chassis and Controls
Kickstand
1. Kickstand
2. Cap screw
3. Flat washer
4. Long spacer
5. Torsion spring
6. Cap screw
7. Spacer
8. Flange nut
9. Cap screw
10. Support bushing
11. Cap screw
12. Frame assembly
Figure 17
8
9
10
10
8
4
3
2
6
3
8
10
11
7
1
5
FRONT
RIGHT
8
12
Removal
1. Park mower on a level surface. Make sure the engine
is OFF.
2. Pivot kickstand up against the stops and hold in posi-
tion.
CAUTION
Be careful when removing or applying tension
from or to the torsion spring of the kickstand.
The spring is under heavy load and may cause
personal injury.
3. Use a nutdriver or small diameter pipe over the end
of the torsion spring. Push the torsion spring down and
in to release spring tension (Fig. 18).
4. Remove flange nuts, cap screws, flat washers,
spacers, and torsion spring from the kickstand and
frame. Note: long spacer and torsion spring is on the left
side of the machine and short spacer is on the right.
5. Remove kickstand from the frame.
Installation
1. Make sure mower is parked on a level surface and
the engine is OFF.
2. Position kickstand inside the mower frame. Insert
cap screws through the washers, kickstand, spacers,
and frame (Fig. 17).
3. Secure cap screws with flange nuts. Tighten fasten-
ers.
4. Pivot kickstand up against the stops and hold in posi-
tion. Use a nutdriver or small diameter pipe over the end
of the torsion spring. Push the extension spring down
and out to install spring (Fig. 18).
1. Kickstand
2. Torsion spring
3. Torsion spring end
Figure 18
3
1
2