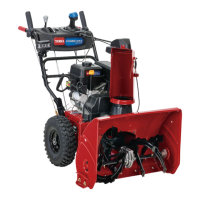
Figure14
1.Shortrod
2.Longchutecontrolrod
4.Insertthefrontendoftherodintotheopeningin
thebackofthechutegearcoveruntilitslidesintothe
chutegear(Figure15).
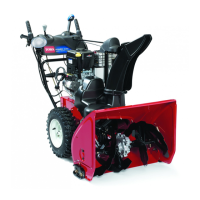
Figure15
5.Aligntheholesinthenestedendsoftherodsand
insert2carriagebolts(intheloosepartsbag)through
theshortrodfromtheleftsideofthemachine(from
theoperatingposition).
6.Insertthecableclipthatsupportsthedeectorcable
ontotheforwardcarriagebolt,andsecurethecarriage
boltswithlocknutsfromtheloosepartsbag(Figure
16).
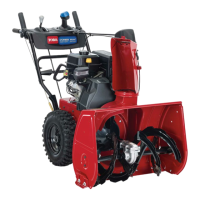
Figure16
1.Cableclip2.Deectorcable
7.HoldthebluetriggercapdownandrotatetheQuick
Stickinacircletoensurethatthechuteanddeector
operatesmoothly.
5
ConnectingtheWiretothe
Headlight
Partsneededforthisprocedure:
1
Cabletie
Procedure
1.Insertthewireconnectoronthelooseendofthewire
straightintothebackoftheheadlightuntilitissecurely
inplace(Figure17).
Figure17
1.Plasticcliponwire
connector
3.Cabletie
2.U-bolt
Note:Ensurethattheplasticcliponthewire
connectorisonthebottom(Figure17).
2.Secureacabletie(fromtheloosepartsbag)aroundthe
wireandthehandleabout2.5cm(1inch)belowthe
U-bolt(Figure17).
9
 Loading...