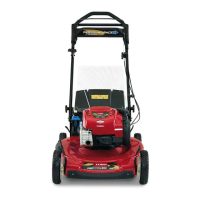
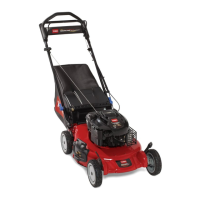
13
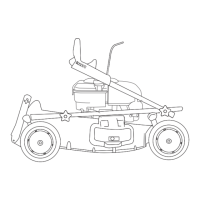
2.
Hold the self–propel bail 1 to 1
!/2
in. (25 to 38 mm)
from the handle (Fig. 20).
1063
1
2
3
4
5
Figure
20
1. 1
to 1
!/2
in. (25 to 38 mm)
2.
Self -propelled bail
3.
Cable jacket
4.
Cable support
5. Nut
3. Pull
the cable jacket down (away from the bail).
4. T
ighten the nut on the cable support.
5.
Release the bail and ensure that the cable is loose.
Note:
The cable must be loose with the bail in the
released position or the mower may creep when the bail is
disengaged.
Maintaining
the Blade
A
straight, sharp blade provides maximum cutting
performance. Regularly inspect and sharpen the blade.
WARNING
POTENTIAL HAZARD
•
The blade is sharp.
WHA
T CAN HAPPEN
•
Contact with a sharp blade can cause serious
personal injury
.
HOW T
O A
V
OID THE HAZARD
• W
ear gloves or wrap the sharp edges of the
blade with a rag.
1.
Stop the engine and pull the wire of
f of the spark plug
(Fig. 18).
WARNING
POTENTIAL HAZARD
•
Gasoline is extr
emely flammable, highly
explosive and under certain conditions can
cause personal injury or pr
operty damage.
WHA
T CAN HAPPEN
• T
ipping the mower may cause fuel leakage
fr
om the carbur
etor or fuel tank.
HOW T
O A
V
OID THE HAZARD
• A
void fuel spills by running the engine dry or
r
emoving gas with a hand pump; never siphon.
2.
Drain the gasoline from the fuel tank. Refer to the
Draining Gasoline section, page 1
1.
3. T
ip the mower on its left side (Fig. 21). A
void rotating
the blade because starting problems may result.
757
Figure
21
Inspecting the Blade
1. Examine
the blade for sharpness and wear
, especially
where flat and curved parts meet (Fig. 22A).
2.
Complete one of the following:
A.
If a slot or wear is noticed, (Fig. 22B & C), replace
the blade. Refer to the Removing and Installing the
Blade sections.
B.
If the blade is nicked or dull, sharpen it. Refer to
the Removing, Sharpening, Balancing, and
Installing the Blade sections.
C.
If there are no signs of wear of dullness, return the
mower to the upright position and replace the spark
plug wire (Fig. 18).
 Loading...