Snow Commander Service Manual 2 - 5
CONTROLS LOCATION & OPERATION
3. To reassemble, reverse the process.
NOTE: When installing the chute, the rounded
heads of the Phillips head screws must be on the
inside of the chute. The smooth head prevents
snow from building up on the bolt head.
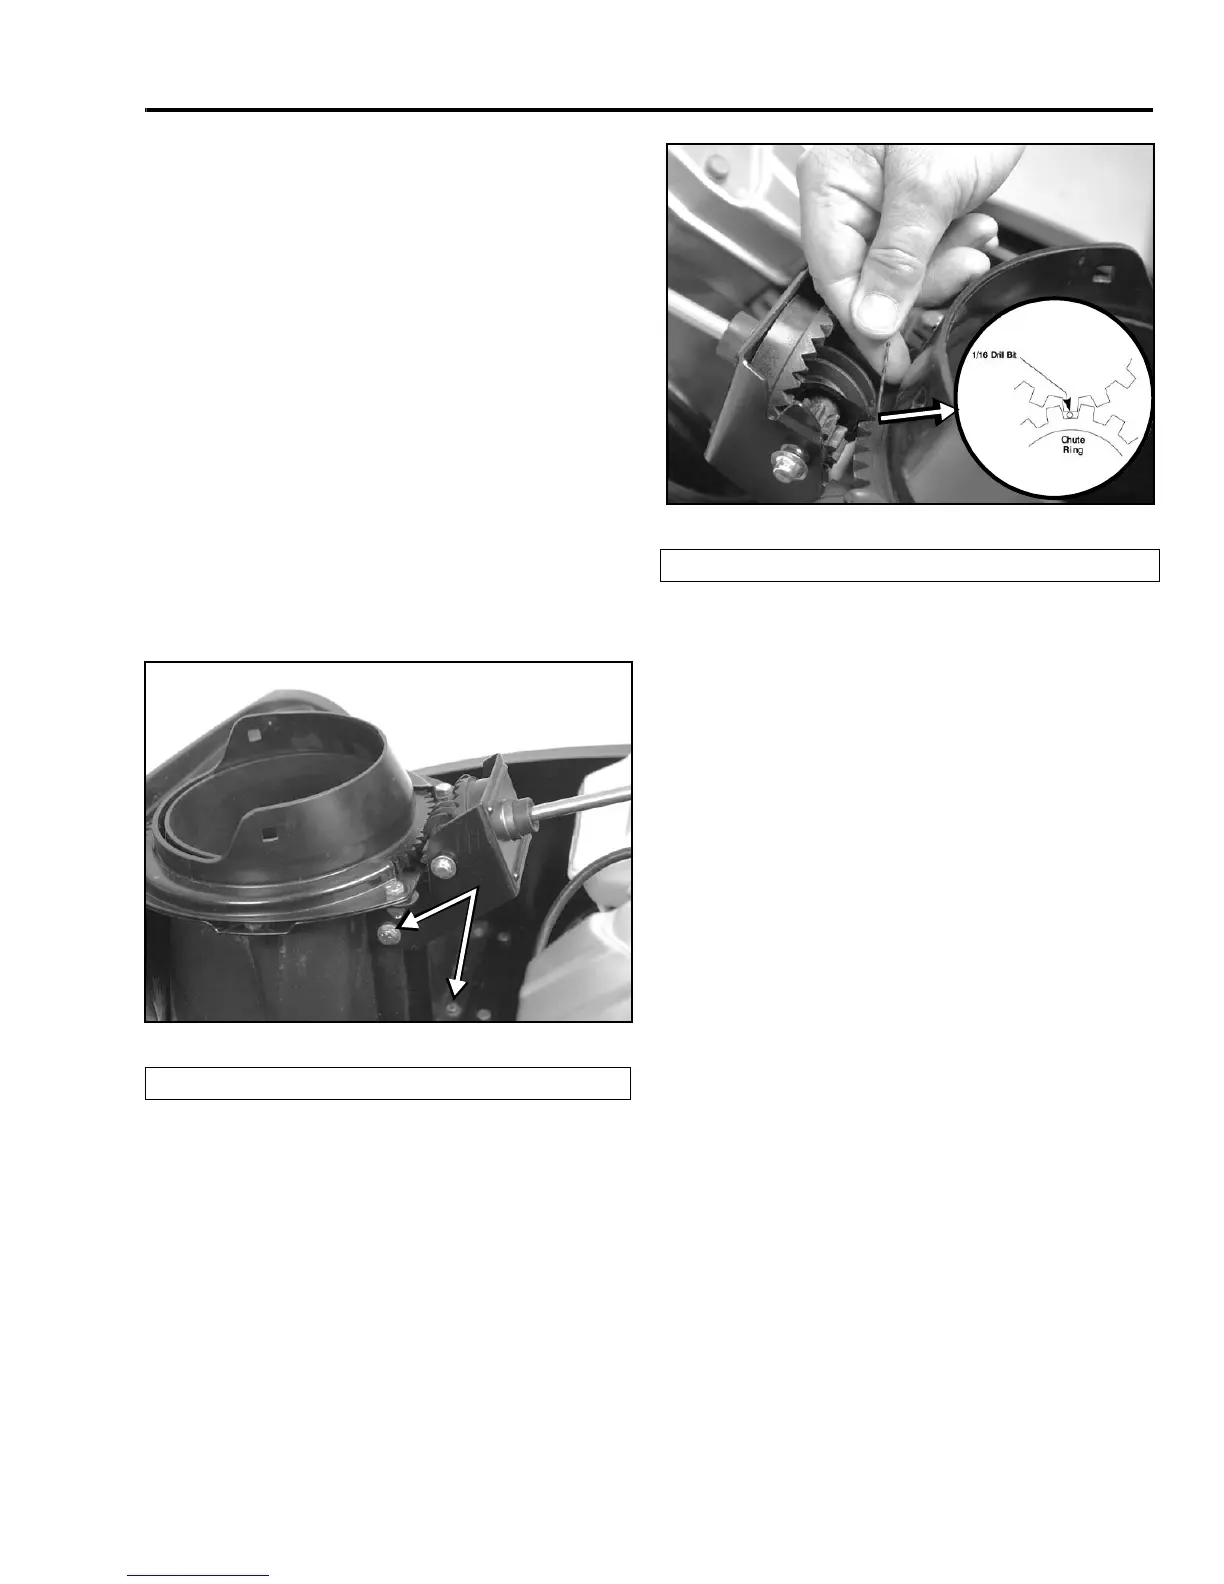
Gear Lash Adjustment
There are 4 capscrews that hold the chute gear
assembly to the housing. Two are visible in Figure 13.
There will be 2 identical capscrews on the other side.
Loosen all 4 capscrews. Rotate the chute to find the
tightest point. Adjust the clearance so that a 1/16”
(1.6mm) drill bit will fit between the top of the tooth on
the worm gear and the valley between two teeth on the
chute ring gear (Figure 14). Grasp the chute rod and
push it to the front. Hold the rod and tighten the
capscrews. Remove the drill bit.
Figure 13
0621-0077
Figure 14 0621-0076-A
Gear Assembly Repair
Should you need to replace 1 or more of the chute
gears, proceed as follows. Remove the chute rod from
the face gear. Remove the 4 capscrews referred to in
Figure 13. The gear assembly can be lifted out and the
gears replaced.
(A) Capscrews
A
(A) 1/1” (1.6mm) Drill Bit (B) Chute Ring
A
B