Snow Commander Service Manual 3 - 1
ENGINE REMOVAL / INSTALLATION
The Snow Commander engine sits in a cradle which is
bolted to the frame. It is best to remove the cradle and
separate it from the engine after removing them as an
assembly from the chassis (Figure 15). The steps are
as follows:
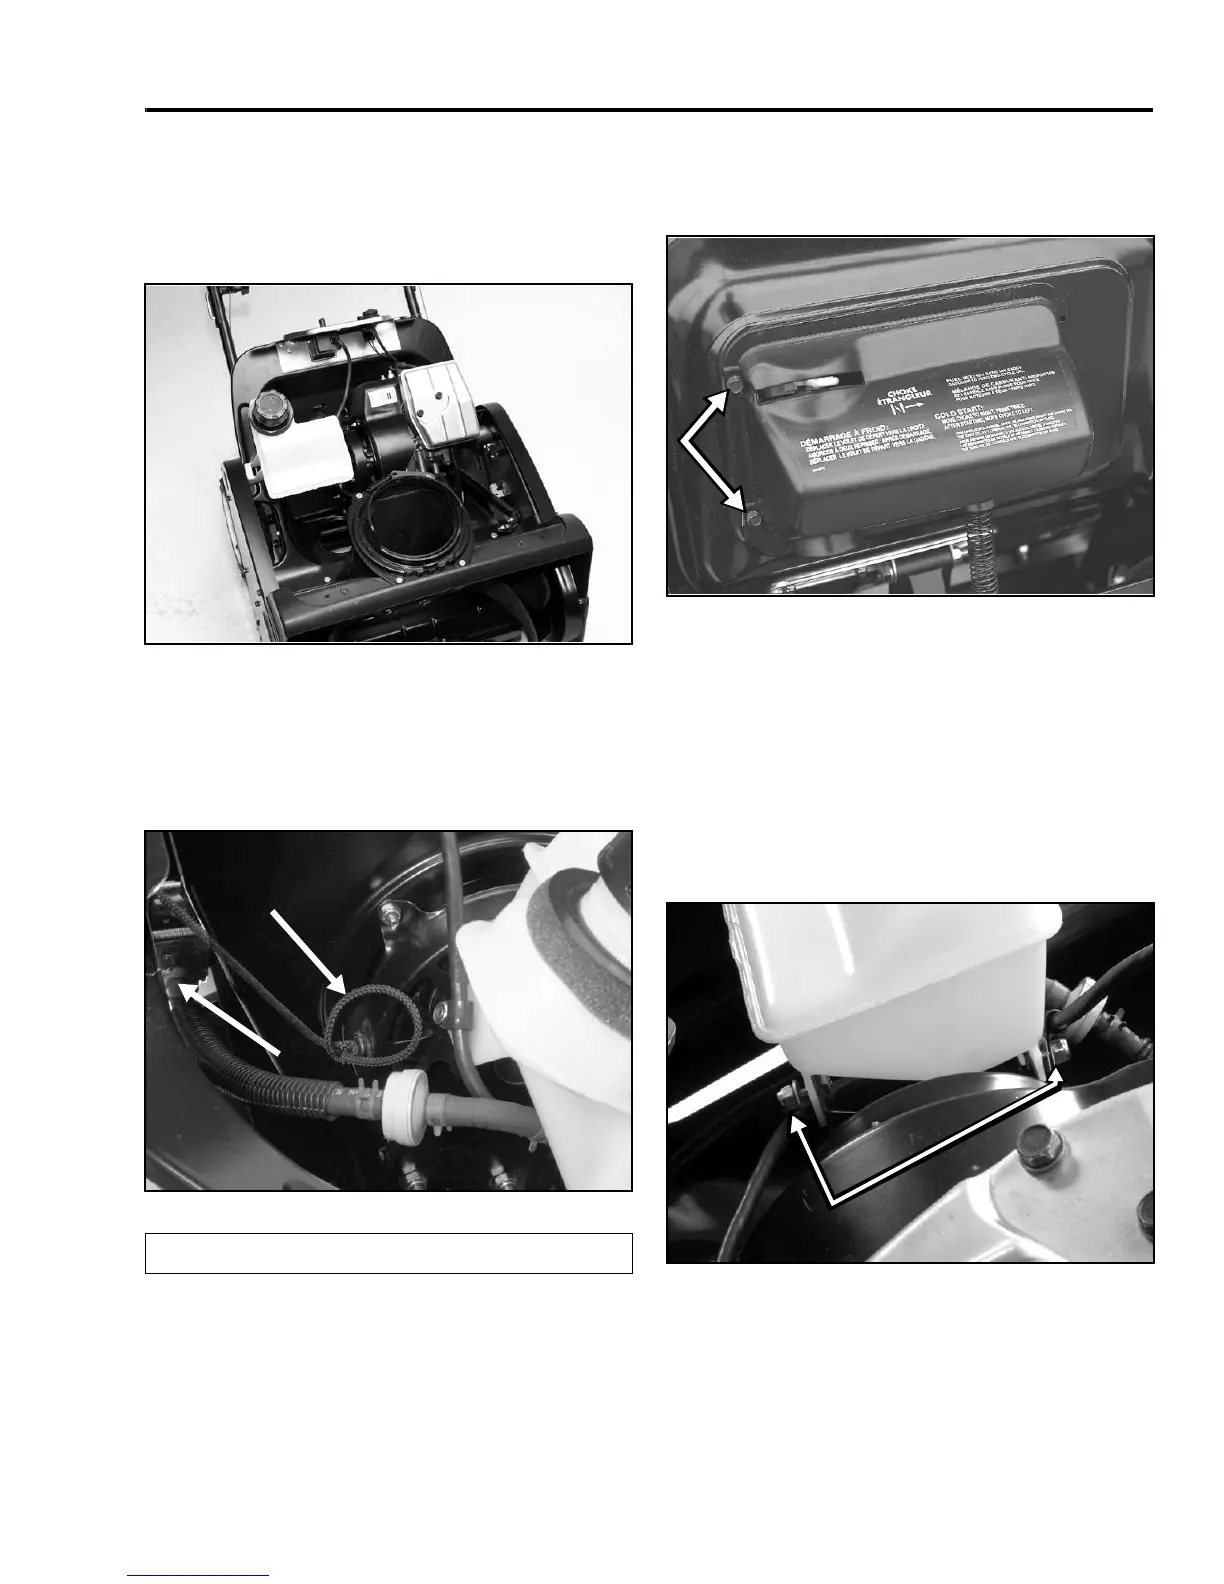
Figure 15
DSC-0138
1. Remove fuel from the tank. Remove the chute and
upper shroud; refer to “Upper Shroud Removal”
on page 2 - 3. Tie a slip knot in the starter rope
where it comes out of the recoil (Figure 16).
Figure 16
3428-0222
2. Untie the knot in the starter handle and pull the
rope through the control panel and support. Roll
up the rope and secure with tape to keep it out of
your way.
3. Remove the two screws in the carburetor cover,
slide the cover to the left to disengage the tabs on
the right side (Figure 17). Remove the cover.
Figure 17
DSC-0181
4. Temporarily clamp the fuel line and slip it off the
carburetor fitting. Be prepared with something to
catch any fuel remaining in the line or filter (Figure
16).
5. To remove the fuel tank, remove the two bolts and
locknuts on the left side of the tank (Figure 18).
Then slide the tank to the left to disengage it from
the support pin on the right side (Figure 19). Lift
the tank out of the machine.
Figure 18
3428-0223
(A) Starter Rope (B) Carburetor Fitting
A
B