Snow Commander Service Manual 7 - 5
MAINTENANCE
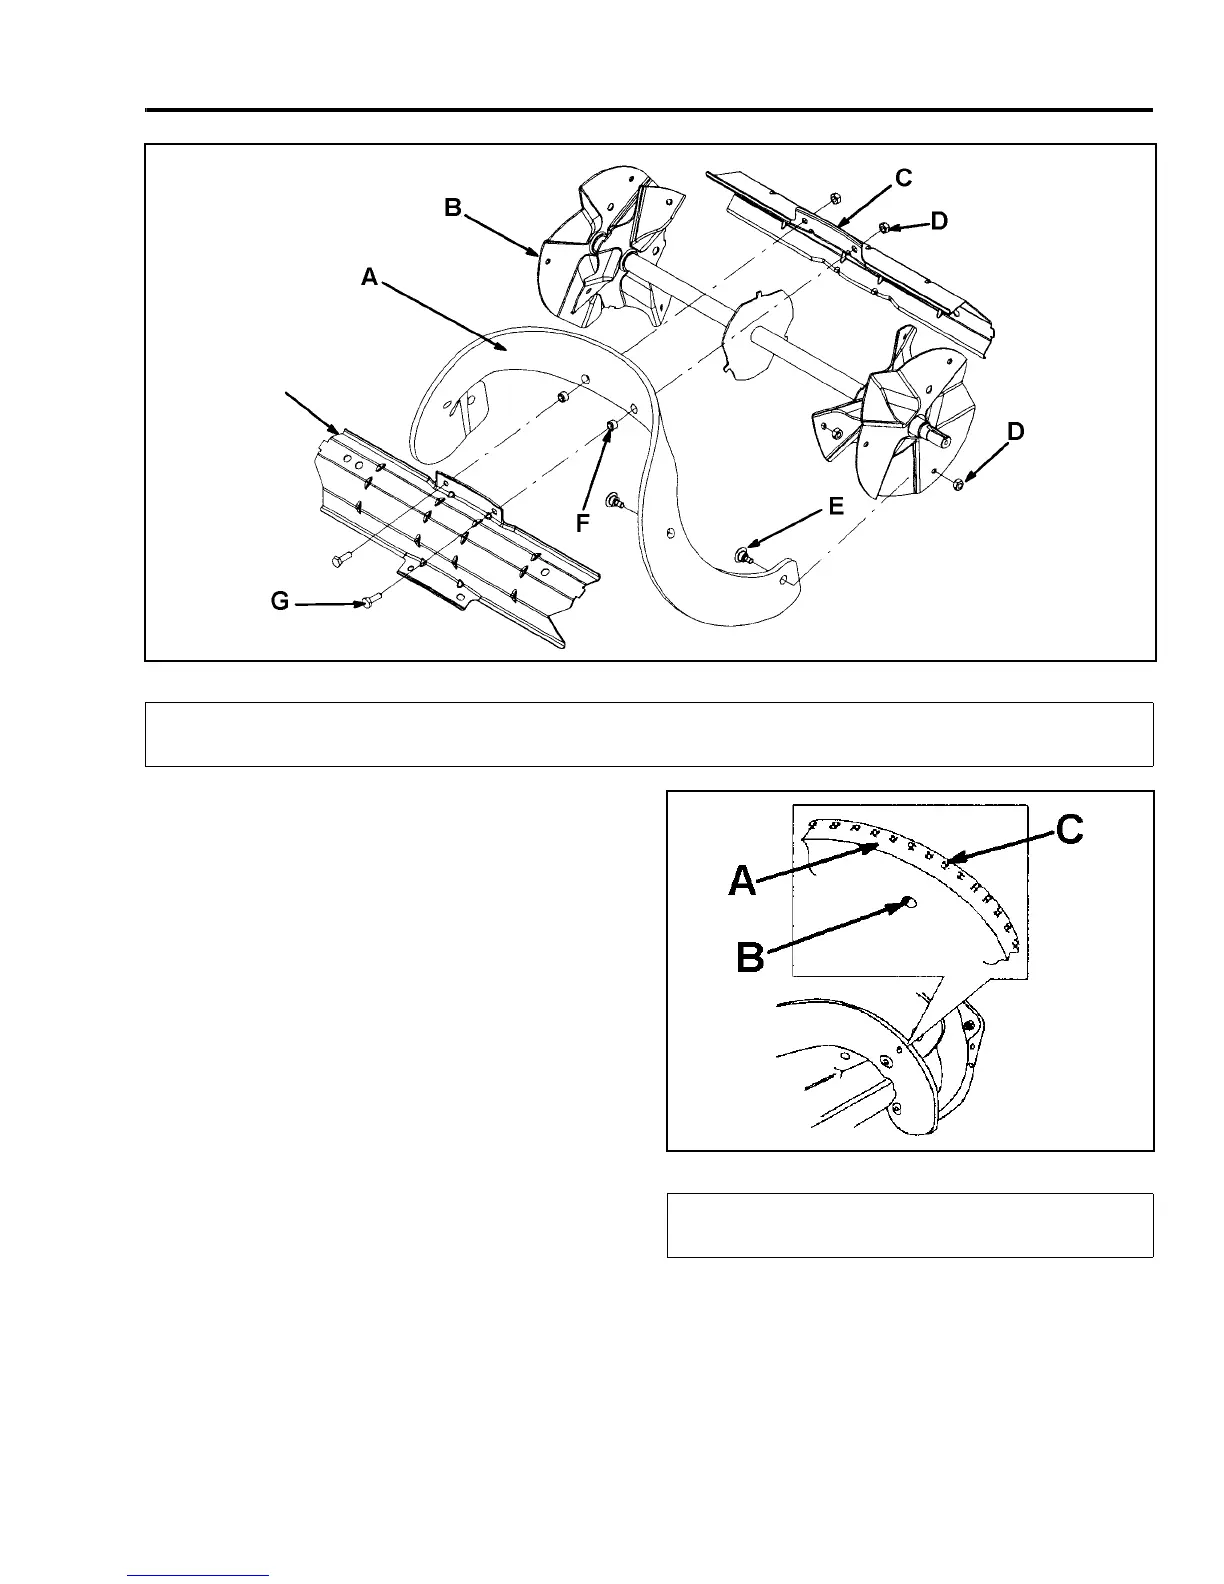
Figure 85 m-5057
2. Remove the two hex-head cap screws and two
locknuts that secure the center of the rotor blade
to the rotor drum (Figure 85).
3. Slide the rotor blade out from between the rotor
drum parts (Figure 85).
4. Remove the two spacers from the old rotor blade
and install them in the new blade.
Installing the New Rotor Blades
1. Examine a new rotor blade edge for the difference
in the thickness of the rubber layers (Figure 86).
Figure 86
m-5059
Install the rotor blades with the thick rubber layer
on the inside of the curve. (Figure 86). If you do
not install the rotor blades properly, they will wear
more quickly and may vibrate excessively.
(A) Thick rubber side of the
rotor blade (3)
(B) Rotor Assembly
(C) Rotor Drum
(D) Locknut (18)
(E) Torx Screw (12)
(F) Spacer (6)
(G) Hex-head Cap Screw (6)
(A) Thick Rubber Side
(B) Wear Indicator Hole
(C) Thin Rubber Side