LevelingtheMowerDeck
Checktoensurethemowerdeckislevelanytimeyou
installthemowerorwhenyouseeanunevencuton
yourlawn.
Themowerdeckmustbecheckedforbentblades
priortoleveling;anybentbladesmustberemoved
andreplaced.RefertotheCheckingforBentBlades
procedurebeforecontinuing.
Themowerdeckmustbeleveledside-to-siderstthen
thefronttorearslopecanbeadjusted.
Requirements:
•Themachinemustbeonalevelsurface.
•Allfourtiremustbeproperlyinated.Referto
CheckingtheTirePressureintheDriveSystem
Maintenancesection.
LevelingtheMowerfromSide-to-Side
Themowerbladesmustbelevelfromsidetoside.
Checktheside-to-sidelevelanytimeyouinstallthe
mowerorwhenyouseeanunevencutonyourlawn.
1.Parkthemachineonalevelsurfaceanddisengage
thebladecontrolswitch.
2.Movethemotioncontrolleversoutwardtothe
parkposition,stoptheengine,removethekey,and
waitforallmovingpartstostopbeforeleavingthe
operatingposition.
3.Checktheairpressureofallfourtires.Ifneeded,
adjusttotherecommendedination;referto
CheckingtheTirePressureintheDriveSystem
Maintenancesection.
4.Settheheight-of-cutlevertothe3inch(76mm)
position.
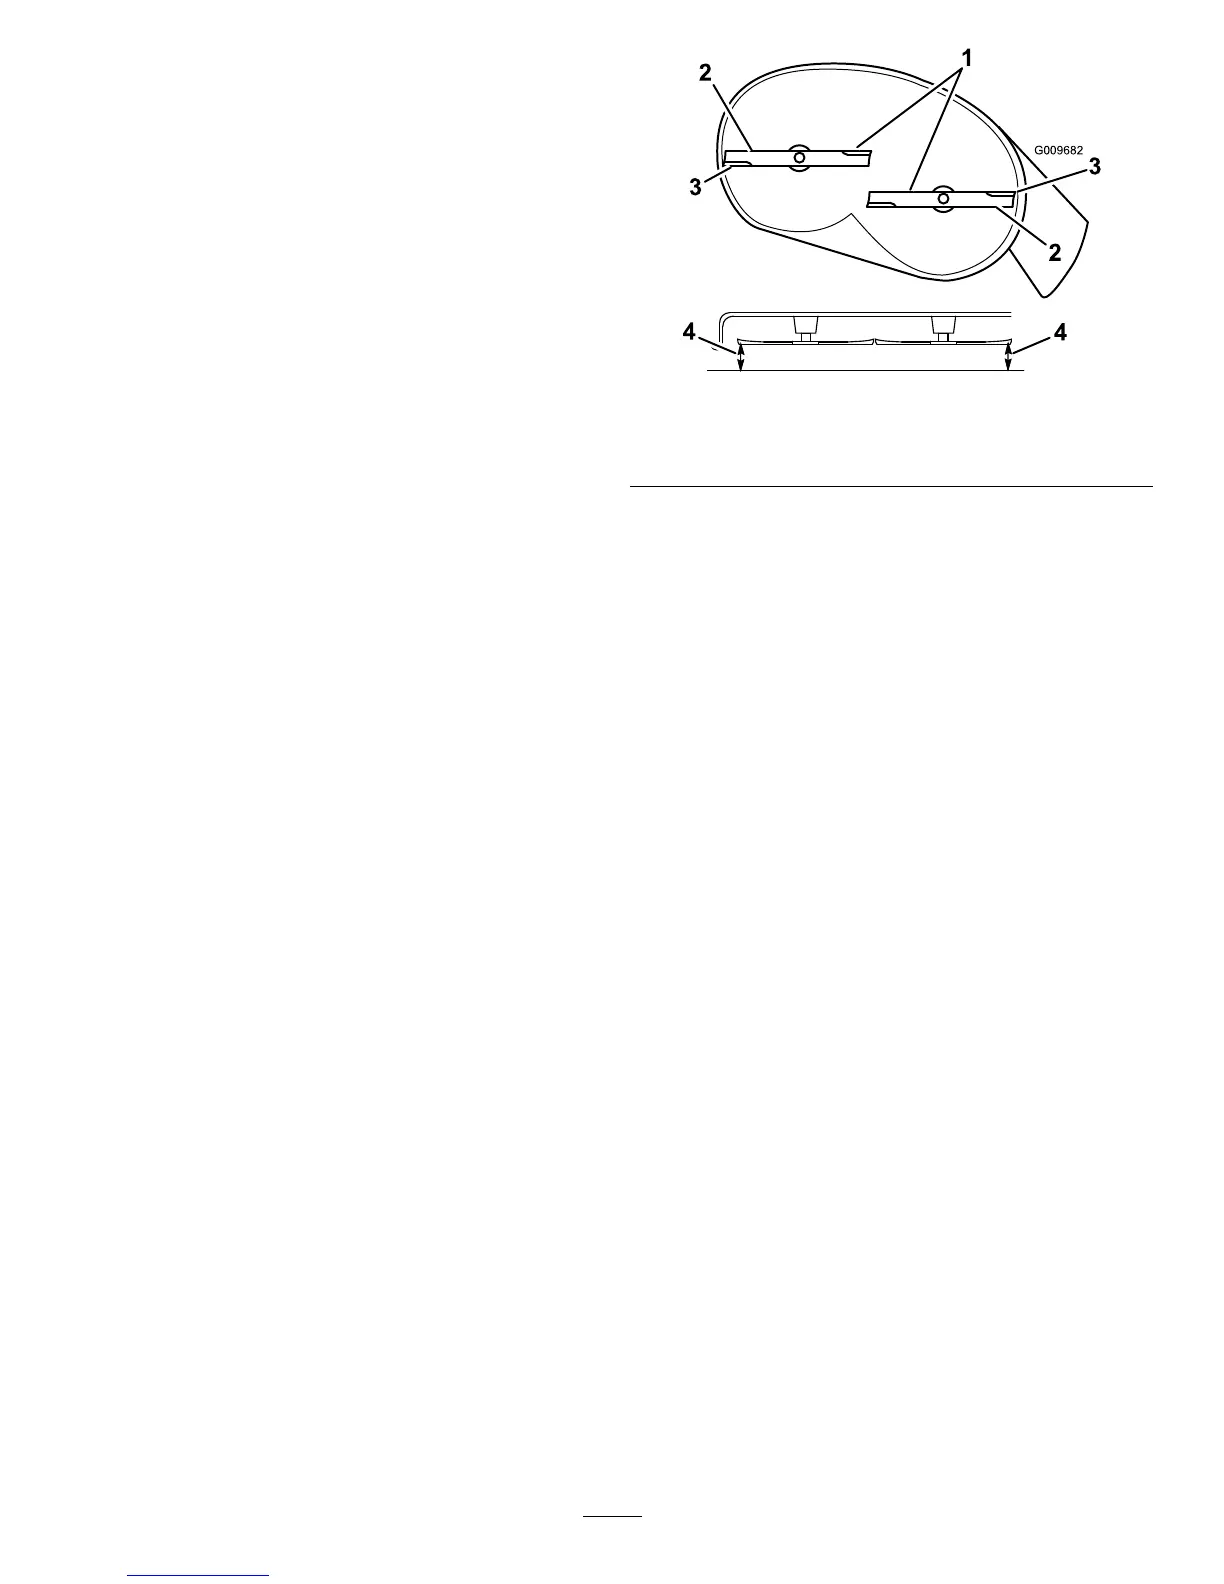
5.Carefullyrotatetheblade(s)sidetoside(Figure50).
Measurebetweentheoutsidecuttingedgesand
theatsurface(Figure50).Ifbothmeasurements
arenotwithin3/16inch(5mm),anadjustmentis
required;continuewiththisprocedure.
Figure50
1.Bladessidetoside
3.Outsidecuttingedges
2.Sailareaofblade
4.Measurehere
6.Movetotheleftsideofthemachine.Loosen,but
donotremove,therearlockingnutonthehanger
bracket(Figure51).
7.Loosenthesidelockingnutonthehangerbracket
justenoughtoallowtheeccentricplatetobeadjusted
(
Figure51).Usea3/8inchdriveextensionona
socketwrenchtomanipulatetheeccentricplate.Use
thewrenchtorepositiontheheightofthemower
deckandadjustitsothemeasurementstakeninStep
5arewithin3/16inch(5mm).
8.Stopthedeckattheadjustedpositionandtightenthe
sidelockingnutonthehangerbrackettoholdthe
newposition(Figure51).Tightentherearlocking
nutonthehangerbracket.
9.Continuelevelingthedeckbycheckingthe
front-to-rearbladeslope;refertoAdjustingthe
Front-to-RearBladeSlope.
39
 Loading...