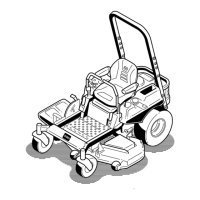
Figure40
1.Blade3.Boltandwasherassembly
2.Washer
SharpeningtheBlades
1.Usealetosharpenthecuttingedgeatbothends
oftheblade(Figure41).Maintaintheoriginalangle.
Thebladeretainsitsbalanceifthesameamountof
materialisremovedfrombothcuttingedges.
Figure41
1.Sharpenatoriginalangle
2.Checkthebalanceofthebladebyputtingitona
bladebalancer(Figure42).Ifthebladestaysina
horizontalposition,thebladeisbalancedandcanbe
used.Ifthebladeisnotbalanced,lesomemetaloff
theendofthesailareaonly(Figure42).Repeatthis
procedureuntilthebladeisbalanced.
Figure42
1.Blade2.Balancer
InstallingtheBlades
1.Installthebladeontothespindleshaft(Figure40).
Important:Thecurvedpartoftheblademust
bepointingupwardtowardtheinsideofthe
mowertoensurepropercutting.
2.Holdthebladeendusingaragorthickly-padded
glove(orplaceawrenchonthetopsheavenut).
Installthewasherandbladeboltandwasher
assembly.
3.Torquethebladeboltto45-55ft-lb(61-75N-m).
Incorrectinstallationofthebladeor
componentsusedtoretainthebladecausethe
bladetocomelooseandcouldseriouslyinjure
orkillyouorbystanders.
AlwaysinstalltheoriginalToroblades,washers
andbladeboltsasshown.
LevelingtheMowerDeck
Themowerbladesmustbelevelfromsidetoside.
Checktheside-to-sidelevelanytimeyouinstallthe
mowerorwhenyouseeanunevencutonyourlawn.
1.Parkthemachineonalevelsurfaceanddisengage
thebladecontrolswitch.
2.Movethemotioncontrolleversoutwardtothe
neutralposition,engageparkingbrake,stopthe
engine,removethekey,andwaitforallmovingparts
tostopbeforeleavingtheoperatingposition.
3.Checktheairpressureofallfourtires.Ifneeded,
adjusttotherecommendedination;refertothe
CheckingtheTirePressuresectioninDriveSystem
Maintenance.Ifeitheroneisoutofrangethen
followadjustmentprocedure.
4.Carefullyrotatethebladessidetoside.
5.Measurebetweentheoutsidecuttingedgesand
theatsurface(Figure43).Ifbothmeasurements
arenotwithin3/16inch(5mm),anadjustmentis
required;continuewiththisprocedure.
Figure43
1.Bladessidetoside3.Measurehere
2.Outsidecuttingedges
38
 Loading...