Do you have a question about the Toshiba e-studio 4555c and is the answer not in the manual?
Guidance on how to use the manual effectively and understand its conventions.
Explanation of symbols used throughout the manual for warnings and notes.
How original and paper orientation is indicated in the manual (e.g., A4 vs. A4-R).
Information on model names and their corresponding series names used in the manual.
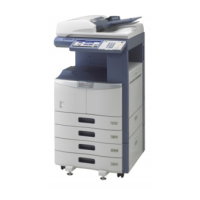
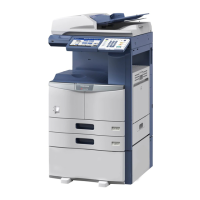
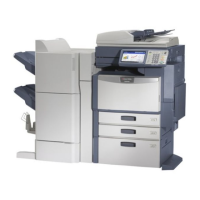
Reference to where information about available optional equipment can be found.
Notes on how control panel screens are used as examples and potential differences.
Statement regarding company and product names being trademarks of their respective owners.
Overview of the copier function's main control panel interface and its elements.
Instructions and guidelines for loading various types of paper into the machine's trays.
How to manually register paper sizes not automatically detected by the device.
Guide to specifying paper attributes like thickness and type for optimal printing.
Detailed steps for loading paper into the high-capacity paper feeder unit.
Important considerations before starting copying, including storage and functions.
Methods and precautions for placing various types of originals on the glass or RADF.
Step-by-step instructions for performing basic copying operations.
Procedures for using the bypass tray for special paper or non-standard sizes.
Details on default settings, confirming, clearing, and restrictions on copy functions.
How to select paper for copying, including automatic and manual methods.
Options for selecting color modes like Full Color, Black, and Auto Color.
How to optimize image quality by selecting modes based on original content.
Adjusting the darkness or lightness of copied images automatically or manually.
Procedures for resizing images, including auto-selection and manual ratios.
Options for collating, stapling, hole-punching, and other post-copy processing.
Instructions for copying on both sides of the paper to save resources.
Storing copied documents to network folders or the device's hard disk.
How to access and navigate the various image editing options.
Adjusting image position to create margins for binding or stapling.
Whitening image edges to clean up dirty or torn original borders.
Whitening the center area of copied images from book-type originals.
Copying two facing pages of an original onto separate sheets or one sheet of paper.
Shrinking multiple originals onto a single sheet of paper to save space.
Copying and binding originals in a booklet format, including folding and stapling.
Applying various editing effects like trimming, masking, and image reversal.
Adding special paper as front or back covers to copied documents.
Inserting blank or copied sheets at specified pages within a document.
Adding the date and time to copied pages automatically.
Automatically adding sequential page numbers to copied documents.
Combining multiple copy jobs with different settings into a single operation.
Controlling the orientation of copied images, especially for duplex or book copies.
Adjusting the orientation of book or tablet originals for copying.
Switching between continuous and single-sheet feeding modes for the document feeder.
Copying the entire original image, including fine text at the edges, with slight reduction.
Copying a specific area of an original multiple times onto a single page.
Automatically removing blank pages from scanned originals before copying.
Whitening dark areas around the edges of an image, useful for thick originals.
How to access the image adjustment functions on the touch panel.
Overview of functions to modify image quality like color balance and sharpness.
Adjusting the overall color balance using CMYK values for richer colors.
Fine-tuning color balance by adjusting red, green, and blue intensity levels.
Applying preset image quality enhancements like WARM, COOL, VIVID, and CLEAR.
Adjusting background density to prevent show-through from the reverse side of originals.
Enhancing or softening image outlines to improve clarity or reduce moiré.
Copying colored originals using two specified colors.
Making copies in a single specified color, excluding black.
Adjusting the color tint of the entire image or specific color components.
Modifying the intensity or vividness of colors in the copied image.
Reducing scan noise in images originating from the automatic document feeder.
Creating and using templates to save frequently used settings for copy, scan, or fax jobs.
Procedures for saving custom settings as templates in public or private groups.
How to load previously saved templates to apply settings quickly.
Modifying existing template data, group names, passwords, or auto-start settings.
Removing unwanted templates or entire groups to manage stored settings.
Checking the status of print, copy, scan, and fax jobs, including waiting and in-progress tasks.
Viewing the queue of active and pending jobs, and managing them.
Removing completed or unwanted jobs from the print queue to free up resources.
Temporarily halting a job in the queue and resuming it later.
Changing the order of jobs waiting in the print queue.
Investigating why a job was skipped and how to recover it.
Reviewing past copy jobs, including details like user, date, and paper size.
Checking the paper type, size, and remaining amount in each paper drawer.
Monitoring the approximate toner levels for each color cartridge.
Table showing copy speeds based on paper size, type, feeder, and color mode.
Matrix detailing which copying functions can be used together.
Matrix showing compatibility between various image adjustment functions.
| Functions | Print, Copy, Scan, Fax |
|---|---|
| Print Speed (Black) | 45 ppm |
| Print Speed (Color) | 45 ppm |
| Max Print Resolution | 1200 x 1200 dpi |
| Copy Speed (Black) | 45 cpm |
| Copy Speed (Color) | 45 cpm |
| Copy Resolution | 600 x 600 dpi |
| Scan Resolution | 600 x 600 dpi |
| Duplex Printing | Yes |
| Network Connectivity | Ethernet, USB |
| Monthly Duty Cycle | 150, 000 pages |
| Paper Size | A3, A4, A5, B4, B5 |
| Scanner Type | Flatbed |